
In this week’s episode of what DIY can Julia stretch out over an entire week, we have this DIY ombré painted cake. If you follow me on Instagram stories, you know that I started this cake on a Monday and did not complete it until Friday. Every step was videoed and explained, and I think I drove all of my followers crazy waiting for the cake to be finally finished. Don’t give up on me yet – this DIY isn’t really that hard!!!

The reason I spent so much time on this cake is because I really wanted to try out the lemon supreme cake recipe from Tessa’s Layered cookbook. I made her birthday cake recipe for my Oktoberfest birthday, loved it, and was inspired to try my hand at this recipe for Megan’s birthday!

What was the verdict on the cake? Overall, the lemon supreme cake was a hit. People loved it, with the only comment being that it was quite dense. The cake has a light flavor with not too much sweetness and a nice hint of lemon. The dense texture was something I’m just unsure about. The birthday cake recipe, too, came out dense, and I am not sure if this was something I did wrong, or if Tessa’s cakes are meant to be this way. I even skipped the syrup that is instructed to be brushed on the cakes since the it was definitely moist enough and did not need any more sweetening. The one change I made to the cake recipe was to pour the batter into two 6″ cake pans and cut them in half to make a total of 4 layers. The cook time drastically increased (about double the recommended amount), but they looked and smelled perfect. Hard to say.
The lemon curd filling was really nice too. I made this to the exact recipe, except that I added in about 1 tablespoon of lemon zest. I make my lemon squares with zest and it adds so much more sour lemon flavor to it. I thought it was still less tart than lemon squares and the perfect compliment to the sweet frosting. Speaking of the frosting, I swapped out her buttercream for my American buttercream. To be truly honest, I just hate wasting so many egg yolks, so I stick to my butter, sugar, vanilla, milk combo.
I would definitely make this cake again, but I want to know if anyone else has ended up with very dense cakes from the Layered cookbook?
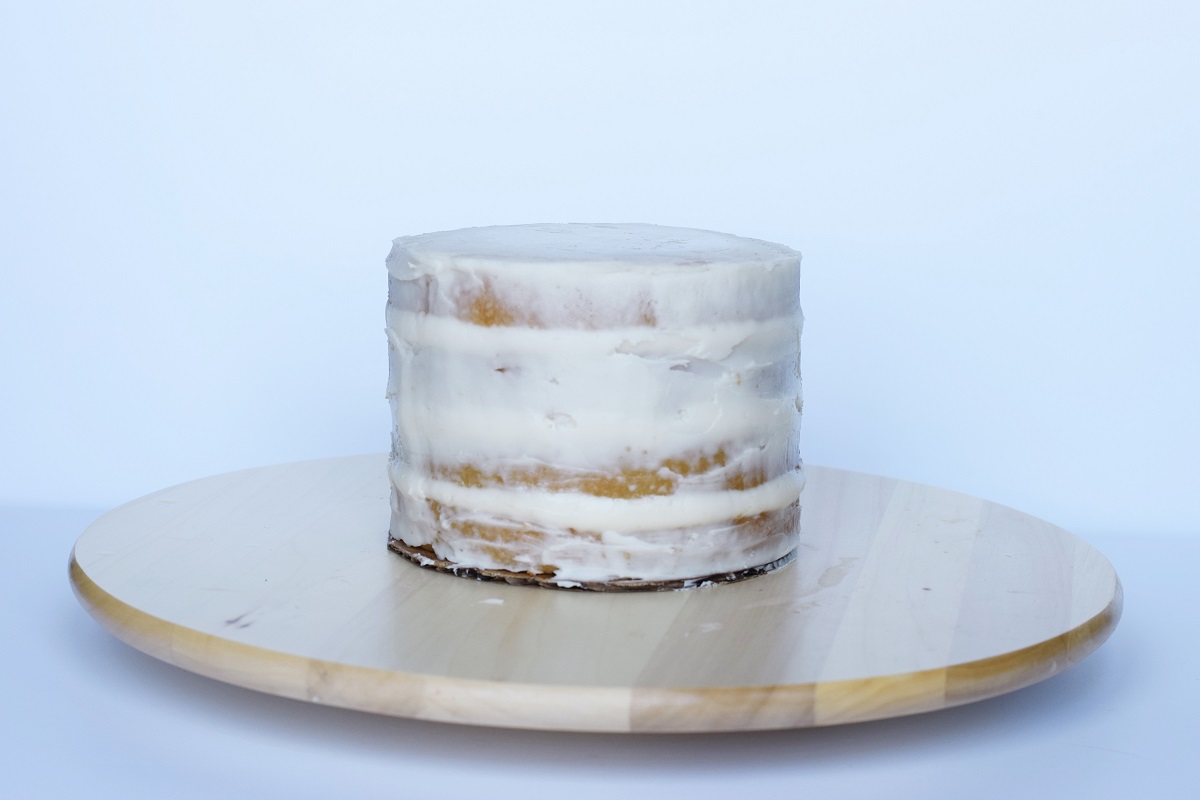
OK – ON TO THE FROSTING DIY! The buttercream recipe I share below is one normal batch which covers a two layer 9″ round cake, or a three to four layer 6″ cake with filling, like the one I made here. About half of the frosting is used to crumb coat the cake. If you aren’t familiar with a crumb coat, it is what is used to fill between the cake layers and then the thin layer of frosting that is applied to the top and outside layers to smooth them into a cylindrical shape. This is crucial to a perfectly decorated cake.


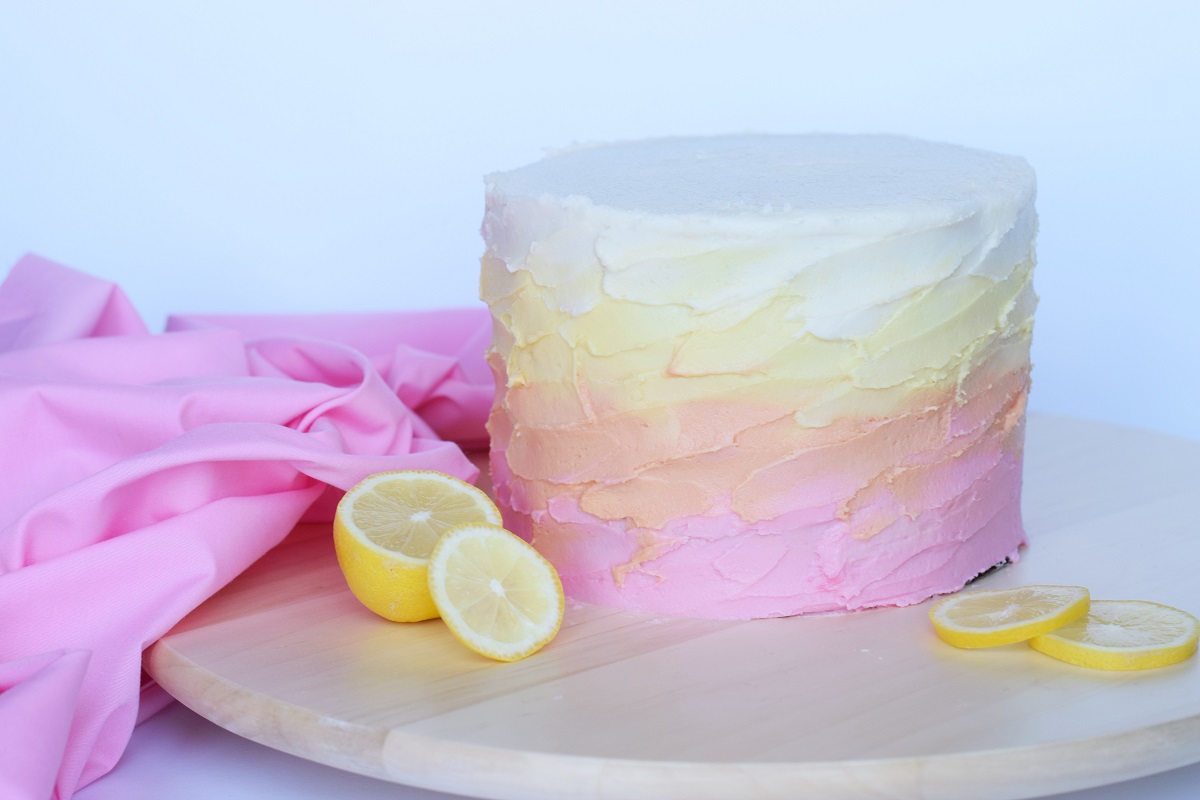
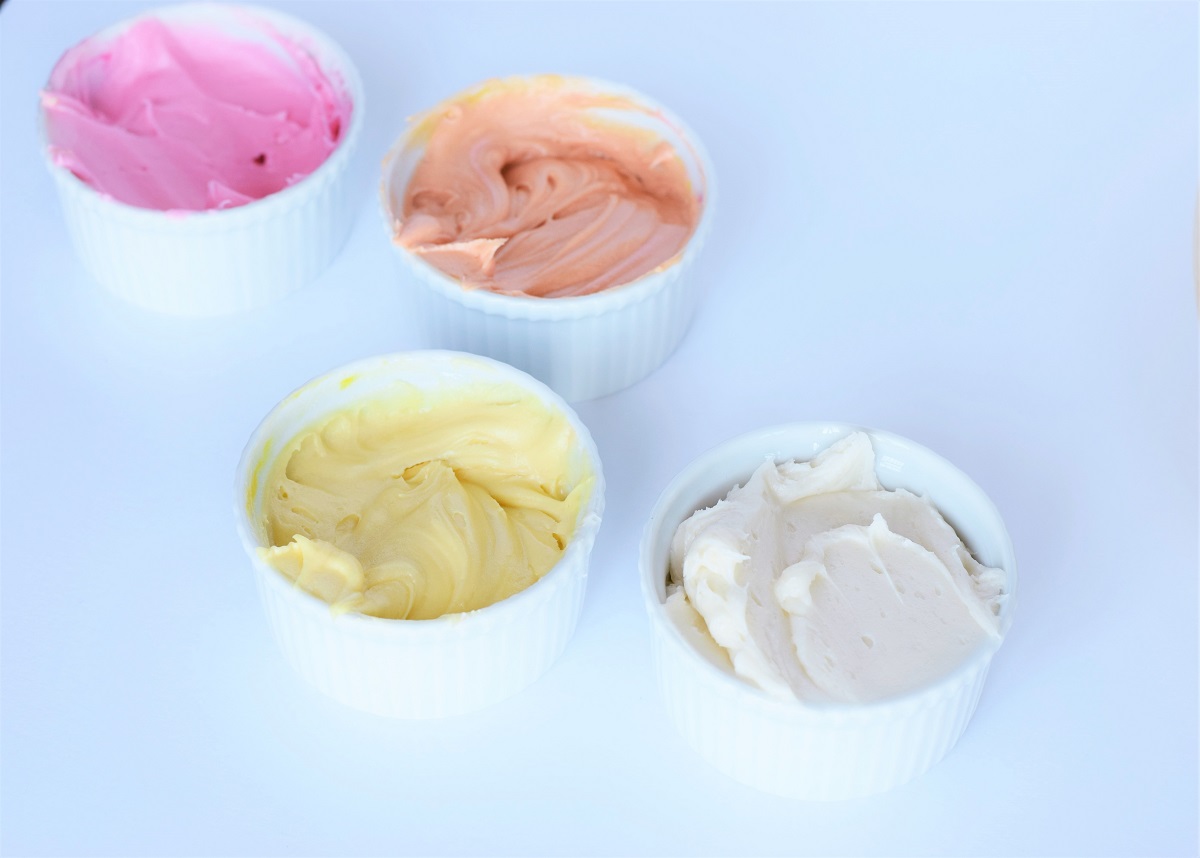
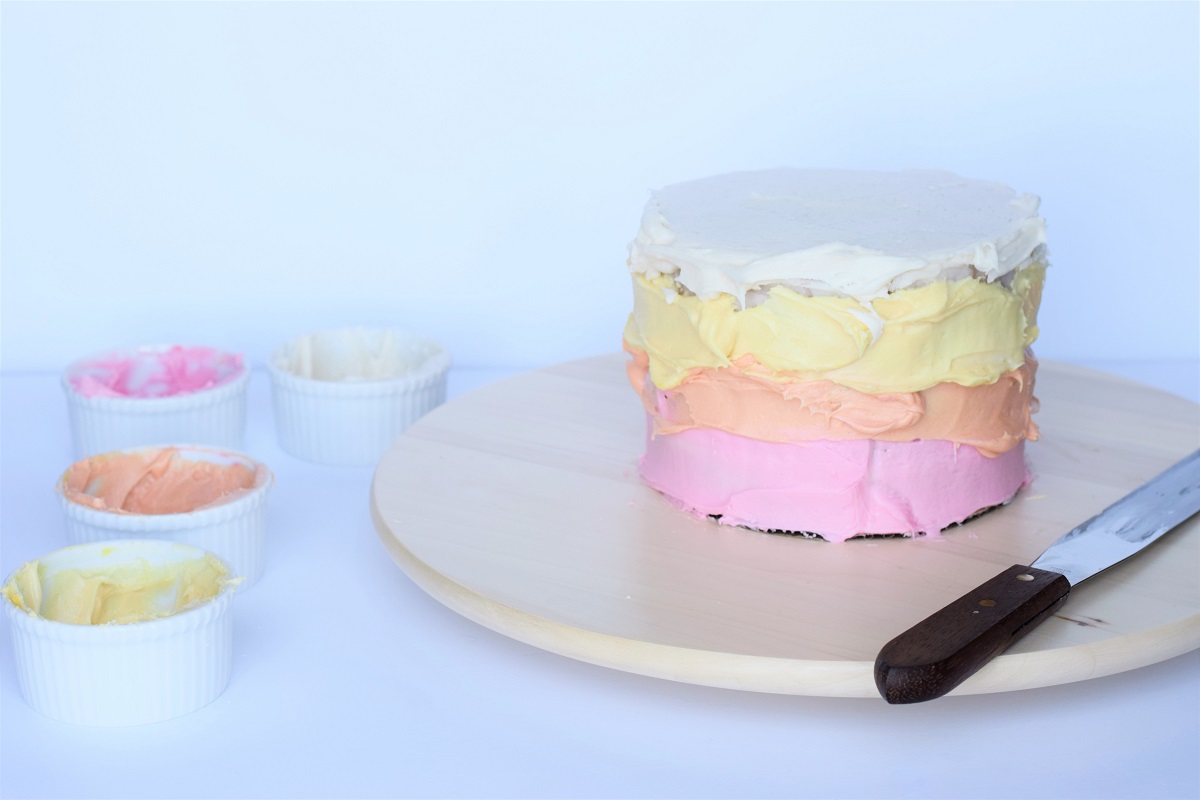
The other half of the frosting is split in to 4 bowls. I used the color combination of white, yellow, orange, and pink, but you can use any color combination you like that has a natural ombré pattern (the colors blend into one another without getting muddy). The frosting is lightly applied from darkest at the bottom to lightest at the top, finishing by smoothing out the top and sides so you have an ombré cake. To create the brushstroke “painted” effect, more frosting is carefully applied from bottom to top using the end of the frosting spatula in diagonal motions. During this step, it is important to clean the spatula as you apply more frosting, but a little mixing is OK to help to blend the layers together.

Want to try it out? Check out the full tutorial below!
DIY Ombré Painted Cake
Supplies
3-4 cooled layers 6″ cake or 2 cooled layers of 9″ cake
2 Sticks of Butter
3-4 Tbs. Milk
1 pound Powdered Sugar
1 tsp. Vanilla
1/4 tsp. Salt
Pink and Yellow Food Coloring
Plastic Bag or Piping Bag
Mixer + Whisk Attachment
Four Small Bowls
Turn Table/Lazy Susan
Icing Spatula
A piece of Cardboard in the Size of Your Cake
Time
2-2.5 hours
Difficulty
Medium
1. Start by making your buttercream frosting. Cream your room temperature butter in a mixer with a whisk attachment until it is whipped and light in color. Then, add in about 1/3 of the powdered sugar and 1 Tbs. of milk. Slowly mix together the ingredients to combine them, and then continue adding portions of powdered sugar and milk until the frosting creates stiff peaks when whipped. Add in the vanilla and salt and whip once more for about 30 seconds.
2. Scoop about 1/2 of the frosting into a plastic bag or a piping bag with the tip cut off. To assemble your cake, lay down your circular piece of cardboard on to the lazy susan and start stacking your cakes and adding the filling in between the layers. Use a ring of frosting around the edge of each layer to keep the filling from seeping out. (If your cake does not have a filling and is using frosting as the filling between the layers, you may need to make more frosting.) Continue stacking your cake layers, ending with the last layer upside down to make a flat top.


3. The next step is to apply the crumb coat to the outside of the cake. Do this by piping a good amount of frosting on to the top of the cake and using your icing spatula to smooth it out. Hold the spatula almost flat on top of the icing and turn your lazy susan. The frosting should begin to flatten out and ooze off the sides of the cake. Once you have smoothed the top, pipe more frosting on to the sides of the cake and then hold your spatula vertical along the side of the cake and once again turn the lazy susan. As you turn the cake with the spatula against it, it will smooth the frosting into the crevices and create a perfect cylinder out of your cake stack. Continue adding frosting and smoothing until the cake is perfectly round and the top is smooth. Make sure to clean off the spatula if it gets crumbs on it as you go to keep the cake from getting lumpy. Place the cake into the refrigerator for at least 1 hour to harden.
4. While the cake is hardening, divide the rest of the frosting into four small bowls. Add in and mix pink food coloring to one bowl, yellow to another, a mixture of pink and yellow to another to make orange, and leave the last one white. Once the cake is hardened, take it out of the refrigerator and place it back on to the lazy susan.
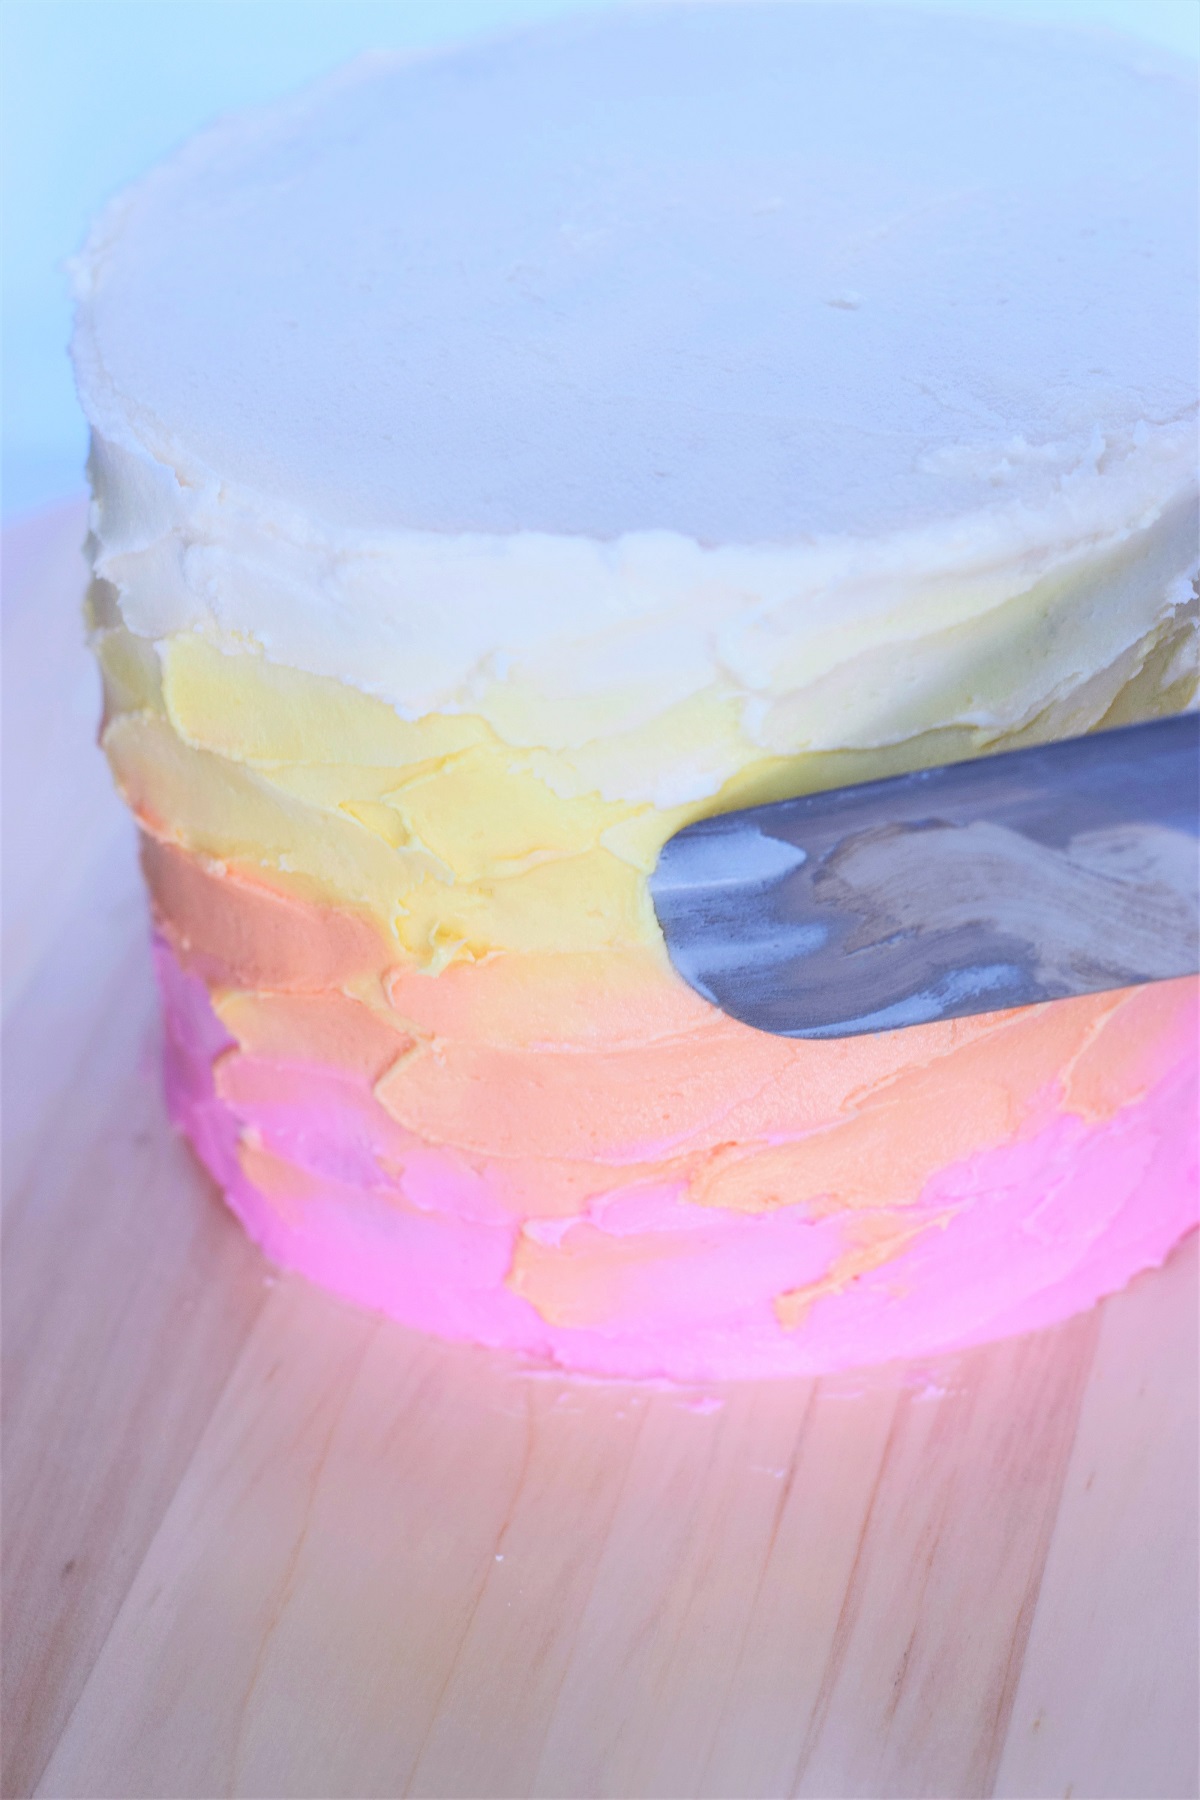
Use the icing spatula to apply pink to the bottom layer, orange to the second layer, yellow to the third layer, and white to the top layer, cleaning off the spatula between each application. Once the cake is covered (this can be messy), take your clean spatula and once again hold it vertically next to the cake. Spin the lazy susan slowly while you hold the spatula to scrape off the excess frosting. This will give you a nice base coat of ombré frosting.
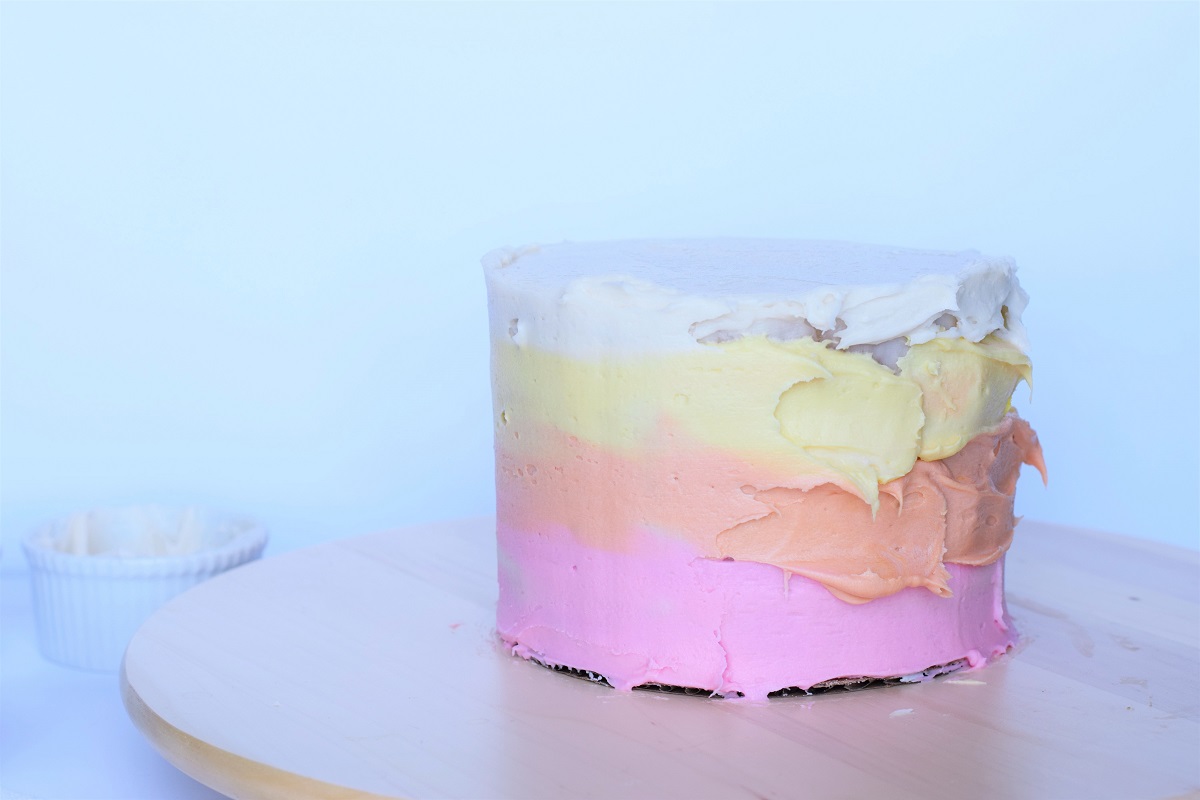
5. The final step is to go back and “paint” on the brushstrokes of frosting over the ombré layers. Use the end of the icing spatula to apply small amounts of frosting over the areas that are already covered in frosting, starting at the bottom with pink and working your way up to the white. This time, you do not have to totally clean off the spatula between uses. This helps to blend the layers together as you move up to the top of the cake. Use long and short motions to apply the frosting brushstrokes to make it look more artistic. The great thing about this technique is that you can keep going back and altering the look, and it doesn’t have to be perfect!
Store the cake in the refrigerator until about 1 hour before you serve the cake.


I realise I’m super late to this, but just found your blog through instagram. I love Tessa’s book, and so far all the cakes I’ve made have turned out great! I think both the lemon cake and the butter cake are quite dense/sturdy cakes. They’re both mentioned in the final pages with recommendations for tiered/wedding cakes. However, I still find them quite light and fluffy, but you have to be careful not to overmix! I cream the butter and sugar like a crazy person, and once I put in the final bit of flour I just fold it gently by hand instead of mixing it. I also really like the orange poppyseed cake (lighter in texture) and the carrot cakes! Super fluffy and moist. P.s. For the buttercream I always buy a bottle of pasteurised egg whites – no waste!
LikeLike
Thanks so much for replying to this post! I will definitely try mixing less on the dry ingredients next time. I think I got overzealous after she explicitly said to mix the butter and sugar so much, so I will try out your hand mixing technique! Also great to know about the egg whites! I hate wasting things, so that would make me feel a lot better 🙂
LikeLike
The ombre is absolutely gorgeous! Such an amazing job!
LikeLiked by 1 person
Thank you so mush!
LikeLiked by 1 person
This looks so good and colorful! Perfect for spring and summer🌸💛
LikeLiked by 1 person
You’re so right! Thanks so much 😄
LikeLike
Simply gorgeous! Love the ombré effect.
LikeLiked by 1 person
Thanks so much Katherine! I love how it turned out in the end!
LikeLike
It turned out well!
LikeLiked by 1 person
Thanks Erika!
LikeLiked by 1 person
what a beautiful cake!!!
LikeLiked by 1 person
Thank you so much! I love how it turned out!
LikeLiked by 1 person
Must be delicious.
LikeLiked by 1 person
We really loved it. The lemon flavor in the cake and curd were both great. The only thing was that the texture was a little dense – trying to figure out if I did something wrong or if that is how it always tastes!
LikeLike
This is really nice 😍
LikeLiked by 1 person
Thank you so much! Glad you like it!
LikeLiked by 1 person