
While most of my focus lately has been on holiday eating – think hot chocolate, cookies, and comfort food – I have also been thinking about holiday clothing as well. Besides the obvious PJ and blanket scarf combo, there are a ton of parties that need a little bit more glitz. (Wait, I can’t show up in my leggings and a huge sweatshirt to this company party?) Christmas and New Years always lend well to sparkle and shine, but I was inspired by something a little different this year.


Details: Top (made by me) | Black Jeans | Black Pumps | Gold Necklace (similar, similar) | Gold Bracelets | Lipstick
I saw this off the shoulder velvet top on Instagram and fell immediately in love with it. And then found out it was unavailable on Nordstrom.com. So obviously I headed straight to the store and bought a yard of velvet. Y’all, I had never worked with velvet before, but it turns out that apart from shedding all over the place like a dog, it’s not the worst to sew!


For this top I altered it a bit to fit my lifestyle better. It’s a little less cropped than the original inspiration, and I purchased green velvet instead of blue since I figured it would work well for Christmas! The velvet is luxurious feeling and so soft to the touch that it almost feels as great as my PJs, while being so much more chic. The sheen of the velvet still feels holiday worthy without being so in your face covered in sequins… though I’m sure this top would pair incredibly with a pair of awesome sequinned pants for NYE… thoughts?
I hope this helps you get into the holiday styling spirit! Do you guys have outfits planned for the holidays yet?
Also, don’t worry, if you’re not so keen on making this top after checking out the tutorial, I did some searching and you can still grab it at Topshop! 16 days ’til Christmas, bunnies!
Velvet Off the Shoulder Holiday Top Tutorial
Supplies:
1 yard Velvet
Thread to match
1.5 yards 1″ Elastic
Sewing machine
Scissors
Measuring tape
Pins
Large clothes pin
Clear nail polish (optional, but helpful)
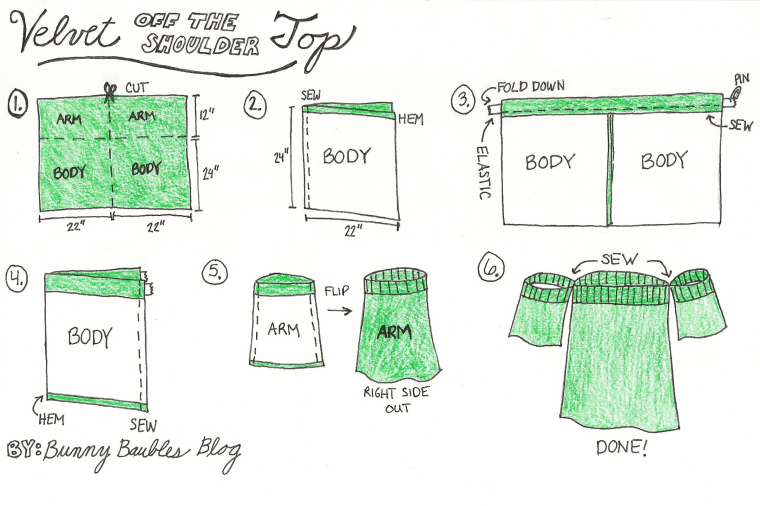
1. Use scissors and measuring tape to cut your one yard piece of velvet fabric in to two pieces so that one is 24″ and the other is 12″. Then, cut these two pieces in half so that you end up with two pieces that are 24″ by 22″ and two pieces that are 12″ by 22″.
2. Start by making the bodice, which is essentially a tube top on its own. Use your thread and sewing machine to hem the top edge of your fabric about 1/4″ on each 22″ side of the 24″ x 22″ pieces. Place the two pieces of fabric back to back (velvet side touching) and sew along one of the 24″ sides to connect them.
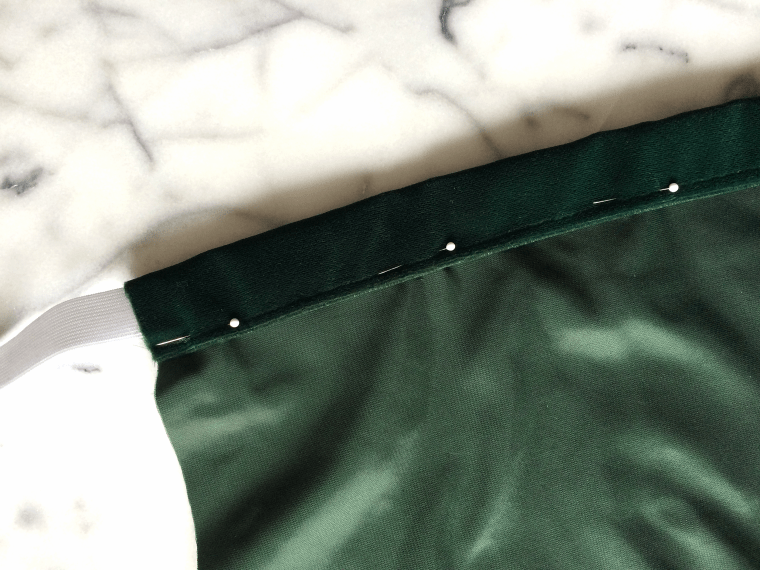
3. Fold the hemmed edge over 1.25″, pin, and sew along the hem line again to make a slot for the elastic. Cut a piece of elastic to the size of your bust (I used 36″). Take a large clothes pin and attach it to one side of the elastic. Use the clothes pin to help you guide the elastic through the slot in the top of the bodice, making sure to not let the other end of the elastic get lost on the other end!
4. Fold your bodice in half so that the velvet sides are touching again and pin the elastic ends together. Pin along the 24″ side of the bodice that has not been sewn yet and sew it closed. Turn it inside out, try it on, and hem the bottom edge to your preferred length. You will want to hem this twice so that it does not fray.

Once the bodice is complete, I added an extra zig-zag stitch to the sides of the shirt to help with fraying, as well as applying a small amount of clear nail polish to the edges to keep those threads from pulling away! Velvet is quite prone to this.
5. To create the arm pieces, follow the exact same procedure as was completed above for the bodice with the 12″ x 22″ pieces, treating the 12″ side as the 24″ side from before. The remaining elastic will be cut in half and then measured around your arm to get the correct length (I used two 13″ pieces for this shirt). The length of the sleeves was adjusted to about 7-8″ long after I completed hemming.
6. To complete the top, you have to sew the arm pieces on to the bodice. Line up each of the seams of the sleeves with the seams of the bodice and pin at the top. Sew along the elastic about 1-2″ to the left and right of the seam to connect the two pieces together on each side.

Really really nice!
I love that top and the material is gorgeous!
Want to make that too 🙂
Love, Colli
LikeLiked by 1 person
Thanks so much! Glad you liked it!
LikeLike
That top looks so good on you! I just did a velvet project too. Plus, it appears we both like to do cute drawings of how we make stuff!
LikeLike