
Wow, it’s May 2, 2020. This is the day I thought I was going to get married for over a year, and here we are postponed. It is surreal. I wrote about rescheduling our wedding if you are interested, but because it’s no longer set for today and all of these times and dates have changed, I thought I could share our invitation design and printing process!
When planning our wedding budget, I knew I wanted our invitations to be pretty, but I wasn’t ready to shell out a big chunk of the budget on them. We wanted our money going to food, entertainment, and the venue for the day, so the invitations were set as a DIY activity.

We scoured the online wedding invitation sites for options that would be perfect for our vision. We wanted the invite to serve as the first indication of how the wedding would look, what the vibe would be, and what our colors were. There were some good options, but nothing was absolutely perfect. We also needed to include information about two different venues (the church and reception spaces) with two different times and a welcome party for the Thursday before the wedding. We quickly realized that getting all of that information on to one preset card was not going to happen, which meant adding more paper, more postage, more money.
I decided that we were perfectly capable of designing our own invites and getting them printed elsewhere. Was that true? Yes (in the end) but it took a lot of time, revisions, and reviews before getting it right! It’s maybe not the task for everyone, but we just loved how our invitations turned out. They were so custom and allowed us to get so much information out there for less than $1.25 each including envelopes! Take a look at my tips below to tackle this wedding task!
Designing Your Wedding Invitations
- Brainstorm. Review wedding invitation sites and find some you really love. We liked a lot of designs on Minted, Basic Invite, and Etsy. Note the font choices you like, colors, imagery, and layout. If you like simple designs or can’t find the font you want due to limited options, designing your own invite is definitely right for you. If you are leaning toward a complicated design with lots of graphics and art, you can find some of those types of images online to buy and use, but it may be easiest and cheapest to just buy from an invitation site.
- Collect Information. Your invitation can’t just look good, it needs to convey information too! Determine what you want to include on you invitations starting with the list below:
- Names of the Bride and Groom
- Names of anyone else who may be hosting the wedding
- Date and time of the wedding (ceremony and reception if different)
- Location of the wedding (ceremony and reception if different)
- RSVP date and how to RSVP
- Dress code
- OPTIONAL: Details of other wedding weekend activities, hotel block information, wedding website
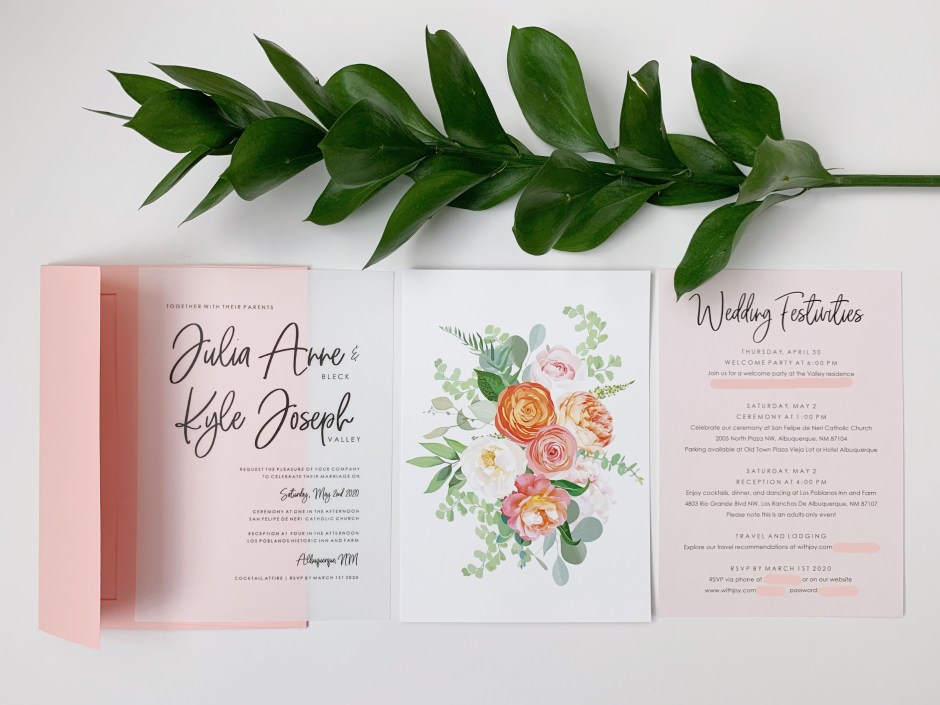
- Write Out the Text. Once you know what needs to go on the invitation, it’s time to start designing! If you don’t have any fancy software like Photoshop, Lightroom, etc. you can use PowerPoint. This is what I used to create table numbers, our invitation, wedding program, and so much more. Draw a rectangle the size of your invitation and start adding text boxes where needed. Use those inspiration invitations you found on other sites to start laying out the invitation and choosing fonts. As you can see in our invitation, we choose two fonts and alternated the font based on each line for the most part. Our names took center stage, as well as the date and city. This was similar to many invites we had looked at, but we were able to include both locations for the ceremony and reception which was usually impossible to fit on standard templates! We also made a second card which used the same two fonts (we adjusted the spacing of the letters for the headers) and this allowed us to provide a lot more detail about the locations of the events, our website, and more. Here are some things to think about for invitation design:
- Stick to a couple of fonts. Too many looks messy and unprofessional. You can change the size of the font if needed to add impact. Fonts that are drastically different also look better together, such as a cursive font and a sans serif font.
- Maintain constant spacing. When the spacing is even, it looks more professionally done.
- Double check spelling and look for typos! Nothing is worse than printing 100 invites with an error on every single one.
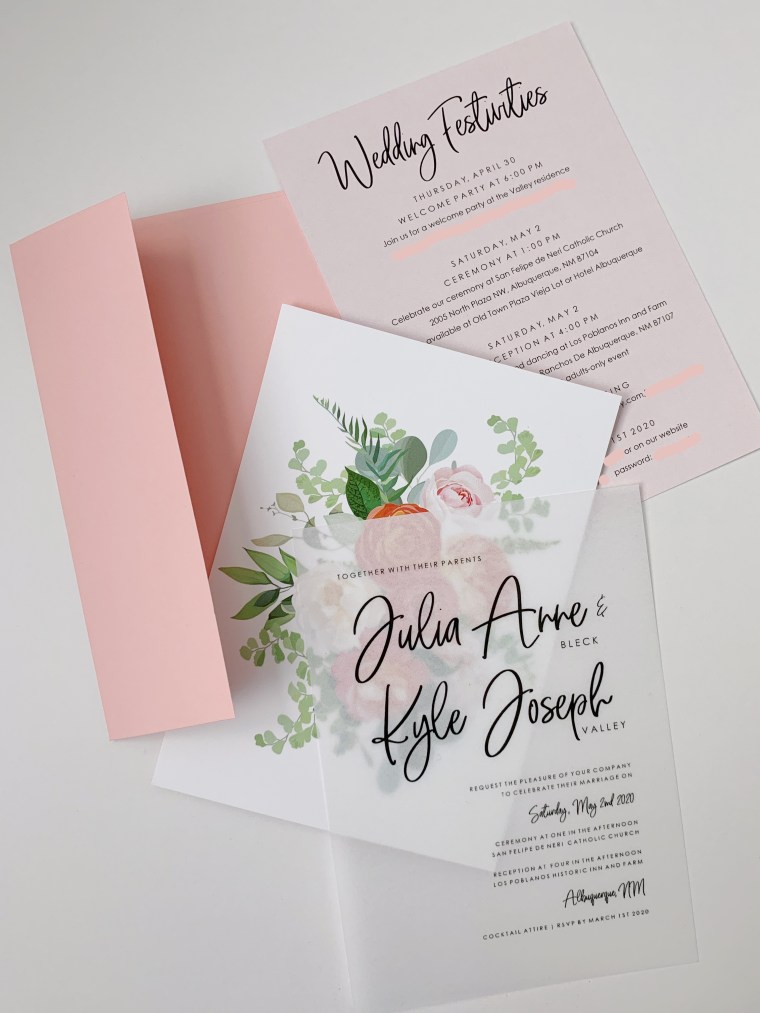
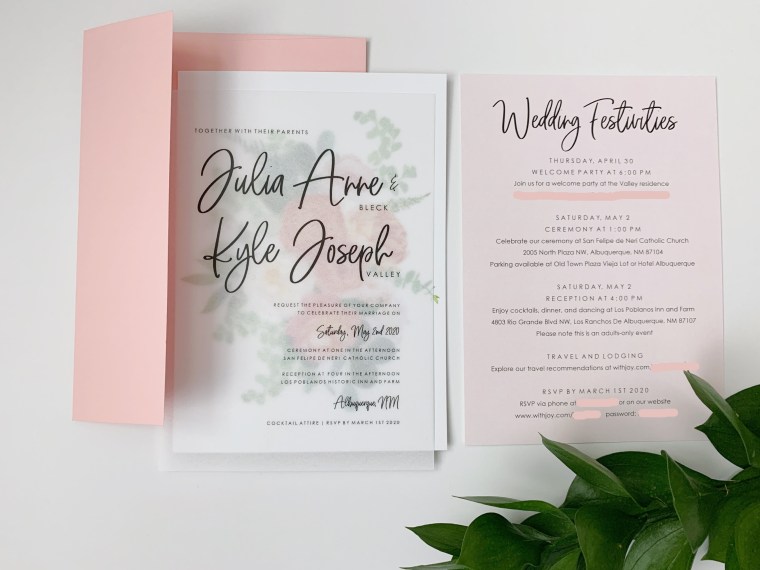
- Add Flourishes. Once you have the basics done, it’s time to add any images you have collected or colors you may want. You can also start to get creative with paper styles and layering. For our invitations, we wanted a sleek look for the main invitation, but liked the idea of incorporating our colors and flowers to give a sneak peek into what the wedding would look like. To do this, we decided to print the first page on vellum paper with no colors which turned out to be very inexpensive. Behind it, we chose to print an image of a bouquet that looked very similar to mine. This image went on the back of the card that held the additional wedding information, and layered together it looked really pretty behind the semi-transparent vellum. You can find images all over the internet to use. I purchased this one off of a clip art store. One additional thing to consider is that printing borders can be tricky because if they are slightly off they will look really bad. Consider using a solid color background that goes all the way to the edge of the paper to make for easy printing.
- Save as a .JPG. In order to easily print out our invitations, I selected all of the text and the background box of our invitation design, grouped it into one piece, and then saved it as a .JPG file. This made it easy to upload to the printing site.
- Money Saving Details. There are a few personal preferences when it comes to invitations which you will want to consider. Are you set on having RSVP cards, or are you OK having people RSVP on your website instead? This can save a lot of money because you will need an envelope with a stamp and another piece of paper for each of those RSVP’s. The other choice you need to make is if you intend on using inner envelopes. People usually use these to write each invitee in fancy lettering and then have the standard addressing on the outside envelope. I personally didn’t see the need to waste more paper, so we opted out and saved money there too.
Printing Your Wedding Invitations
- Choose a Printing Company. When it comes to printing your invitations, not all sites are created equal! We used Catprint to print our invitations, and could not recommend them enough (not sponsored, we just love them!). They will send you free sample paper styles (they have TONS of options for paper weight and finish), and their pricing is very affordable. The quality was also top notch, the imagery came out very clear, and they don’t charge much extra for printing on both sides of the paper which was a big savings. They also have free sample printing (see point 3 below) and an easy to use site. I am sure there are many other good options, but I can’t speak for anything other than what we used.
- Select your Paper. Depending on what look you want, there are way more paper options than you might expect! Cardstock weight, paper finish, and sizing are all customizable. Remember that whatever paper style you choose, if it is very thick you may end up paying more in postage. We used 4″x6″ paper in the “semi-transparent vellum” for the invitation and the “heavy cardstock – plain” paper for the details card. This thickness felt like the standard invitation option, and we were happy with that. Together, these two pieces could be shipped with standard postage.
- Print a Sample First. Being able to print a sample invitation is really helpful before ordering your entire batch of invitations. Sometimes the edges of the paper are closer to your text than you thought, something looks off from your spacing, or the colors don’t turn out as you wanted. This was another reason we used Catprint – free samples! They were very easy to work with when we wanted to make a change to our invitation and it didn’t cost a thing.
- Don’t forget the envelope! When it comes to envelopes, there are, again, many options available at many price points. I wanted to use a pink envelope because I thought it would add more color to our invitation suite and get people excited when they saw it in their mail. I also didn’t want them to be too flimsy, but the thick envelopes will set you back a pretty penny. I found some I loved on Amazon and they worked out great, but there are tons of sites with options for this. Also, after Kyle suffered through licking every Save the Date, we went with peel and stick envelopes for the invitations!
- Addressing. Here’s where I might be crazy, but addressing our own invitations wasn’t too hard and people seemed to love that we did it by hand! My mom helped me out and we bought a return address stamp to use, so it didn’t take too long. Other options include setting up your printer to print addresses from an excel table, printing clear labels to stick on to the envelopes, or having a company print them for you. Again, we went the more DIY/affordable route by hand addressing. Just make sure you have some extra envelopes because you may have a few mishaps.
Designing, printing, and shipping out your own invitations may be a lot of work, but it can be really fun and rewarding as well! We enjoyed having something we could DIY that wasn’t so close to the date of the wedding so that it didn’t stress us out, but still allowed us to do something really personal. Let me know if you try your hand at designing your own invitations!

Great blog, Julia! Can’t believe the date is here. The revised date will be here before you know it. Xoxo
LikeLiked by 1 person
Yes it will!!
LikeLike