
If you have ever lived with me, you would have experienced the great annoyance that is me consistently trying to rearrange the layout of the room. My architect parents were constantly changing the floor plan of every room in our home growing up… I would say twice a year! It was fun and exciting and challenging, and so I learned to do the same with my bedroom. Even at a young age, I would single-handedly push my bed into one corner and pull my dresser into another. Sometimes, it was a disaster, and I had to put everything back after a day of moving. This is how I learned to make my own layouts.

Architects and interior designers use floor plans all the time to lay out walls, furniture, and even accessories to see how they will fit into a space. It’s a great way to conceptualize what a space will look like before changing or building things. I used to do this with paper, but have recently found an entirely new approach just using PowerPoint! Anyone with a computer and a measuring tape can make a layout like this, and it will show you how your room will look before you spend the time actually lugging furniture around.
Since I will be moving this Fall and need to make sure my current furniture will fit into the space, I put together my own room layout. I have also been using this technique to try different rugs, pillows, and decorations before purchasing them!
If you want to create your own floor plan for a room in your home, try out my simple approach below!
The Easiest Way to Create a Floor Plan
Supplies
Microsoft PowerPoint
Measuring Tape
Time
Variable on Size of the room and number of pieces of furniture
Difficulty
Easy
1. TAKE MEASUREMENTS. The first step is to go around your room and measure all of your furniture. You will need to get the width and depth of each piece. If something is an odd shape, take the largest dimensions and approximate the piece as a rectangle. Don’t forget to measure your rugs too! You will also need to measure your room.
2. CREATE THE ROOM AND THE FURNITURE. Open up a blank PowerPoint document and start by going to Insert -> Shapes -> and choose the rectangle. Draw any rectangle, and then go to Format and adjust the length and width to be the same size in inches as your room is in feet. For instance 1 foot in real life = 1 inch in PowerPoint.

Now, you can make your furniture. Create your furniture in the same way that you created the room. If a table is 3′ x 5′, create a rectangle that is 3″ x 5″. If you have a sectional sofa, create two rectangles, select them both, right click and then “Group” them to make them one object.

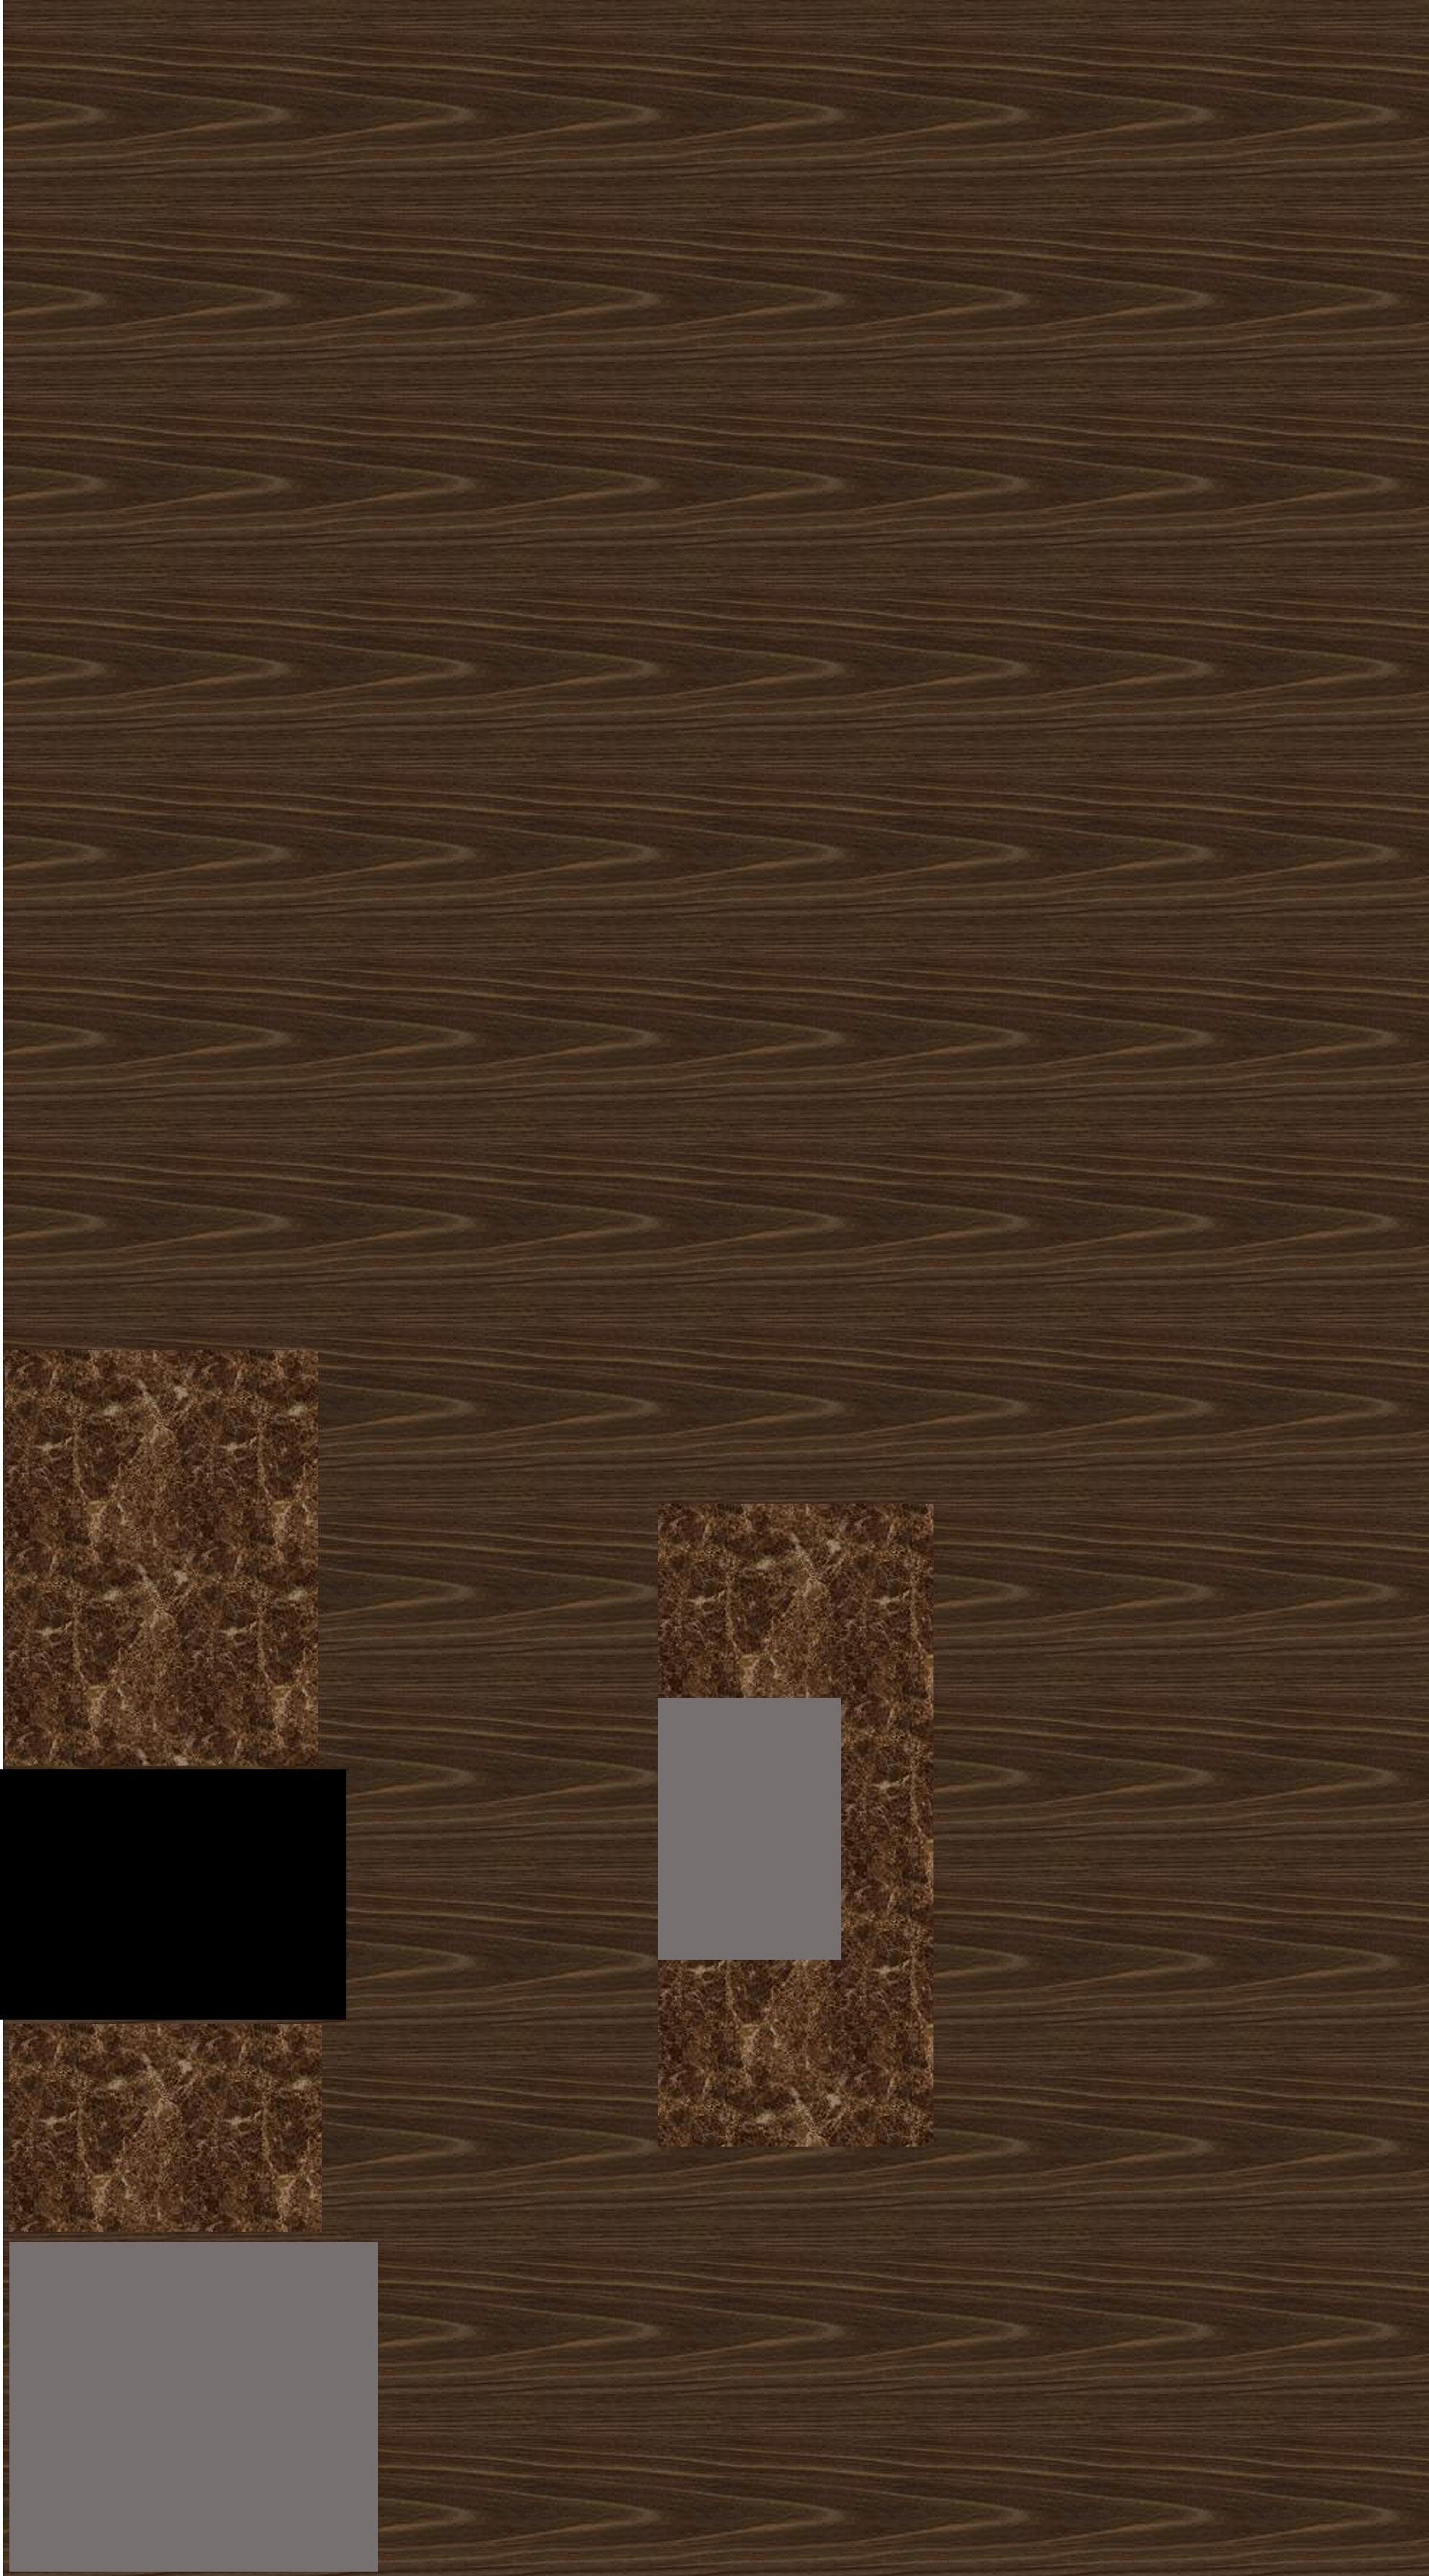
3. CUSTOMIZE YOUR PIECES. To get an even better idea of what the furniture will look like in your space, click on one of your shapes, right click, and choose “Fill”. You can either fill the item with the color that it is, or you can even fill an item with a texture! They have wood, granite, etc. which are perfect for counters and flooring.
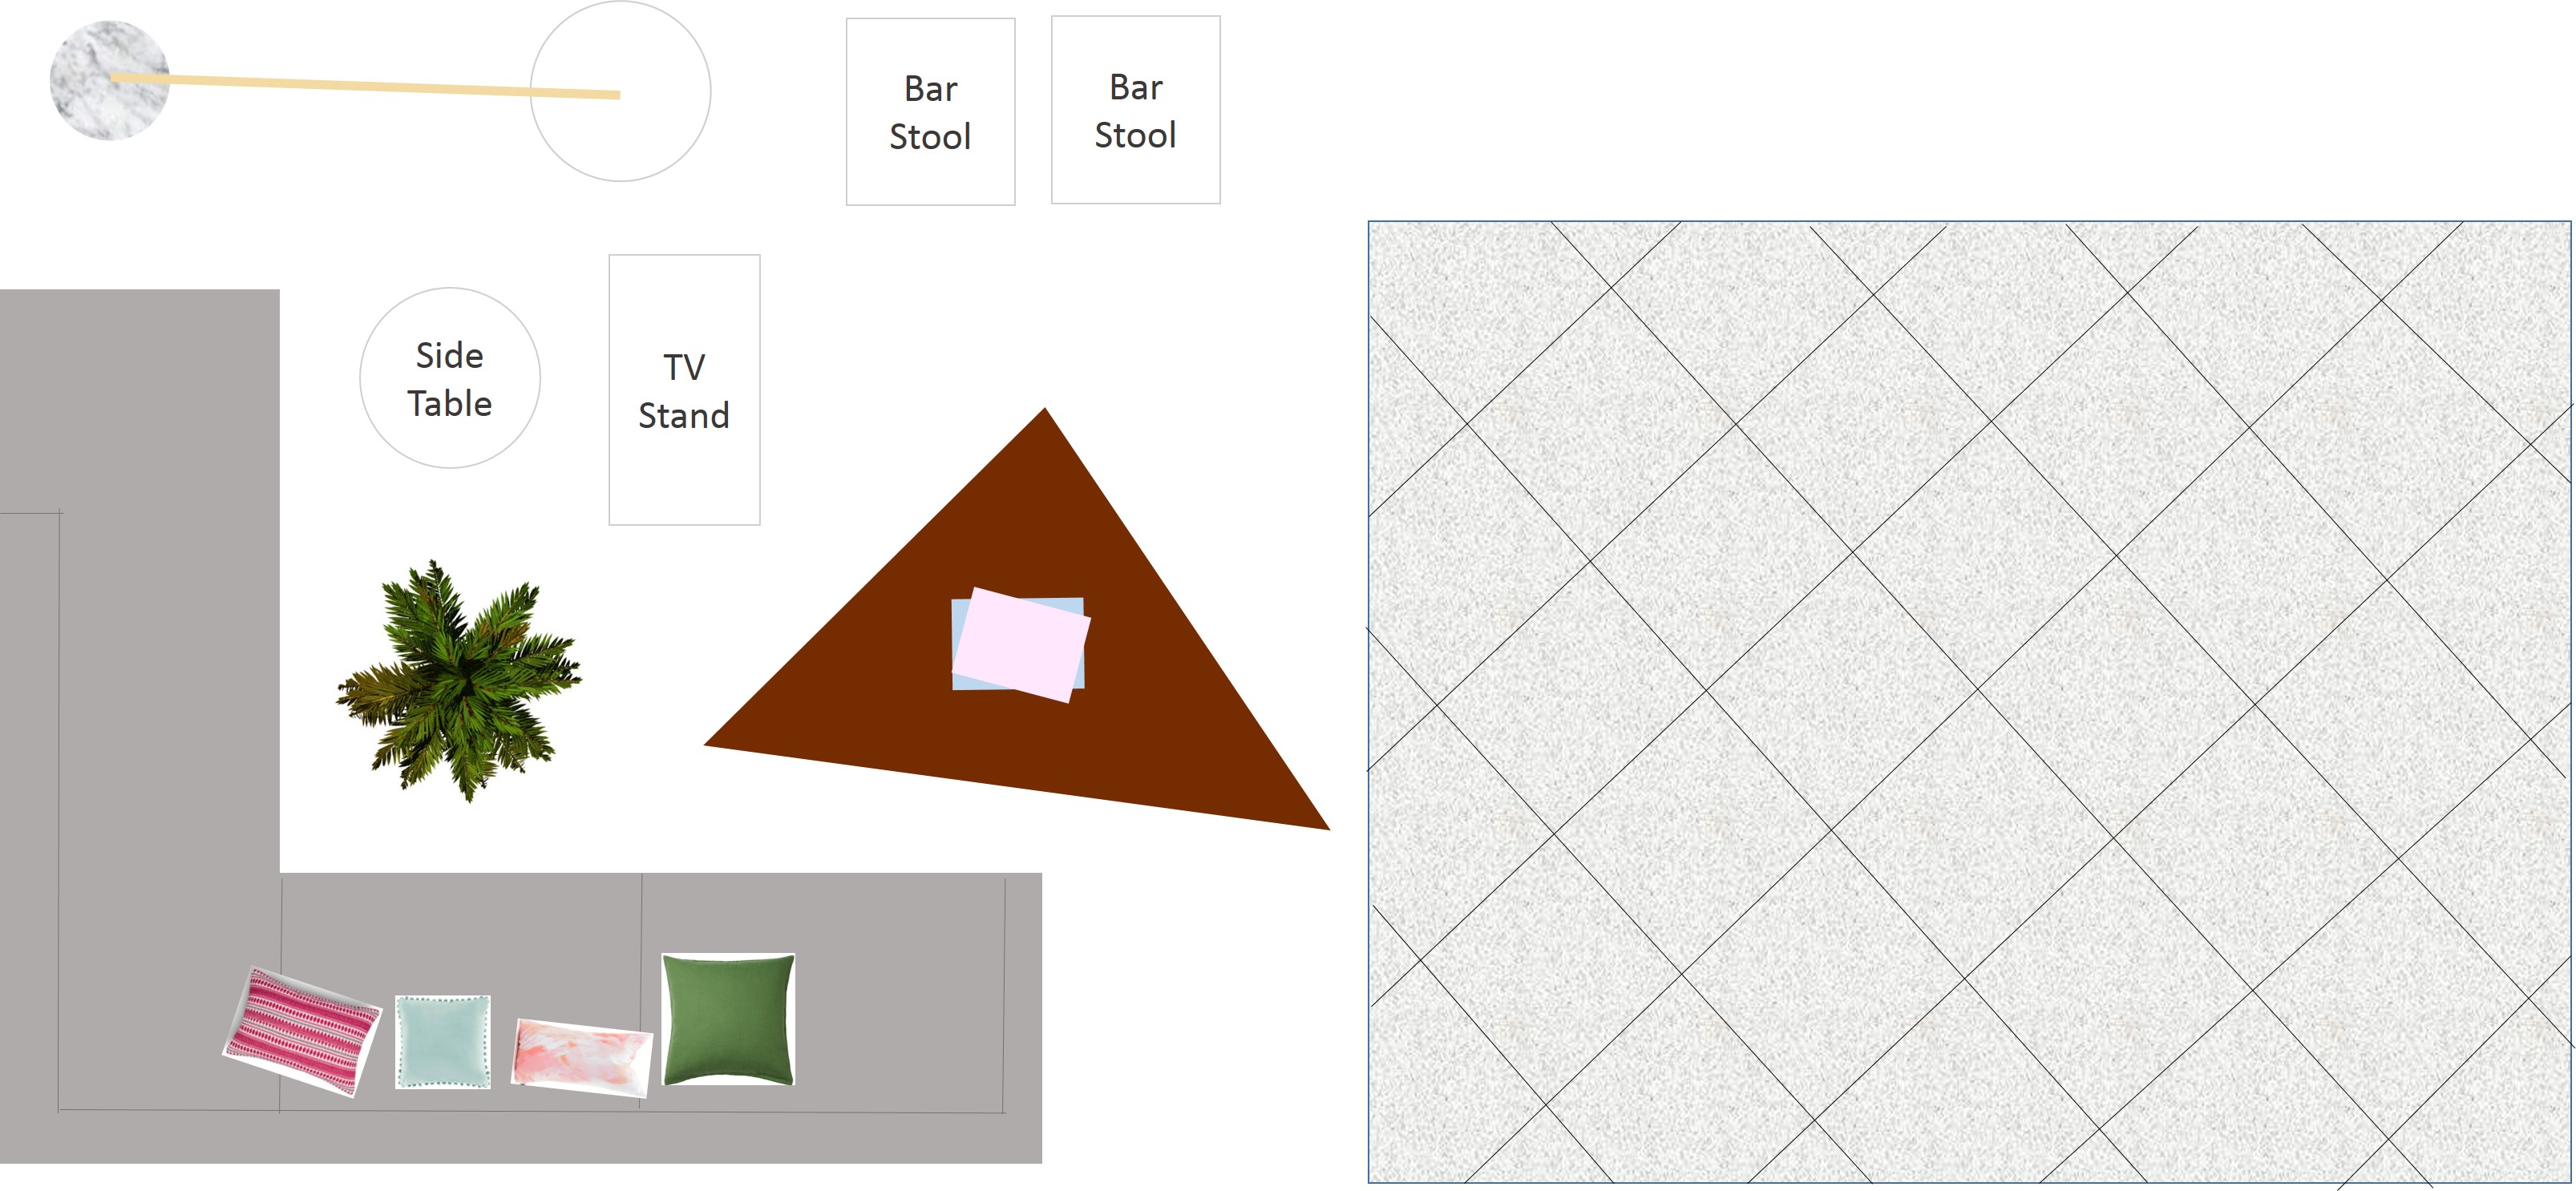
4. MOVE THINGS AROUND. Now for the fun part – start moving things around! If you find that an item is beneath an item that you want it to be on top of, just right click and choose “Bring to Front”. If you find a layout that you like, just go to the slides on the side of the document, right click on the slide you are on, and choose “Duplicate”. Then you can work on rearranging the room in a different way on the next slide!

5. EXTRA TIPS.
- If you have something specific that you want to try out in your new room, like a patterned rug, you can probably find an image of it online to use! Most rugs have an aerial view. Choose this image, copy it, and then paste it into your PowerPoint. To remove any extra white space around the item, just select it -> Format -> Crop. I have also done this with pillows, lamps, plants, etc.
- If you want to try out new artwork or see the view of the room from the side like I showed at the beginning of this post, you can also use PowerPoint to do this. I found most of the items online on the websites where I bought my furniture and accessories, copied the photos, and pasted them into a PowerPoint slide. Right click on items to bring them forward or send them to the back so that they are in front of or behind each other. I always add in a floor by just drawing rectangles and placing them underneath the furniture and rugs since the color of the floor can really alter the look of the room.

This makes me want to rearrange my apartment!!
LikeLiked by 1 person
Omg it’s like my favorite thing to do! Haha, it’s a great way to make a change without spending any money too!
LikeLike