
Everyone wants to be a celebrity! And when a celebrity basically doesn’t have a face, it turns out you can replicate their look into a costume pretty much to a tee.
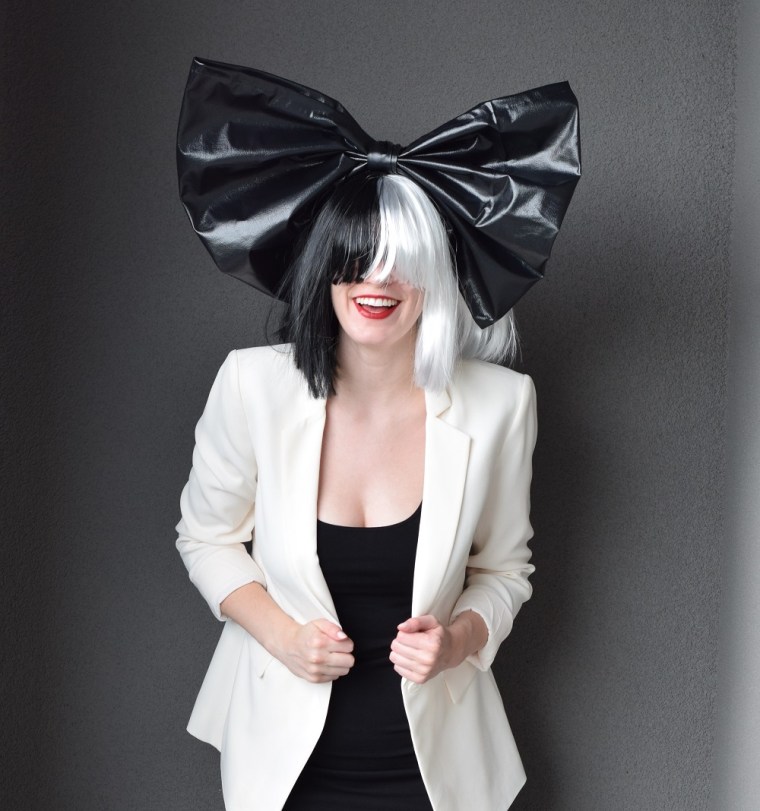
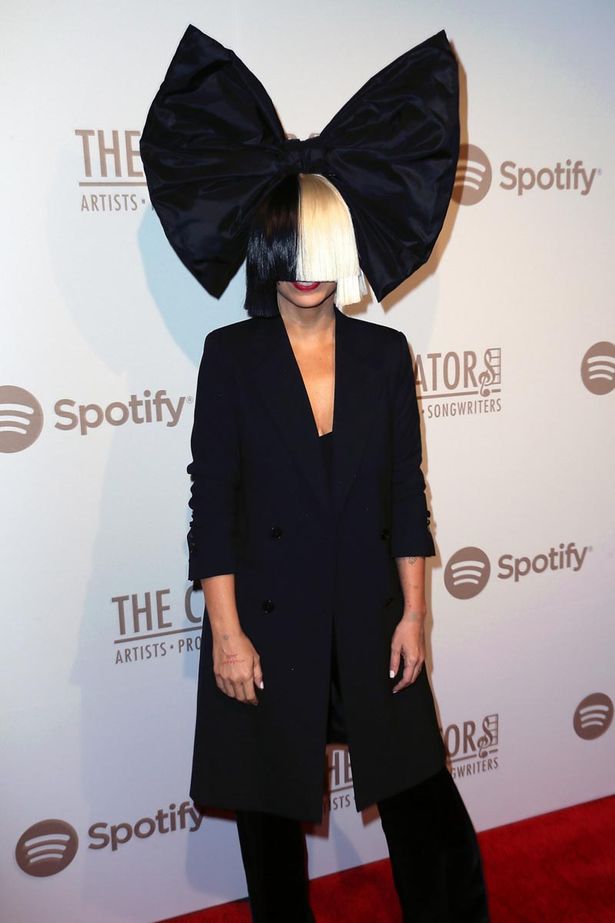
Sia is the mysterious pop artist behind “Chandelier”, “Elastic Heart”, and the more recent hit “Cheap Thrills”. Her iconic look is based around a collection of wigs with long bangs that cover her eyes. Trying out her look turned out to be a ton of fun, even though I was definitely peeking through the bangs every once in a while in order to not trip on things! Being Sia is the best because:
- The only makeup involved is a red lip.
- No hair issues either since you just throw on a wig.
- The clothes can be any Sia outfit you want! So cheap, y’all.
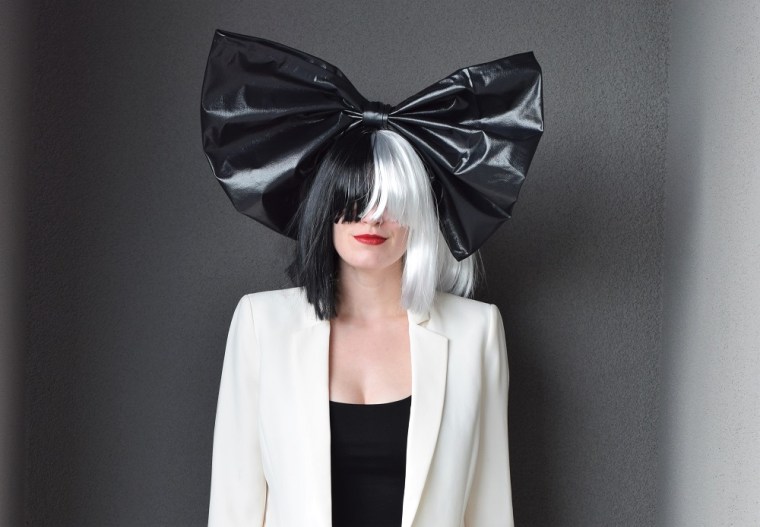
I bought this black and white wig on Amazon and then purchased a bit of black fabric to make a big bow headband. The rest of the outfit I already had, so this entire costume only cost about $15!

Check out the full DIY below for how to make a Sia oversized bow to finish off your look!
DIY Sia Costume
Black and White Wig (Mine is unfortunately sold out! Similar wig here and here)
DIY Black Bow Headband (see DIY below)
Any Sia Outfit – I went with a black dress, white blazer (similar blazer, similar blazer), and black pumps
DIY Black Bow Headband
1/2 yard Black, Stiff, Shiny Fabric (I used faux leather)
Stiff Headband
Sewing Machine
Black Thread
Scissors

1. Cut your fabric into two pieces, one that is about 18″ x 36″ and another that is about 3″ x 18″. Take the 18″ x 36″ fabric and fold the 36″ edges over about 1/2″ and sew them down.
2. Fold the 18″ x 36″ piece and fold it in half so it is about 18″ x 18″ with the right sides of the fabric touching. Sew the non-sewn edges together and then flip the fabric right side out so you have a tube.
3. Scrunch together the tube of fabric in the middle of one of the open sides to make a bow shape and wrap the 3″ x 18″ piece of fabric around the middle a couple of times. Then, wrap the remaining fabric around your headband to connect it and tie it off on the backside of the bow.

20 thoughts on “DIY Sia Costume”