
Most people gawk at a couch covered in pillows and ask, where am I going to sit? I see it as an opportunity for movie marathons, popcorn eating, and cuddling. More pillows please!
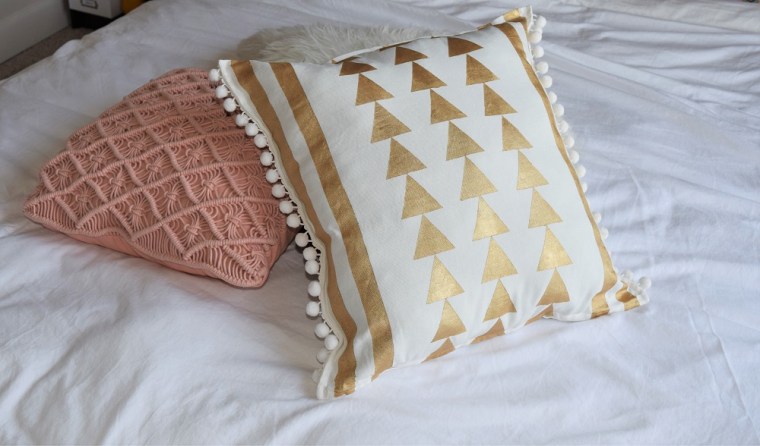
In all seriousness, I was sick of my orange pillow cases. They had served a wonderful purpose for three years to brighten up my space and add color in a non-committal way. Nicely enough they are replaceable, and so I was off to the craft store to change it up and make something that would compliment my white fur pillows and this incredible macrame pillow from Target! (No way I was going to DIY that craziness.) Going with a white, blush, and turquoise theme (turquoise to come soon), the only little something extra missing was gold.

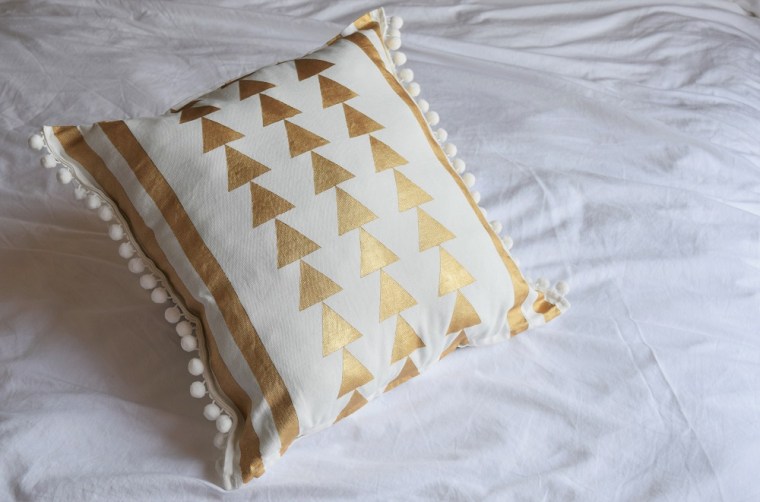
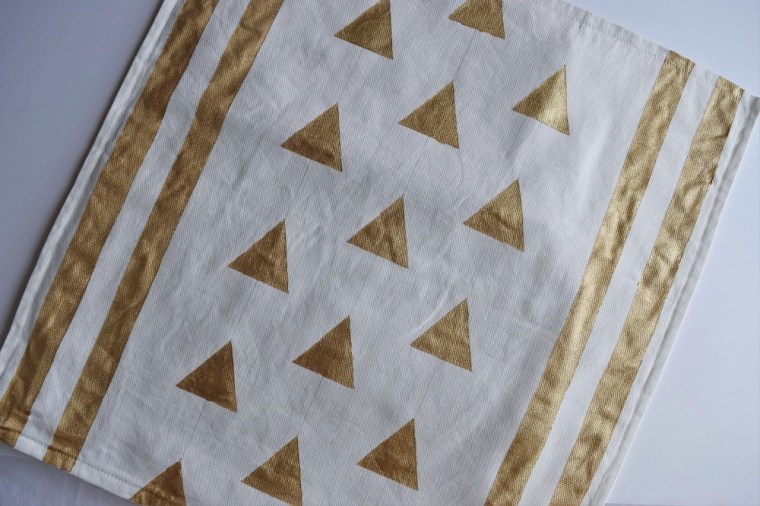
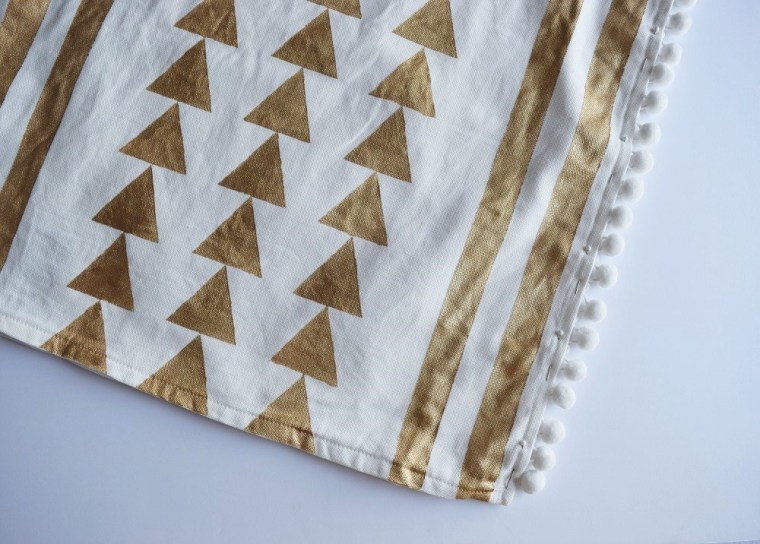
I love the trendy tribal feel of the triangles mixed with the stripes on this pillow. It’s really simple to make since it only requires you to use a pencil, a ruler, and some tape. I hadn’t used fabric paint since I was making custom tee-shirts with puffy paint in elementary school, so I was thrilled to find this amazing metallic gold fabric paint at Joann Crafts. The paint looks like it was part of the fabric and has an incredible sheen to it. I also added pom poms because one elementary school supply just wasn’t enough.
For a fun (and cheap) update to your couch pillows, try out this DIY gold painted tribal pillow case. See below for the full DIY.
DIY Gold Painted Tribal Pillow Case
Supplies:
IKEA White Pillow Case (19″ x 20″)
Metallic Gold Fabric Paint
Paintbrush
Cardboard (I used leftover cereal boxes torn apart)
Scissors
Pencil
Ruler
Masking tape or Painters tape
40″ White Pom Pom Trim (Price online is not correct…)
Sewing Machine
White Thread
Time:
1 hour + 5 hours paint drying time
Difficulty:
Medium
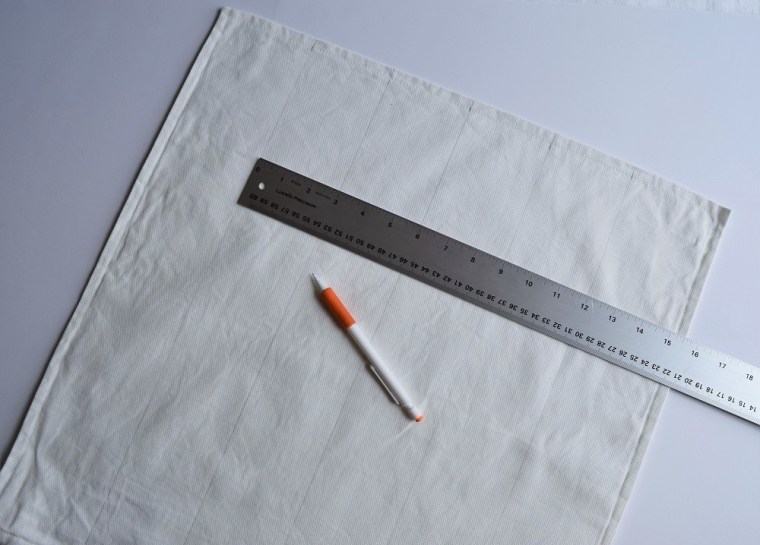
1. Wash and dry your pillow case to make sure there will be no shrinkage at a later date.
2. Once the pillow case is dry, measure out the triangle and stripe pattern by locating the center of the pillow on the side opposite to the zipper (9.5″ from the edge) and marking it lightly with a pencil. Then make lines 3″ away on either side of this line. These lines mark where the triangle pattern will go.
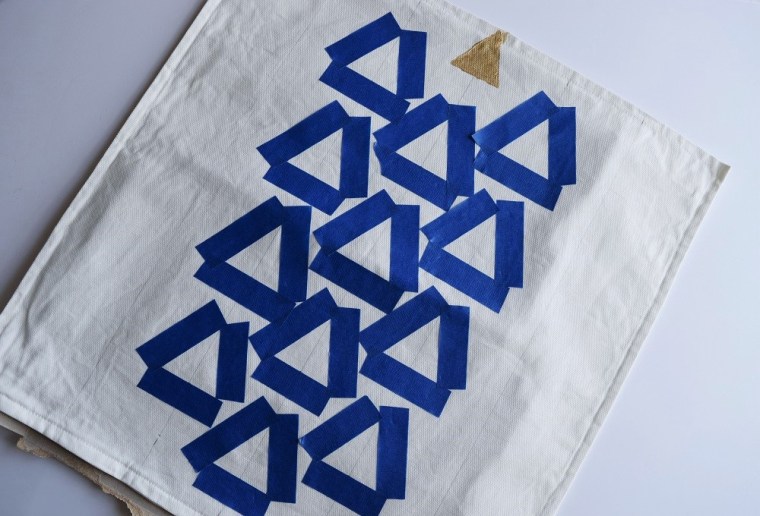
Next, measure and lightly mark with a small dot 2″ sections along the 3 triangle lines. This will be where the triangle tips start.
Finally, measure and lightly mark with a small dot 2″ widths, 1″ on either side of the dots you drew on the triangle lines. All of these dots make up the corners of the triangles.
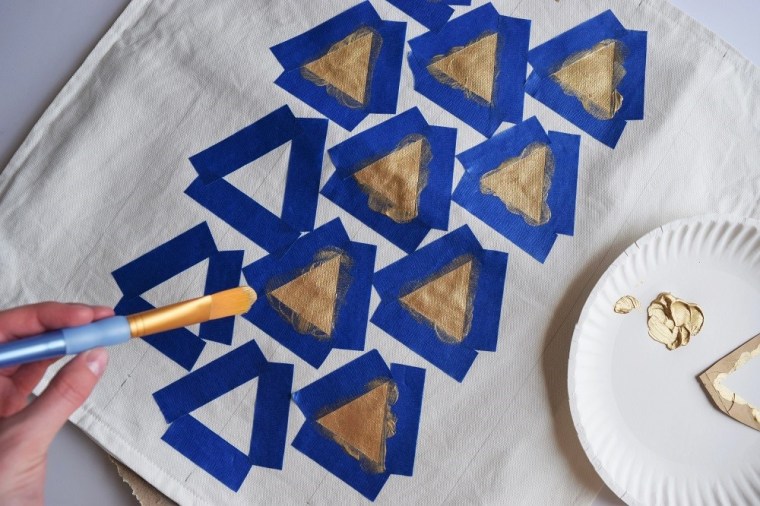
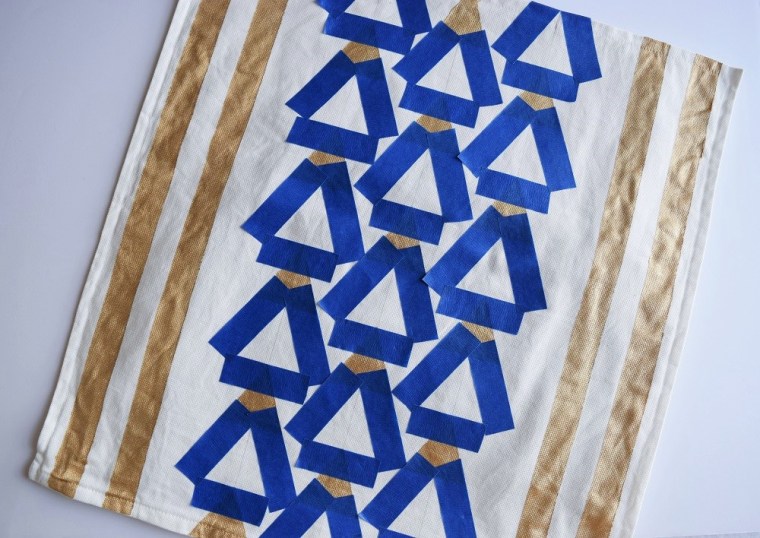
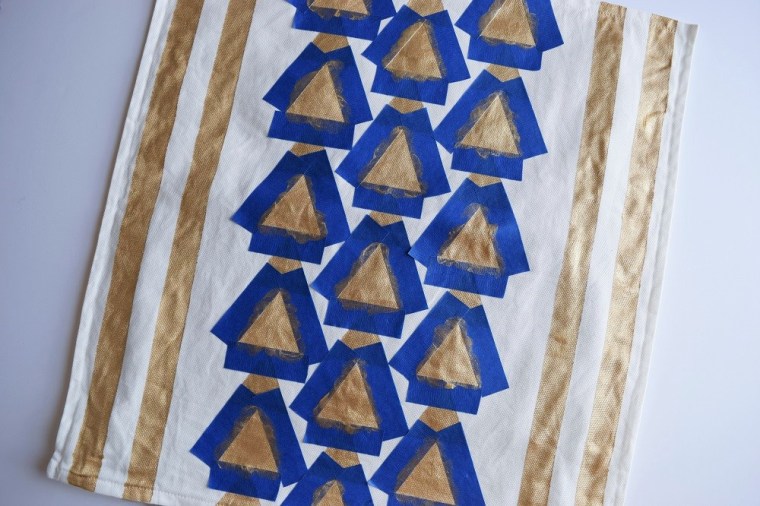
3. Now use the masking tape or painters tape to create borders for the triangles. Use the dots you drew in step 2 to align the edges of the triangles. You will only be able to mark out every other triangle as I have shown below. You will mark out the other triangles later on.
Also at this time, create the vertical lines using your tape, placing three pieces of tape to the left and right of your triangle lines. I started mine about 3″ from the left and right of the triangles. Please ignore the top triangle… I tried using a stencil first and this did NOT work.
4. Time to paint! Place a piece of cardboard inside the pillow case to keep the paint from seeping through the fabric to the other side. Use your paintbrush to carefully fill in the triangles, as well as the open space between the vertical line tape. Allow the paint to dry for about an hour, or until the paint is no longer sticky to the touch. Remove the tape.
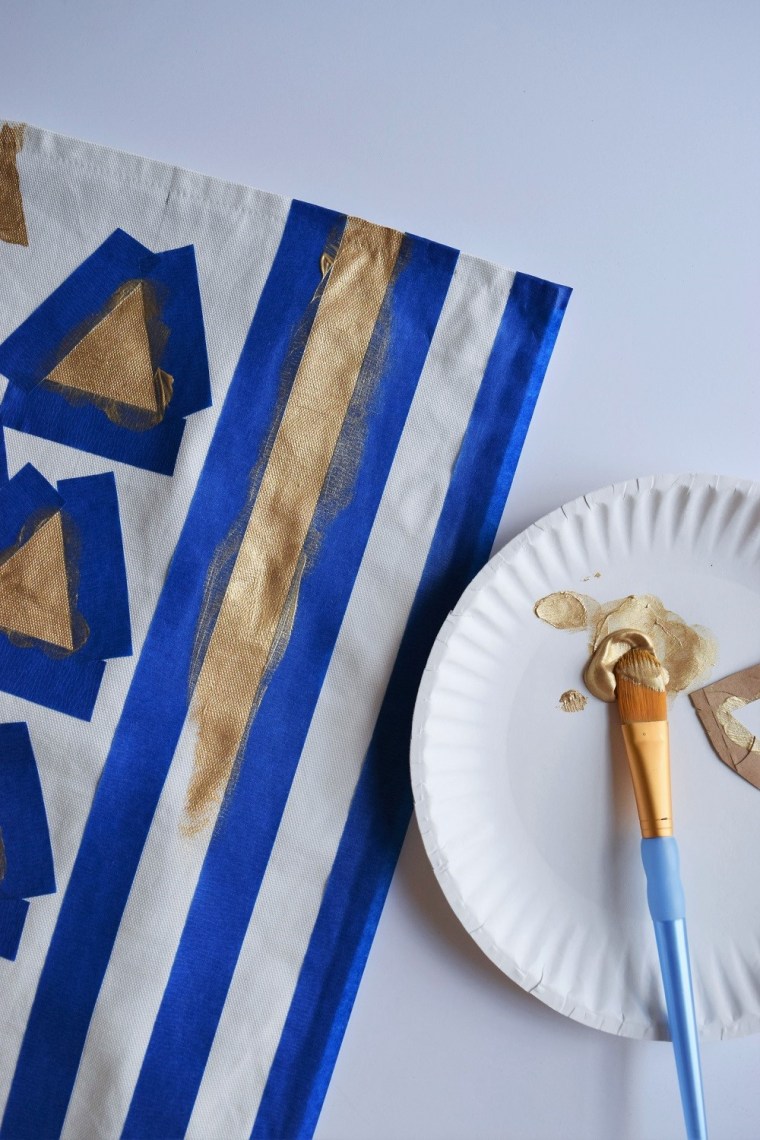
5. At this time, you will need to mark out the rest of your triangles with tape. Again, place tape around the three dots you drew in step 2, as shown below. Paint within these spaces and allow to dry for 4 hours. Remove the tape.
6. To finish your pillow case, cut your pom pom trim in half so you have two 20″ pieces and line them up on the sides of the pillow case. Sew on the trim.
NOTE: Do not wash your pillow case until the paint has set for at least 72 hours per the paint instructions.

This DIY project is so adorable! I’ve been browsing your blog and just LOVE your sense of style and creativity! Look forward to new projects (and I’m definitely going to make one of these pretty pillows next weekend!)
Lena – http://zoyaandme.com/
LikeLiked by 1 person
Thanks so much, Lena! You are too sweet. Let me know how it goes if you try out this DIY!
LikeLike
Love this finished product! It looks super professional while adding that boho touch that is so stylish this season!
LikeLiked by 1 person
Thanks so much Marissa! I love it too, boho but a little glam 🙂
LikeLike