
I’ve been having a love affair with white tops this summer. I pretty much have exclusively paired a white tank, my white peplum, and white lace shirts with all of my skirts. White is fresh, crisp, and classic, so it’s no wonder it’s everyone’s closet staple. It also makes me look tan, and I love that about you, white.
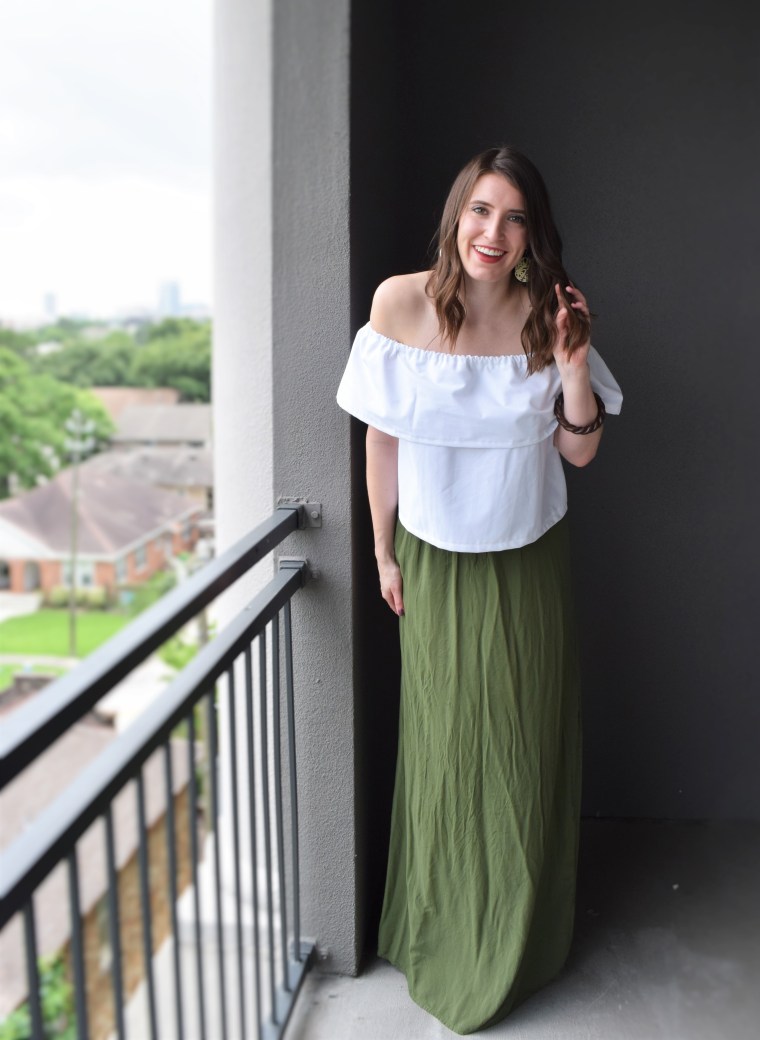
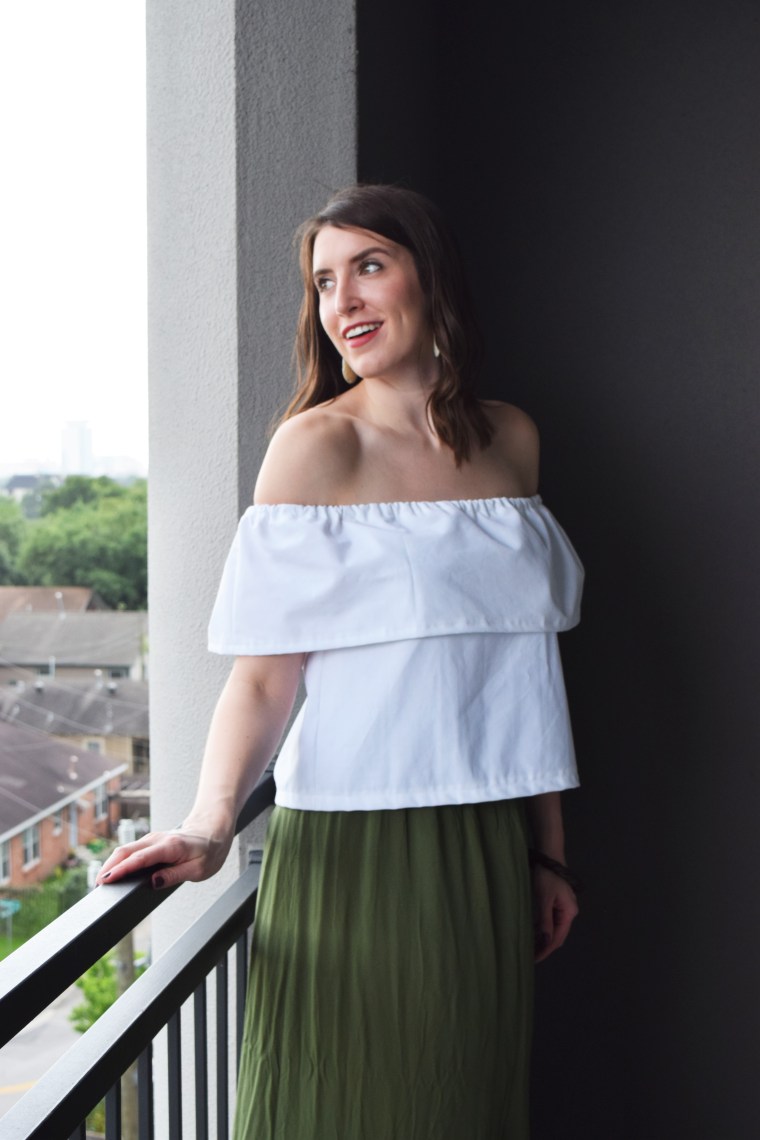
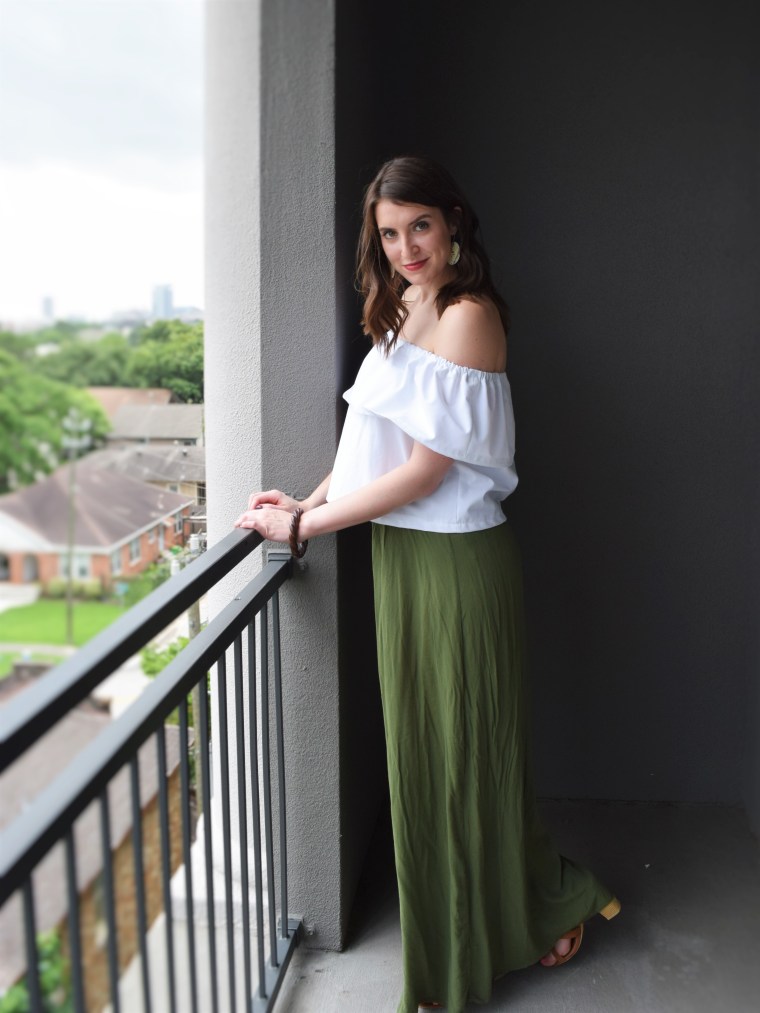
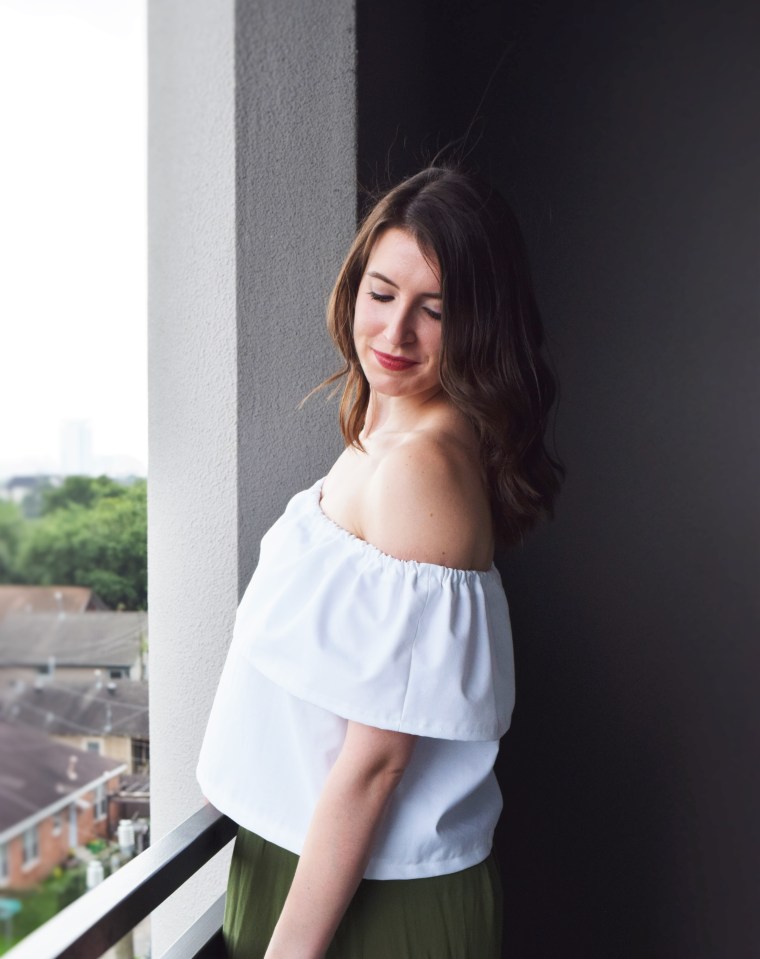
In order to incorporate a more interesting white top that could be worn with high waisted skirts into my wardrobe, I dreamed up this white off the shoulder ruffle crop top, similar to my off the shoulder seersucker dress. And by dreamed, I mean I think I saw it all over the place because I ended up finding so many good links for the non-sewers out there! As is usually the case, I spent a fraction of the price ($12 to be exact) by making my own top, so don’t rule out your crafting skills so quickly.
Topshop | Shopbop | Urban Outfitters | Nordstrom
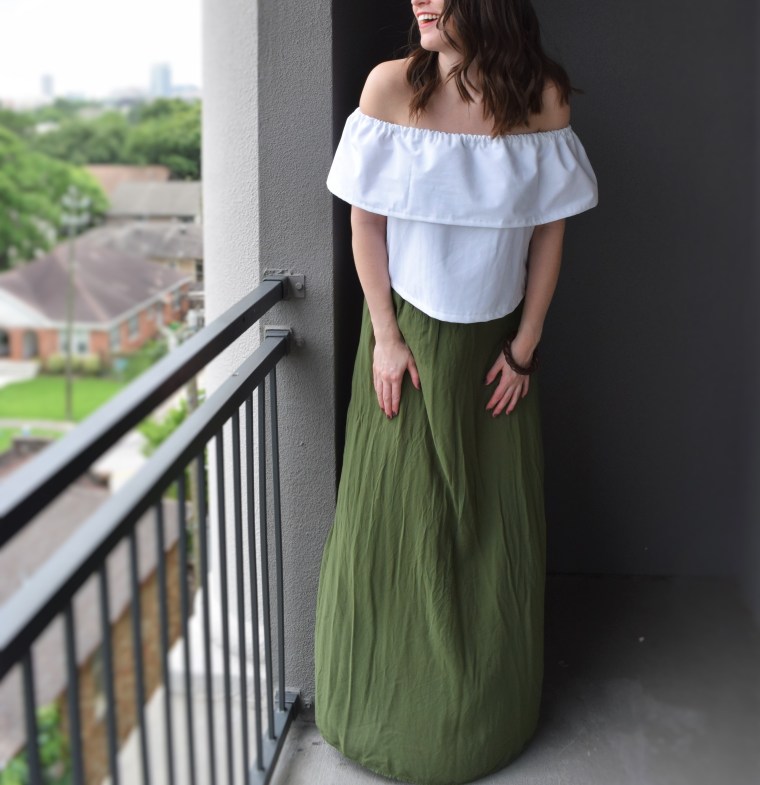
Clothing Details: Off the Shoulder Crop Top – Made by me (see above for purchasing options) || Maxi Skirt (similar green maxi skirt) – Forever 21 || Lace Up Sandals – Shoedazzle || Bracelet (similar wooden bracelet) – Vintage
This top is light and airy, perfect for the hot Houston Summers. Since I made it myself, I was able to alter it to the exact length that I wanted, which I would say is a long crop top. It can be worn with jeans and a small midriff or with high waisted options without showing any skin. And as history repeats itself, I have created my fifth off the shoulder sewing project. Is the off the shoulder trend taking over my life? Are you guys sick of it? Is it too late now to say sorry? Well, sorry… I’m not sorry.

See below for the full tutorial.
Off the Shoulder Ruffle Crop Top
Supplies:
1.5 yards White Cotton Fabric
1.5 yards 3/8″ Elastic
White Thread
Sewing Machine
Scissors
Measuring Tape
Pins
Large Safety Pin
Pencil or Pen for marking
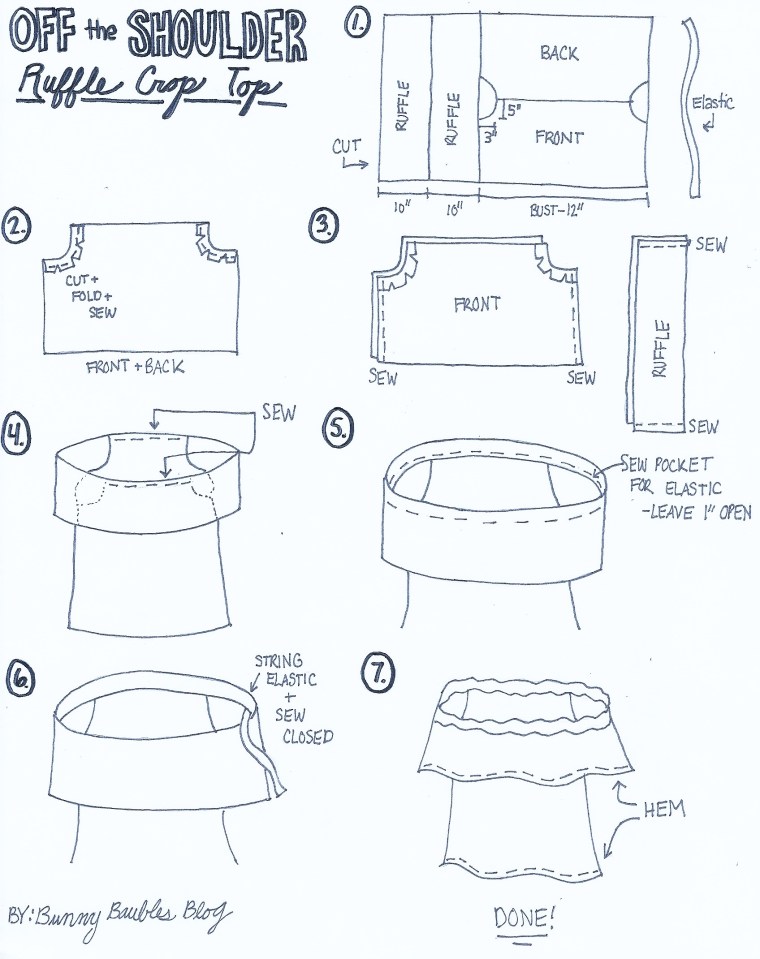
1. Start by taking a couple of measurements. First measure around your bust. Take this measurement and subtract 12″. This will be the width of the FRONT and BACK pieces. Second, measure around your shoulders and subtract 4″. This will be the width of each of your RUFFLE pieces. Third, take the measurement of your shoulders again and subtract 2″. This will be the length of your elastic. Mine was 38″.
Measure and mark out all of your pieces as shown on your fabric. Cut each piece out from the fabric.
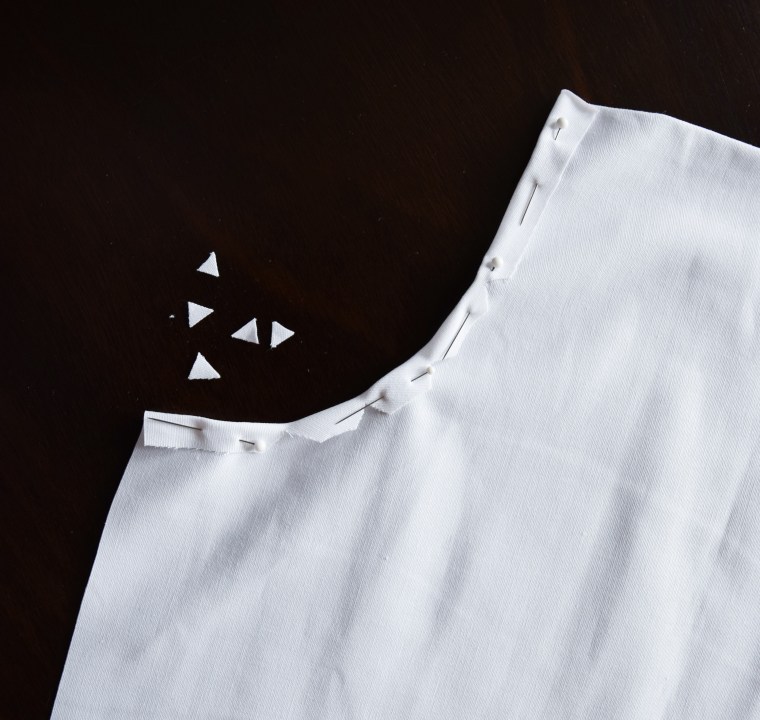
2. Take your FRONT and BACK and fold the curved edges over about 1/4″ toward the back side of the fabric, and pin them in place. You may need to cut some small triangles in the fabric so that the fold lies flat when you fold it over. Thread your machine and sew along the pinned edges of the arms.
3. Place your FRONT on top of your BACK with the right sides of the fabric touching and sew along the sides of the body to connect them about 1/4″ from the edge of the fabric.
Also place each of your RUFFLE pieces on top of one another with the right sides of the fabric touching and sew along the short sides to connect them.
4. Turn the ruffle and body right side out. To connect the two pieces, slide your body pieces into the ruffle loop and line up the center of the ruffle with the center of the body at the top. Pin the front RUFFLE to the FRONT and the back RUFFLE to the BACK. You will have some section of the ruffle on the edges that is not pinned to anything where your arms will go later. Sew along the pins 1/4″ from the edge of the fabric.
5. Fold the top edge of the entire ruffle backwards 1/4″ and pin. Sew along this line. Then, fold that same edge over 3/4″, pin, and sew all the way around except for about a 1″ section.
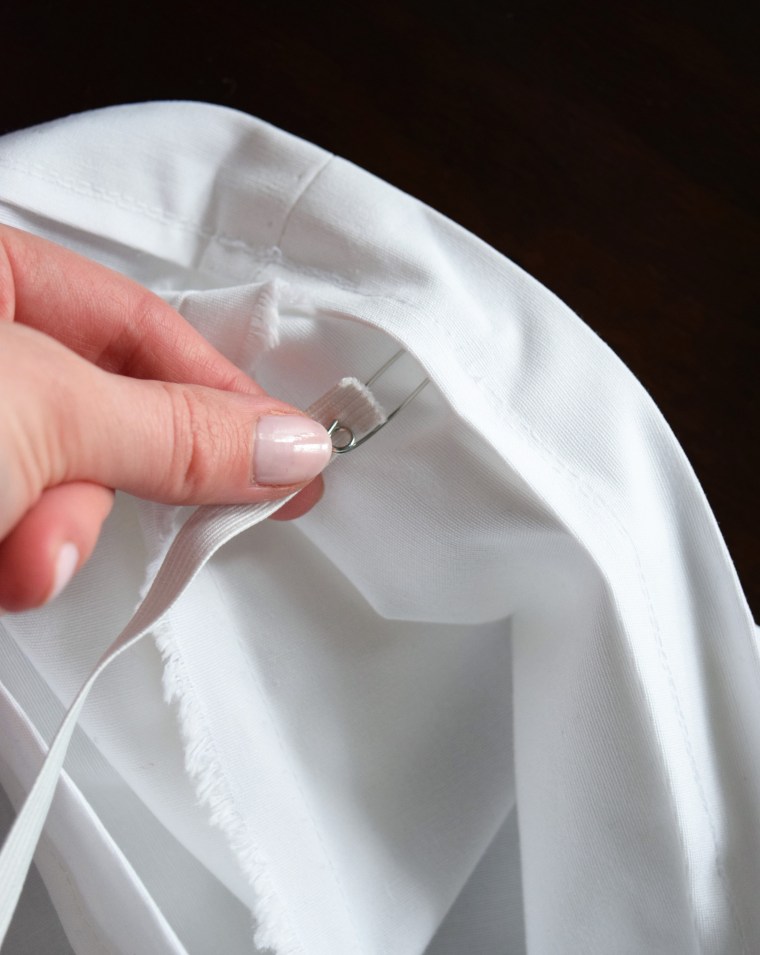
6. Connect your safety pin to the end of the elastic and string it through the pocket you just made, making sure to not lose the end of the elastic in the fabric. Sew the ends of the elastic together and sew up the 1″ hole.
7. Hem the ruffle and the body at the bottoms to your desired length.

cm or inches
LikeLike
I have a 31.5″ bust (32A cup), 24″ waist and 33″ hips, so yeah, I needed to drastically alter what you suggested. Everything was way too HUGE.
LikeLike
It is an oversized fit, so maybe it was larger than what you typically would like?
LikeLike
I actually ended up using stretch fabric so yes it was still initially bigger than what I liked, but I did manage to take it in. Thank you. I don’t usually do oversize since unfortunately I am short and can’t pull it off without looking like a child wearing her mom’s clothes lol. I wish I could though. I’ve always wanted to be taller.
LikeLiked by 1 person
Yes I did alter it. Thanks. I also used 4 way stretch fabric, so while it was initially still big, I took it in on the sides and it fit. If I were taller I think the oversize fit would look better.
LikeLike
Bust-12 was way too big unfortunately. I have a 32A chest and I’m also 5’3 and 100 lbs so I needed to alter your instructions to fit my petite shape. It turned out nice though. Also, I made the ruffle 6″ since the 10″ was way too long on me. I’m guessing you’re super tall.
LikeLiked by 1 person
Yes I am 5’9” and curvy! Good to know it was too large for you, but that you were able to alter it.
LikeLike
I don’t think I fully understand how the measurements work. At the beginning of your directions you state to subtract 6′ from the bust, however, on the pattern diagram it says subtract 12″. I did a little bit more research and others are saying multiply by 2 do you know why? This top is apart of my final in class and I’d like to master the pattern so that I can make and sell shirts like this in my summer collection.
LikeLiked by 1 person
Hello! I’m so sorry for the confusion, the drawing is correct and I will update the directions. For me, I chose to make each side of the shirt 22” wide because my fabric was very stiff. If you are using a light, flowing fabric that is thinner and has more drape I would definitely double the bust measurement as the measurement all the way around, so each piece (front and back) would be the length of your bust.
LikeLike
Hello, what size do you normally wear? I’m curious what size your measurements closely match to. Thanks!
LikeLiked by 1 person
Hi! I usually wear a size 6! My measurements are about 35″ bust, 29″ waist, 39″ hips
LikeLike
sorry can you please explain to me why do i have to subtract 6″ ? im new at this ..
LikeLike
Hi Vera, so this measurement was just an arbitrary value that worked well in my opinion. In general, you will want to have somewhere around double the measurement you take for any project where you will want to have a ruffle. Let’s say your shoulders are 40″ around. This means you will want to have around 80″ of fabric for the entire area around your shoulders to start. I tried this and thought it was a little too much volume, so I subtracted a little. The measurement for the front and back panels which make up the entire ruffle around your shoulders in my example would end up being 34″ each if your shoulders are 40″. Does this make sense? Please let me know if you are still confused.
LikeLike
Oh how I wish I knew how to sew! This looks great! Maybe one day I’ll be brave enough to try 😉
LikeLiked by 1 person
Yes you should!! I know you could do it, years of model making from scratch I think you could make it happen 😉
LikeLike