
Things that I did not expect to happen at this point in time in my life: to be celebrating friends having babies and to use my childhood stuffed animal as a prop in blog photos. New surprises every day, I tell you. My sweet friend Lisa is expecting twins and our friend group could not be more excited. She hosted an adorable shower a couple weeks back, and you know I jumped on that DIY baby gift bandwagon.

I saw the cutest tutorial on A Beautiful Mess blog for these round baby play mats, and I thought they would be just perfect as a gift. I followed the tutorial pretty closely, but did change up a couple of things, so I thought I would explain how I made mine!
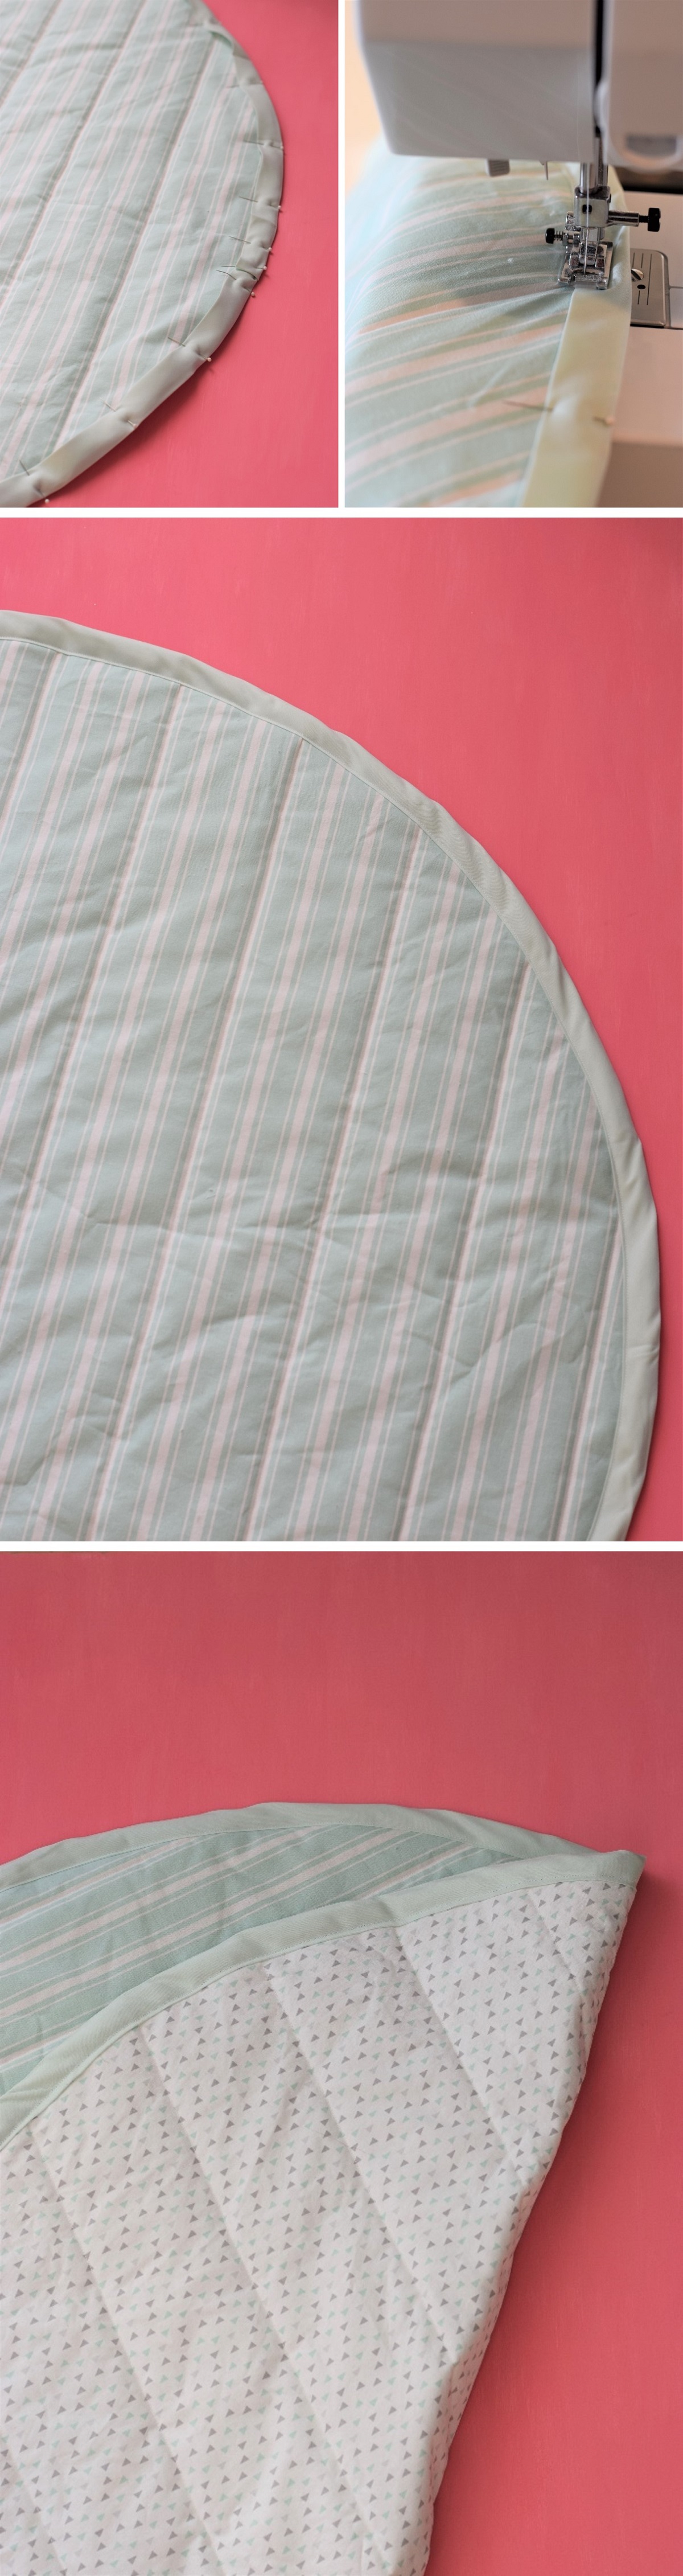
The most important part of this project is picking adorable, complementary fabrics. I loved using a small pattern on one side and a large pattern on the other with the same color palette. The bias tape border can also match, but it can be fun to add a pop of color. I did one play mat in mint, grey, and white, and another in light blue, white, and yellow (I couldn’t resist that bunny fabric!).

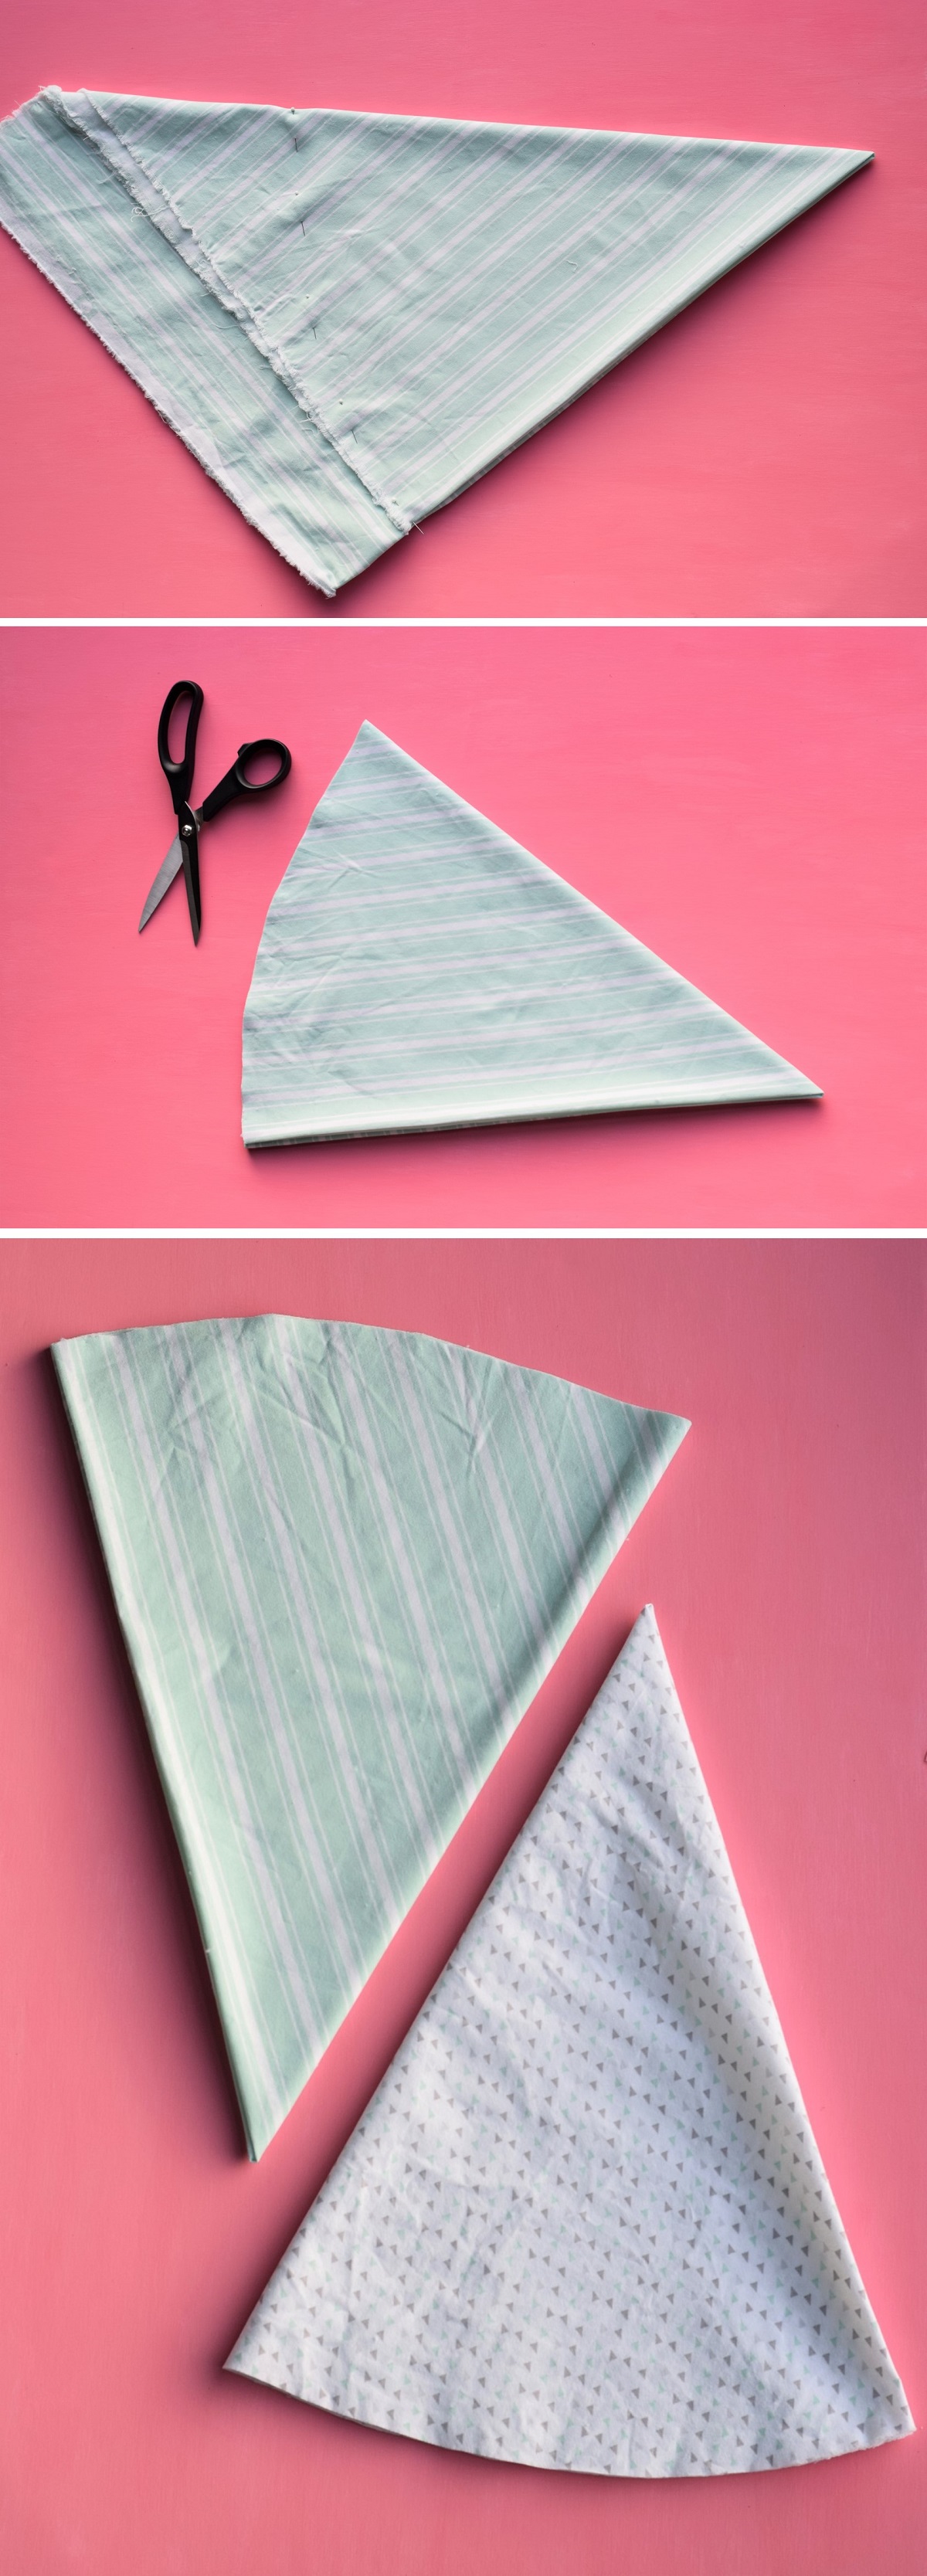
I used most of the same materials that A Beautiful Mess did, but I thought it was much simpler to skip the tracing and just fold the material multiple times, measure out a consistent radius for the circle, and then cut along a short round side. Once you unfold the material you get a perfect circle! I also only quilted mine in one set of rows. I had planned to make a diamond pattern, but I thought the stripes were really beautiful on their own. My last change was to use wide bias tape since I thought it was easier to work with than normal width bias tape.


If you have a baby shower coming up, think about making a personalized gift by throwing together a quilted baby mat. These are so sweet and honestly come together really quickly. They are the perfect first quilting project! Since I didn’t have a real life baby to use as a prop with my quilted play mat (LOL!) I used my stuffed animal from childhood. Her name is Doggy (because I am very creative) and am now realizing how much love she has seen over the years… she needs fur coat to actually look like a non-hairless dog!
DIY Quilted Baby Play Mat
(Based on A Beautiful Mess sewing tutorial)
Supplies
1 yard of large print fabric
1 yard of small print fabric in complementary or matching colors
1 yard x 1 yard of Medium Weight Batting
3 yards Wide Bias Tape
Matching Thread
Measuring Tape
Pins
Scissors
Sewing Machine
Time
2 hours
Difficulty
Easy
1. Take one piece of fabric and fold it in half three times so that it is in eighths. Then, use your measuring tape to measure from the center of the folds (the tip) to 17″ out. Place a pin in this location and repeat to make a rounded curve. Cut along the pins and unfold the fabric to reveal a circle with a 34″ diameter. Repeat on the other 1 yard of fabric and the batting to make 3 circles total.
2. Place your batting in between your fabric pieces with the right sides of the fabric facing out. Pin the circle in a few places to keep it from moving. Measure out across the diameter of the circle lines about 3-4″ away from one another. Place pins along the lines that you can sew along. Sew along these lines to quilt the blanket.

3. Complete the blanket by pinning the bias tape around the edge of the blanket by sandwiching the two halves around edge to cover the open sides of the quilt. For the last section of bias tape, fold the tape back to cover the bare ends of the bias tape. Sew along the edge of the bias tape.

Love the play mat. Thanks!
LikeLiked by 1 person
Thank you so much! I’m so glad you liked it!
LikeLiked by 1 person