
Happy New Years, bunnies! I’m not big on New Years resolutions per say, but I am big on New Years cleaning and purging of junk. I love getting rid of things because it makes room for new, beautiful projects!
There’s nothing I love more than a trendy home accessory that totally changes a room… especially a cheap one! In most magazines and home decor ads, decorators are using trays to help organize a cute arrangement of things on coffee tables, beds, and sofas, and I’m totally into it. Knowing how many remotes, candles, and random books end up on my coffee table, I decided it was time to purchase a fancy tray.
I looked around and found many trays I loved. Leafed with gold edges and lacquered to a shiny perfection, or inlaid with a geometric wooden modern design. Did I mention, WAY out of my cheapskate price range? So where does a modern thrifty shopper like me go in times of decorative need? IKEA.
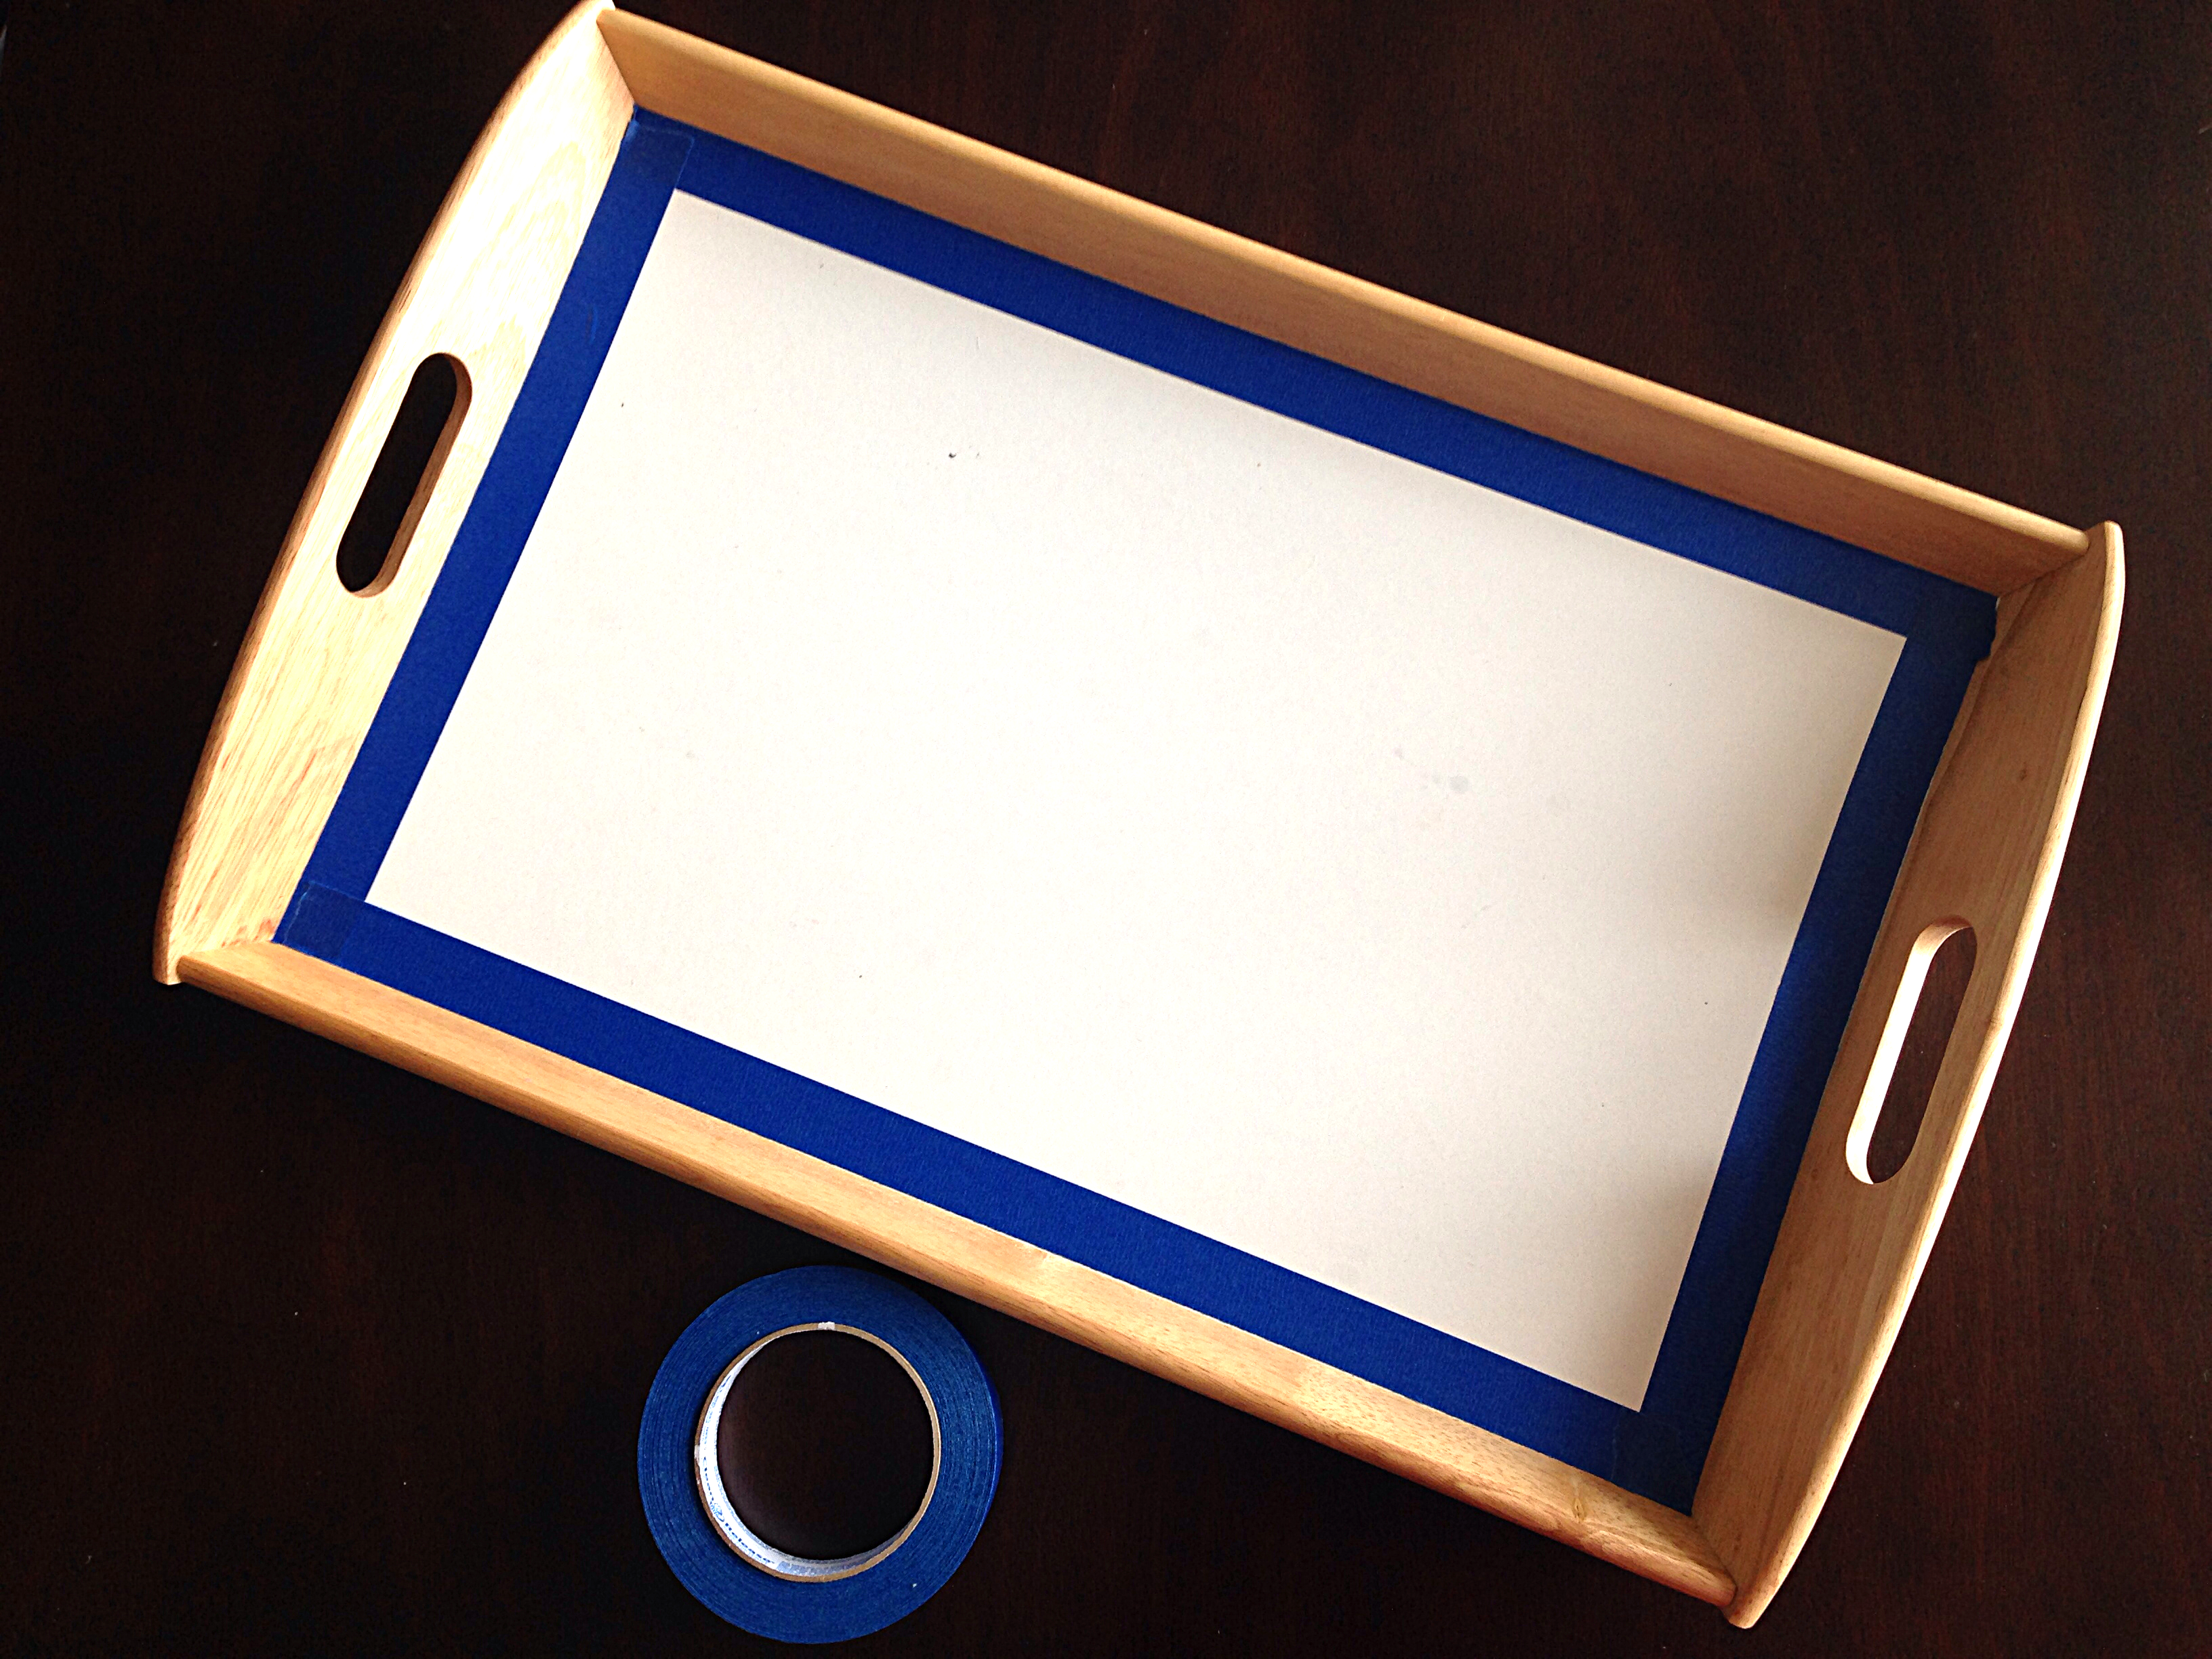
IKEA did not disappoint, as they almost never do, and I found this tray for $8! Ok, it’s neither gold, nor lacquered, or even very interesting…but it’s a blank slate for getting creative with!
Remember my Gilded Mirror DIY? I used my leftover paint and slapped together this gorgeous tray. Check out the instructions below for a trendy tray you can display on your coffee table!
DIY Gold + Geometric Painted Tray
Supplies:
Plain tray (IKEA)
Gold, White, and Blue Acrylic Paint
Paint Brush
Painters Tape
1. Tape around the inside edge of the tray on the flat white surface to protect it from the gold paint. Make sure to adhere the tape so there are no bubbles or crevices for paint to slip through! Take you gold acrylic paint and brush and paint long, light strokes of gold paint all over the wooden surfaces. Paint thin layers of paint to keep it even looking, and repeat two more times after each coat dries (wait until paint is no longer tacky, at least a couple of hours, between each coat). Once the paint has dried you can remove the tape.
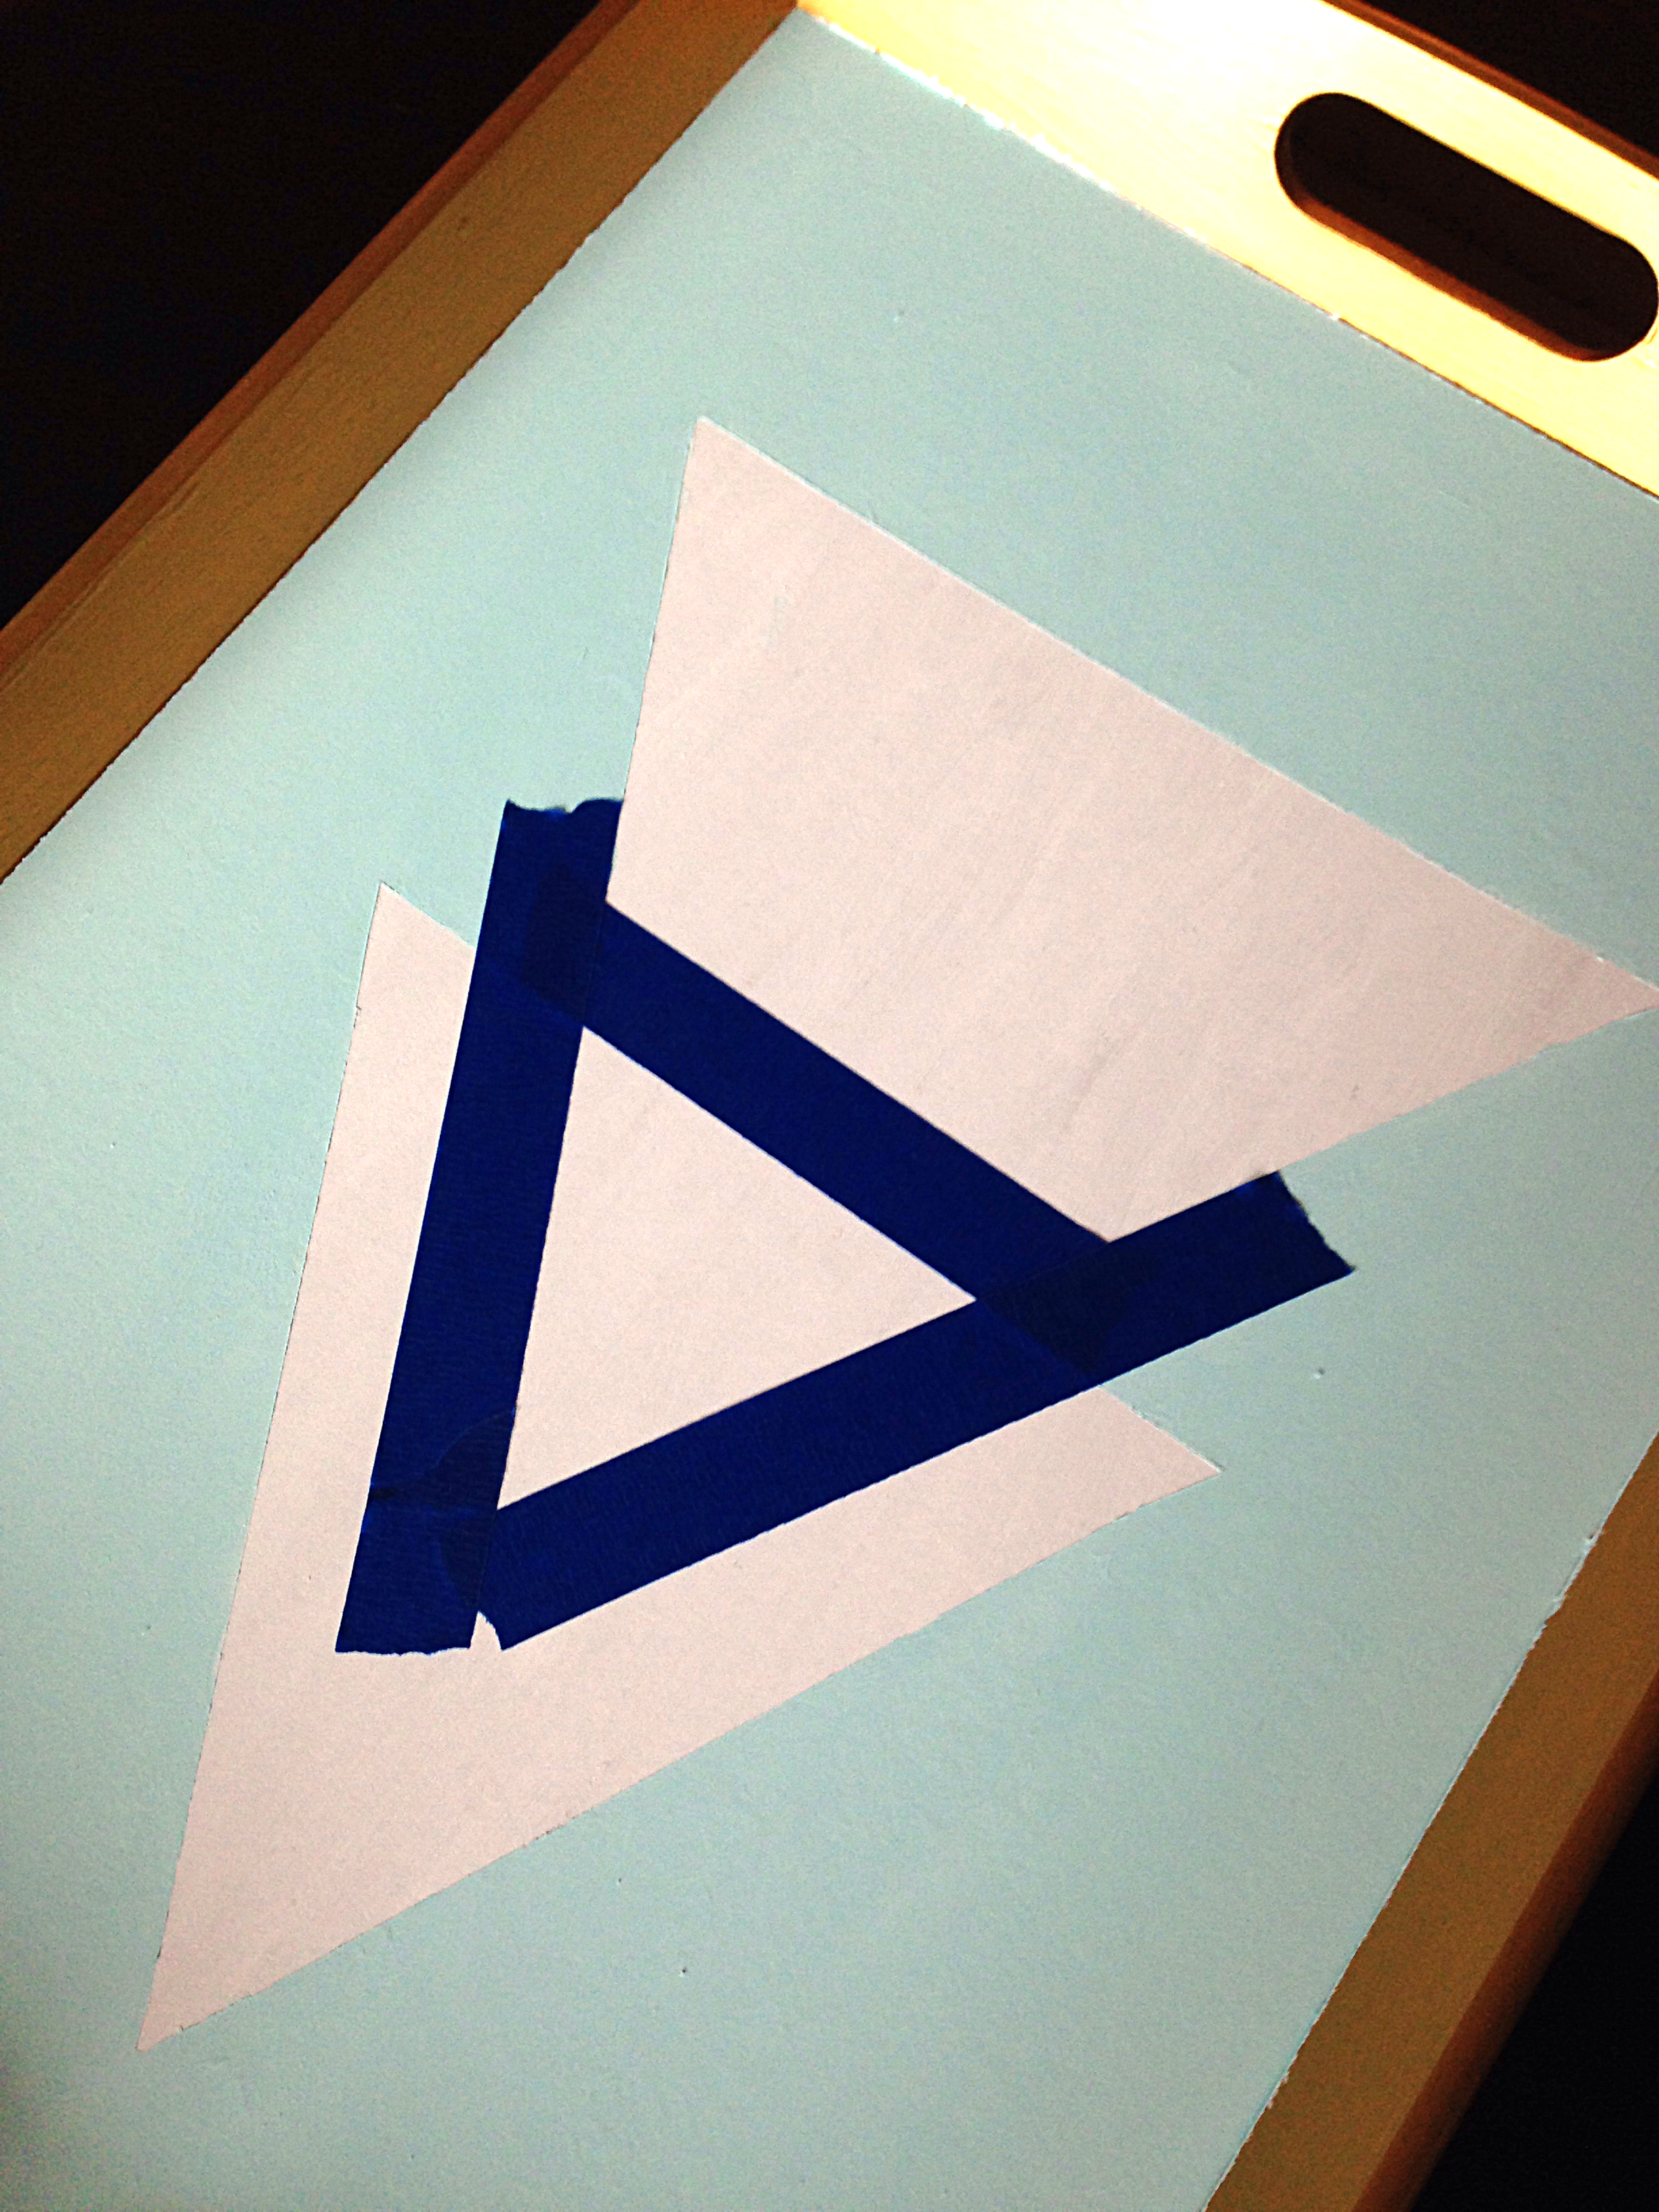
2. Now use your painters tape to create a geometric pattern in the middle of your tray. I chose to create two triangles overlapping each other in the middle. If you are worried about straight lines, measure the dimensions of the triangle to have equal length sides and be centered in the middle of the tray. Also apply tape to the sides of the tray you just painted gold so that you will not get any blue paint on the gold areas.

3. Paint around your geometric pattern using a coat of light blue paint, or mix together blue with lots of white paint to get your desired color. Use large brushstrokes and a light, even coat to make sure the paint lines look clean. You may need to repeat this step multiple times to get a fully even coat. Once the paint has dried, remove the tape.


4. The last step is to paint the gold triangle where the two large ones overlap in the middle of your tray. Grab your tape again and outline this overlapping triangle area. Carefully fill in the middle of the triangle, using multiple coats of paint again if necessary.
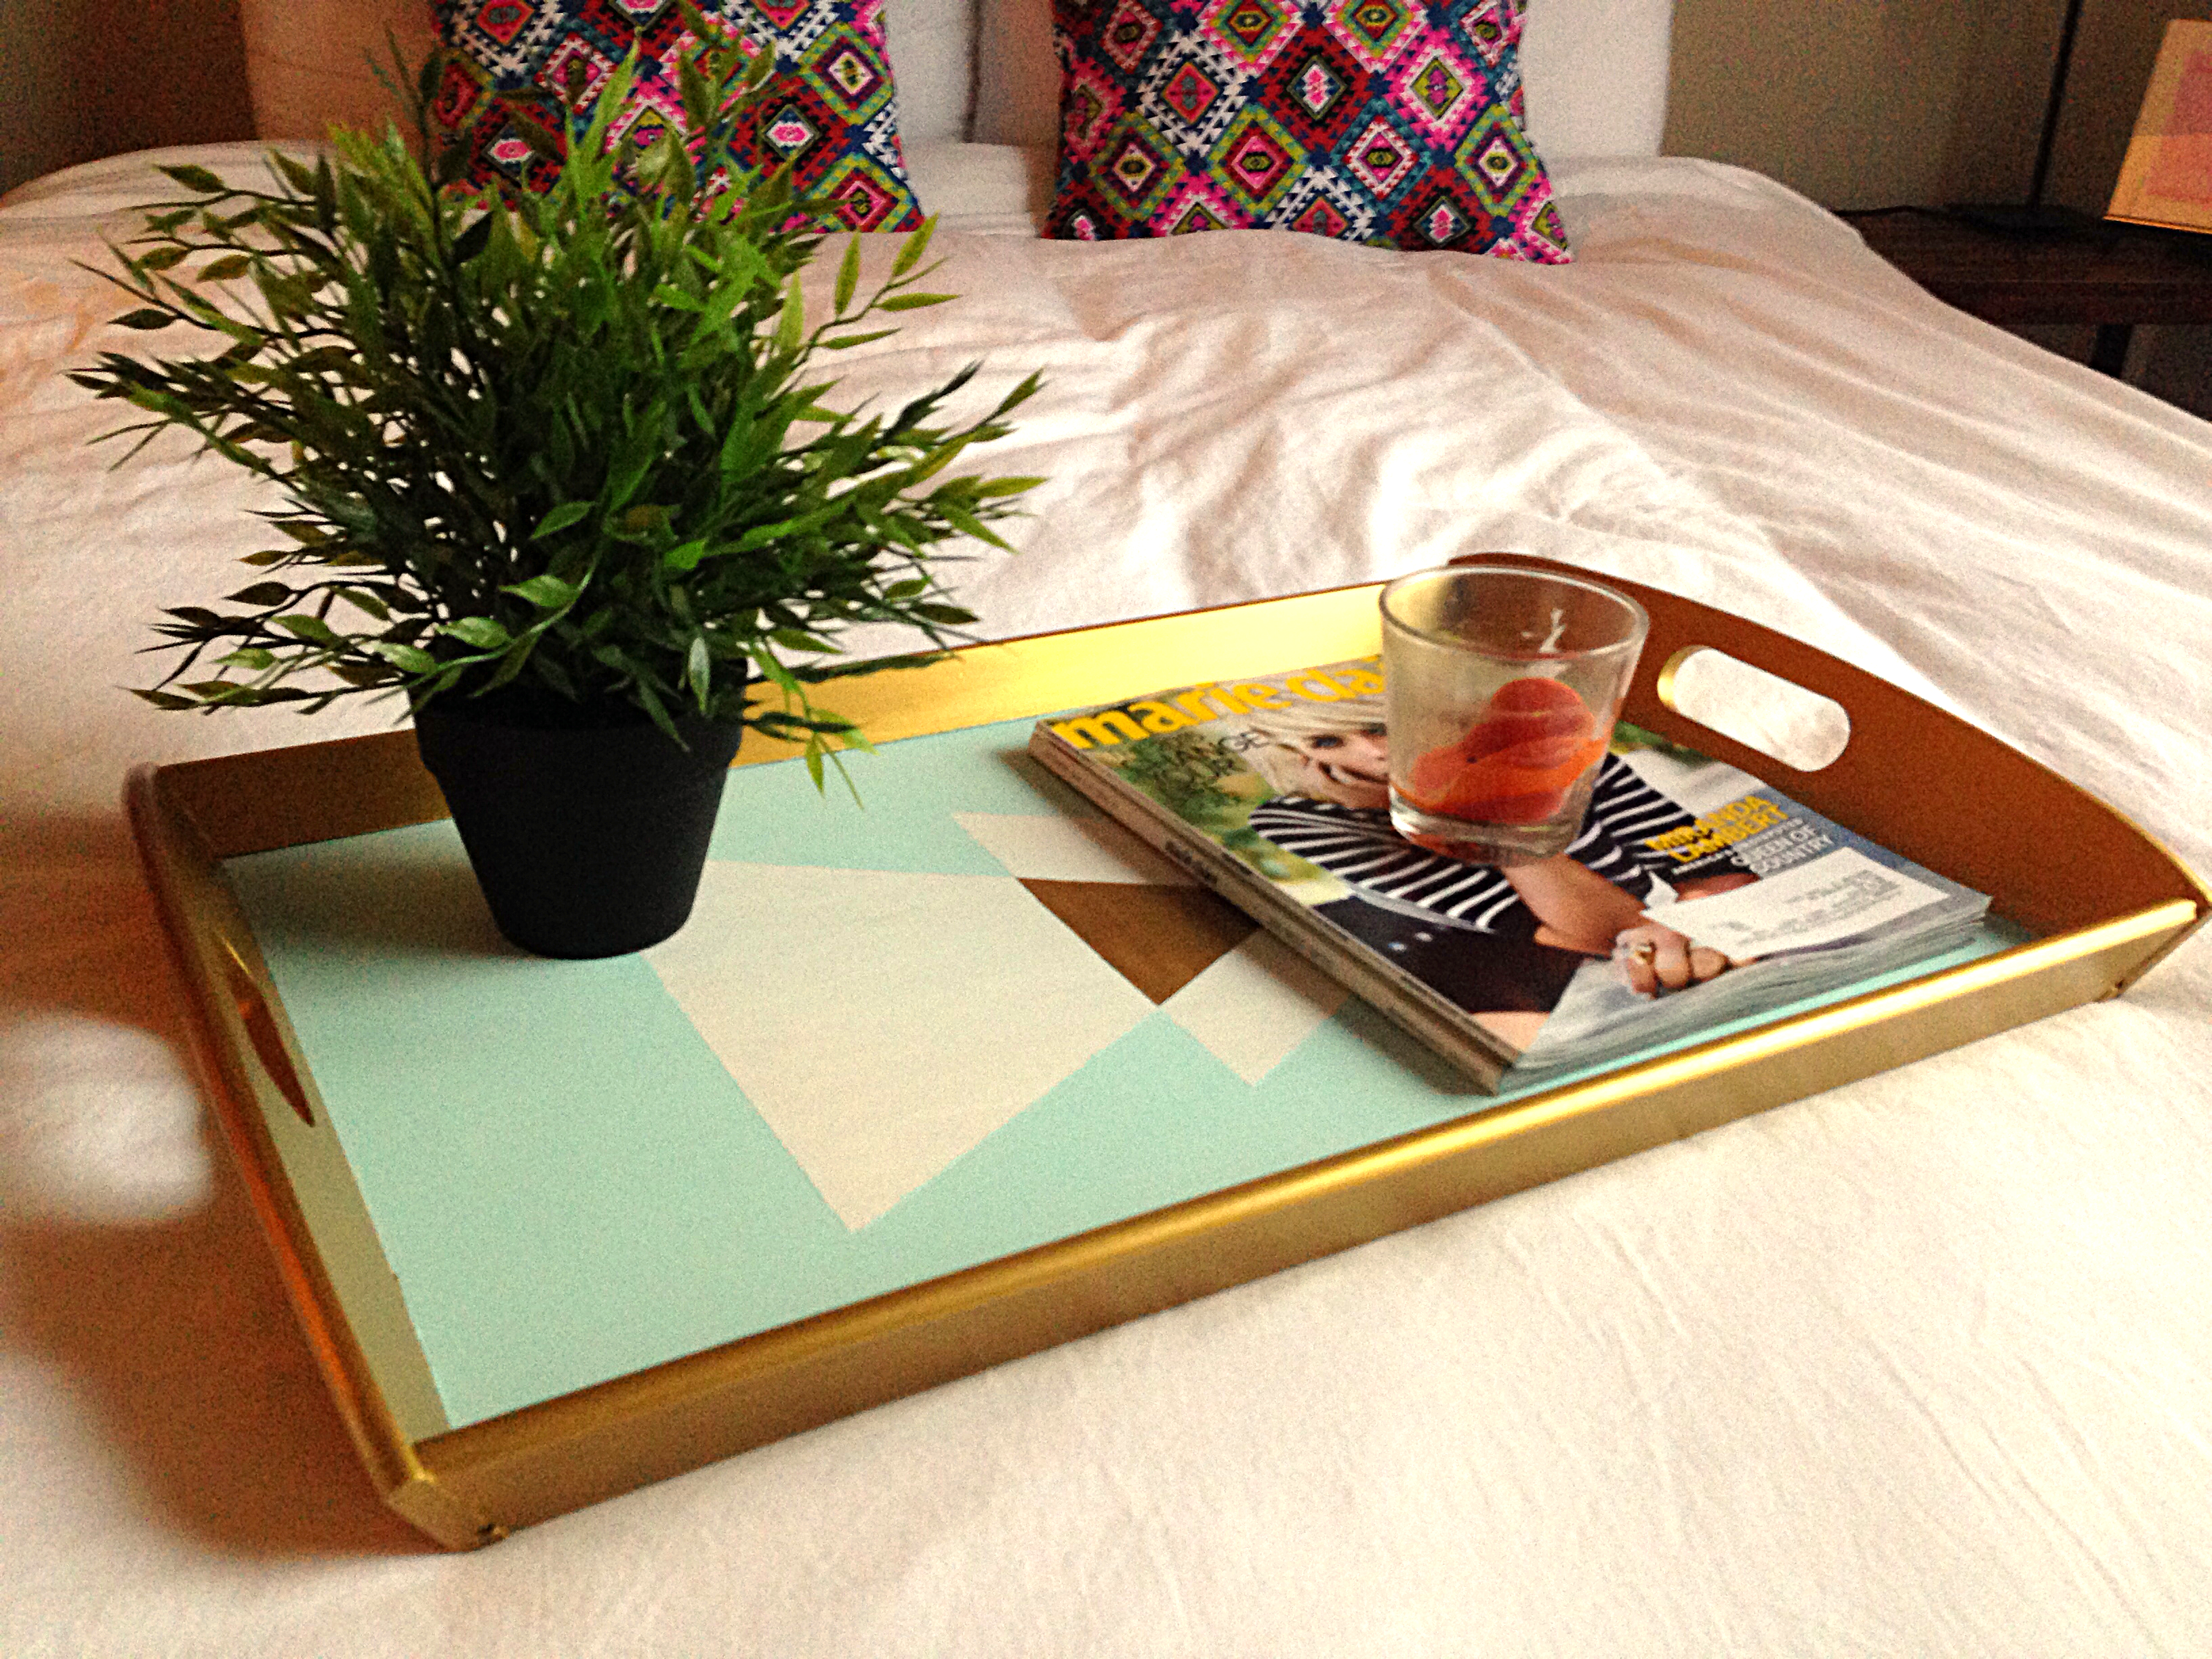
Remove the tape, and your tray is now complete! Style your tray with books, candles, a small vase of flowers, or cute trinkets! Or use it for the three remotes it takes to turn on your TV (I have no idea how that happens)… also very stylish…


LOVE it!!!!!!!! Happy new year!!!!!!
LikeLike
Thank you! You too!!
LikeLike
Wow you transformed that tray! I really want to do this now… It’s amazing!
LikeLike
Thanks so much! Go for it! 🙂
LikeLike
Elegant!
LikeLike
Thanks! 🙂
LikeLike
Really lovely idea..
LikeLike
Thank you!
LikeLiked by 1 person