
During a fabulous day floating down the Guadalupe River with some great friends, I slipped my head back to relax and tragically lost my favorite sunnies to the water. Ok, they were only $15 sunglasses, but as I squinted all the way home from Austin, I HAD to detour before going home to pick up some new ones…and found the exact same pair I had purchased before at Urban at Target!

I had been rather nonchalant with taking care of my last pair, throwing them into my purse and scratching up the lenses almost immediately. Investing in a new pair inspired me to invest in something to keep them safe! Since I tend to pick out the world’s smallest purses, I needed a maleable case that could cram into any shape. I designed this simple Sunny Sleeve you can make with a few scraps of fabric to protect your sunglasses from keys, candy wrappers, and lipsticks alike. Follow my tutorial below to save those sunnies! Click below to see the full tutorial.
Soft Sunglasses Case Tutorial
Supplies:
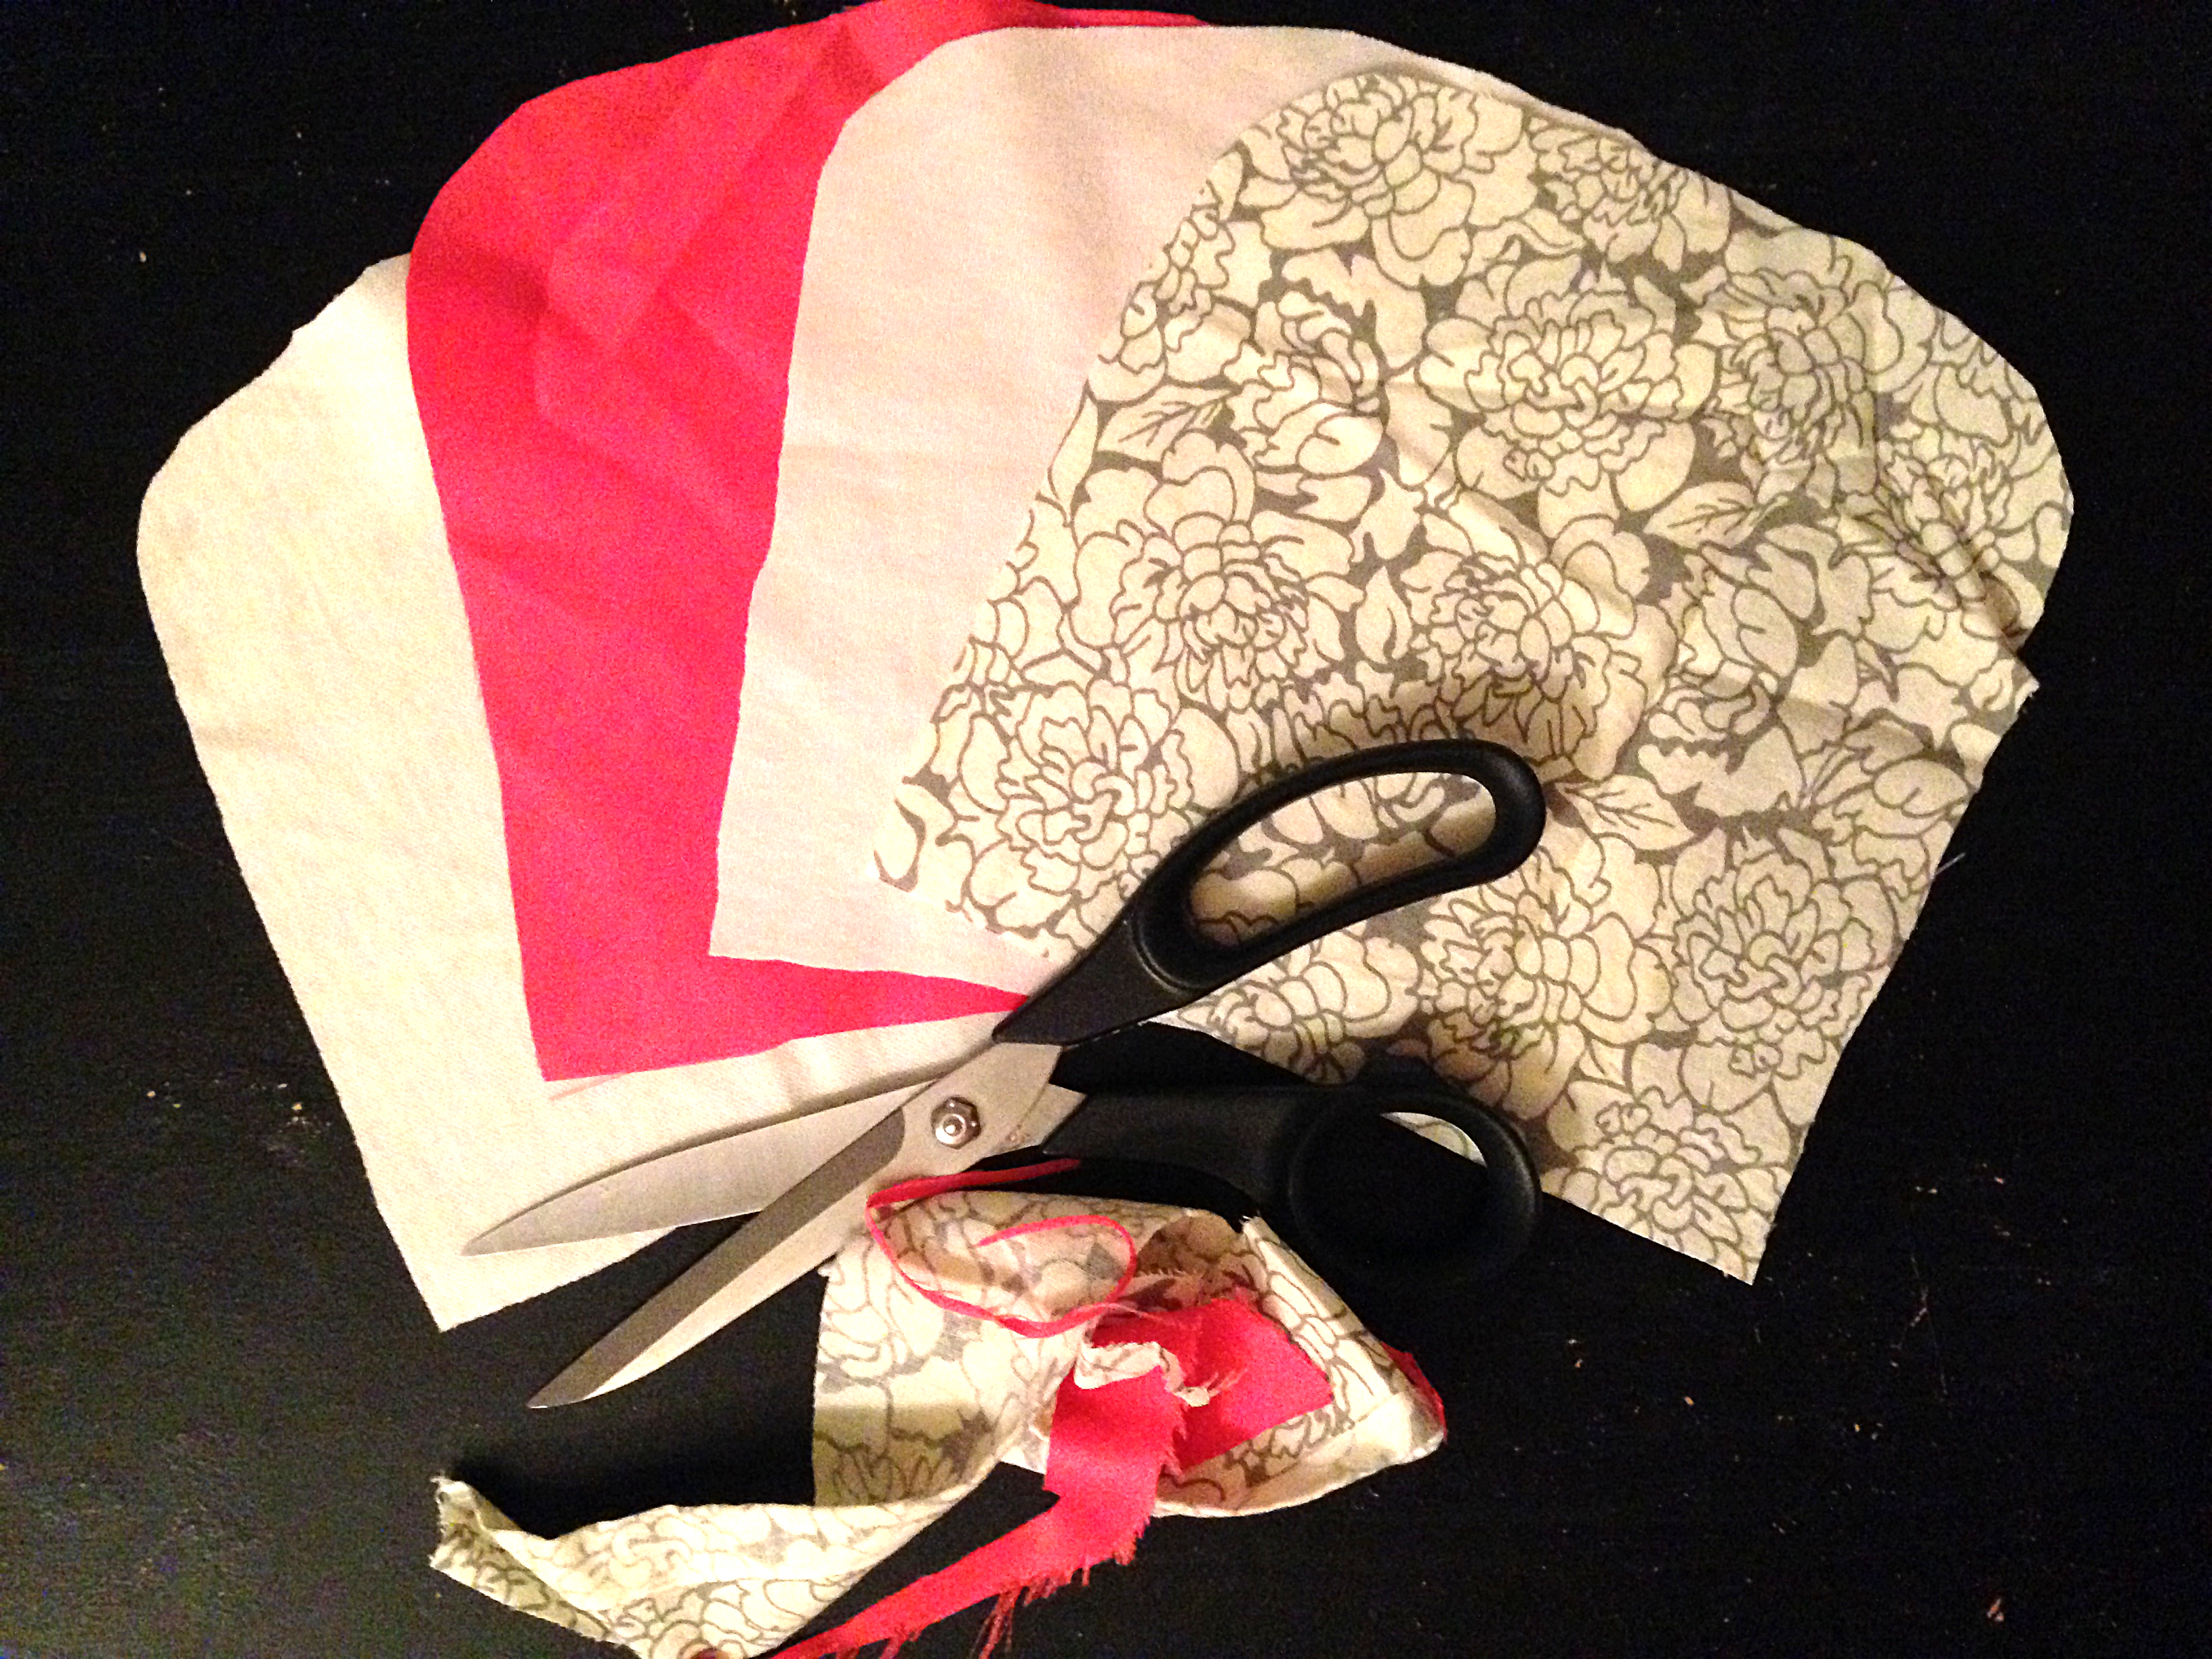
2 Pieces of Cute Fabric about 10″ x 10″, plus 2 more of Plain Fabric about 10″ x 10″ if the fabric is very thin
Thread to match the fabric
Pins
Needle
Scissors
1 Piece of 8 1/2″ x 11″ Paper
Pencil
1. Fold the piece of paper in half the short way. Place your sunglasses on the piece of paper a 1/2″ from the fold. Use your pencil to trace a similar shape to the one shown below around your sunglasses, leaving about a 1/2″ around each side of the glasses. Use your scissors to cut along the line you just drew and unfold the paper to reveal your stencil.


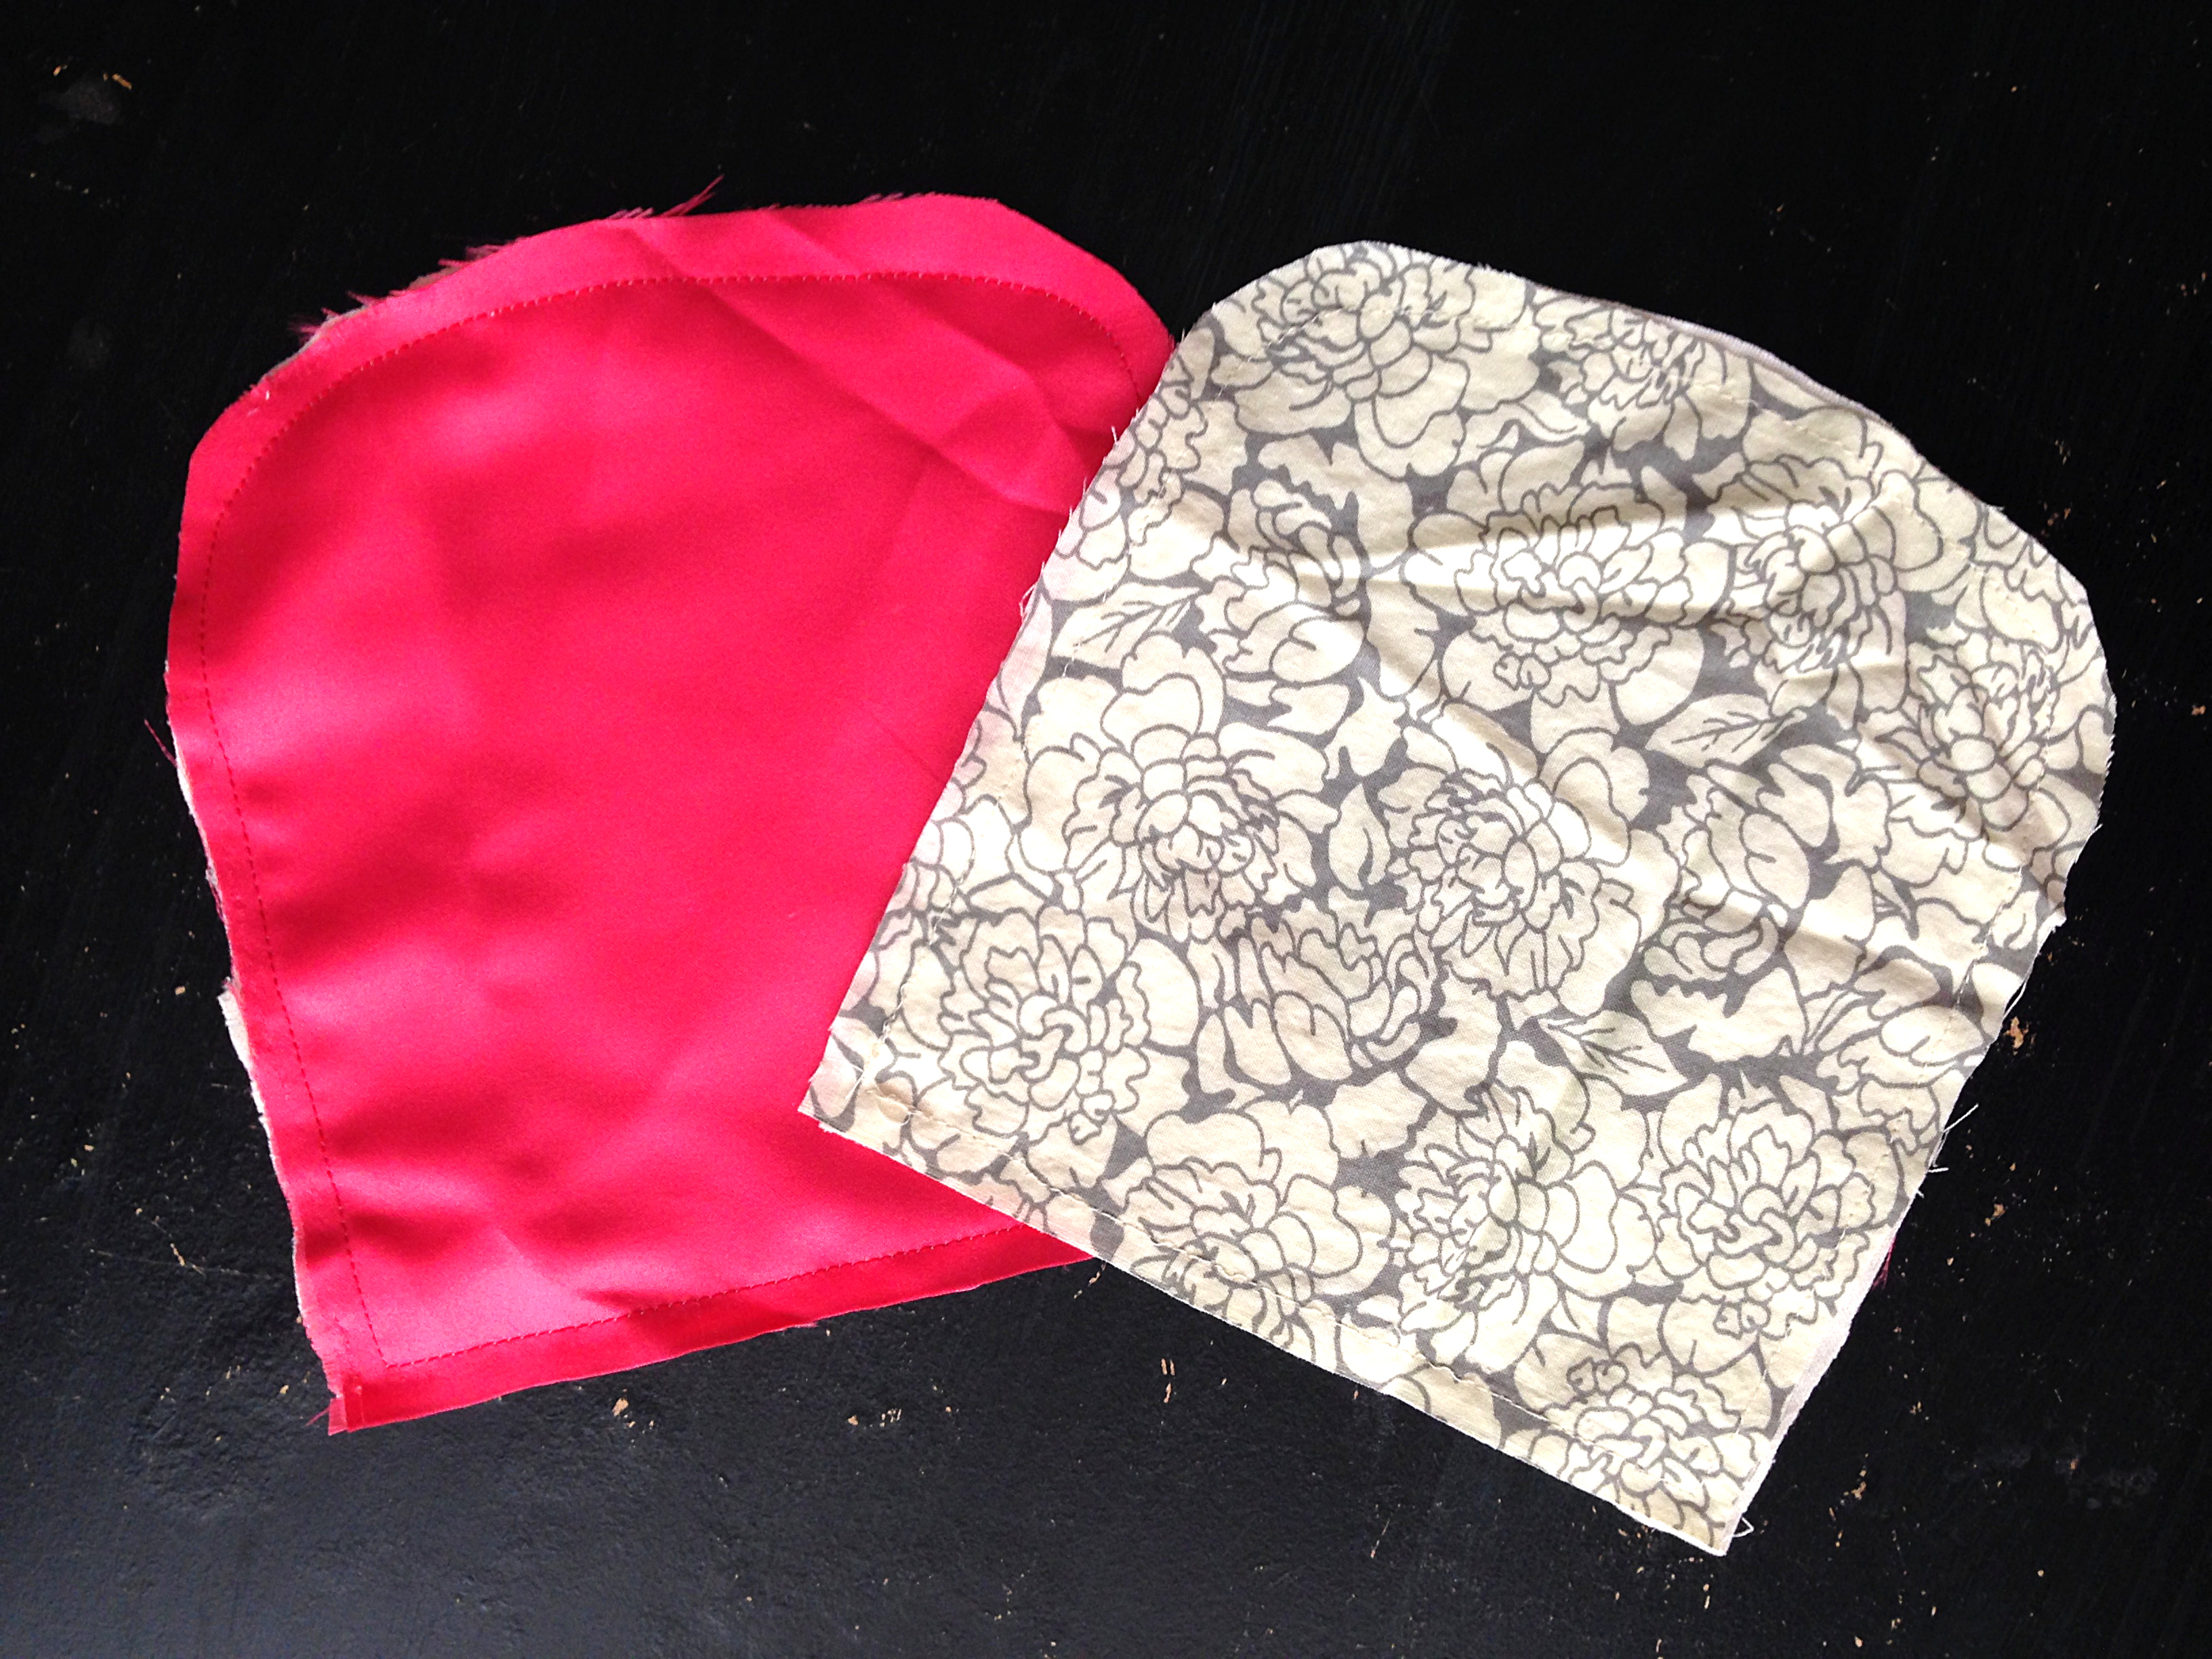
2. Pin your fancy new stencil to one of your pieces of fabric and cut around it. Repeat on all of the fabric pieces. I used two pieces of white fabric along with the two cute pieces to bulk up my sleeve because the cute pieces of fabric were very thin. When choosing fabrics to use, one will be the outside and one will be a lining. Have fun and try mixing patterns and colors! I opted for a cream and gray floral pattern for the outside and bright pink for the lining.
3. If using only an outer piece and a lining, skip to step 4. Take your white pieces of fabric and pin them to the back of the cute fabrics. Once pinned, carefully sew along the edges of the fabrics about a 1/4″ from the edge. This is just to adhere the white fabric to the outer fabric and lining fabrics so that they are thicker and help to protect the glasses better.

4. Take your “two” pieces of fabric and place them one on top of the other with the cute sides facing in. The fabric will be turned inside out from here so make sure the good sides of the fabric are touching. Pin these together along the edges. Sew a seam a 1/4″ from the edge on all sides except for the straight one.


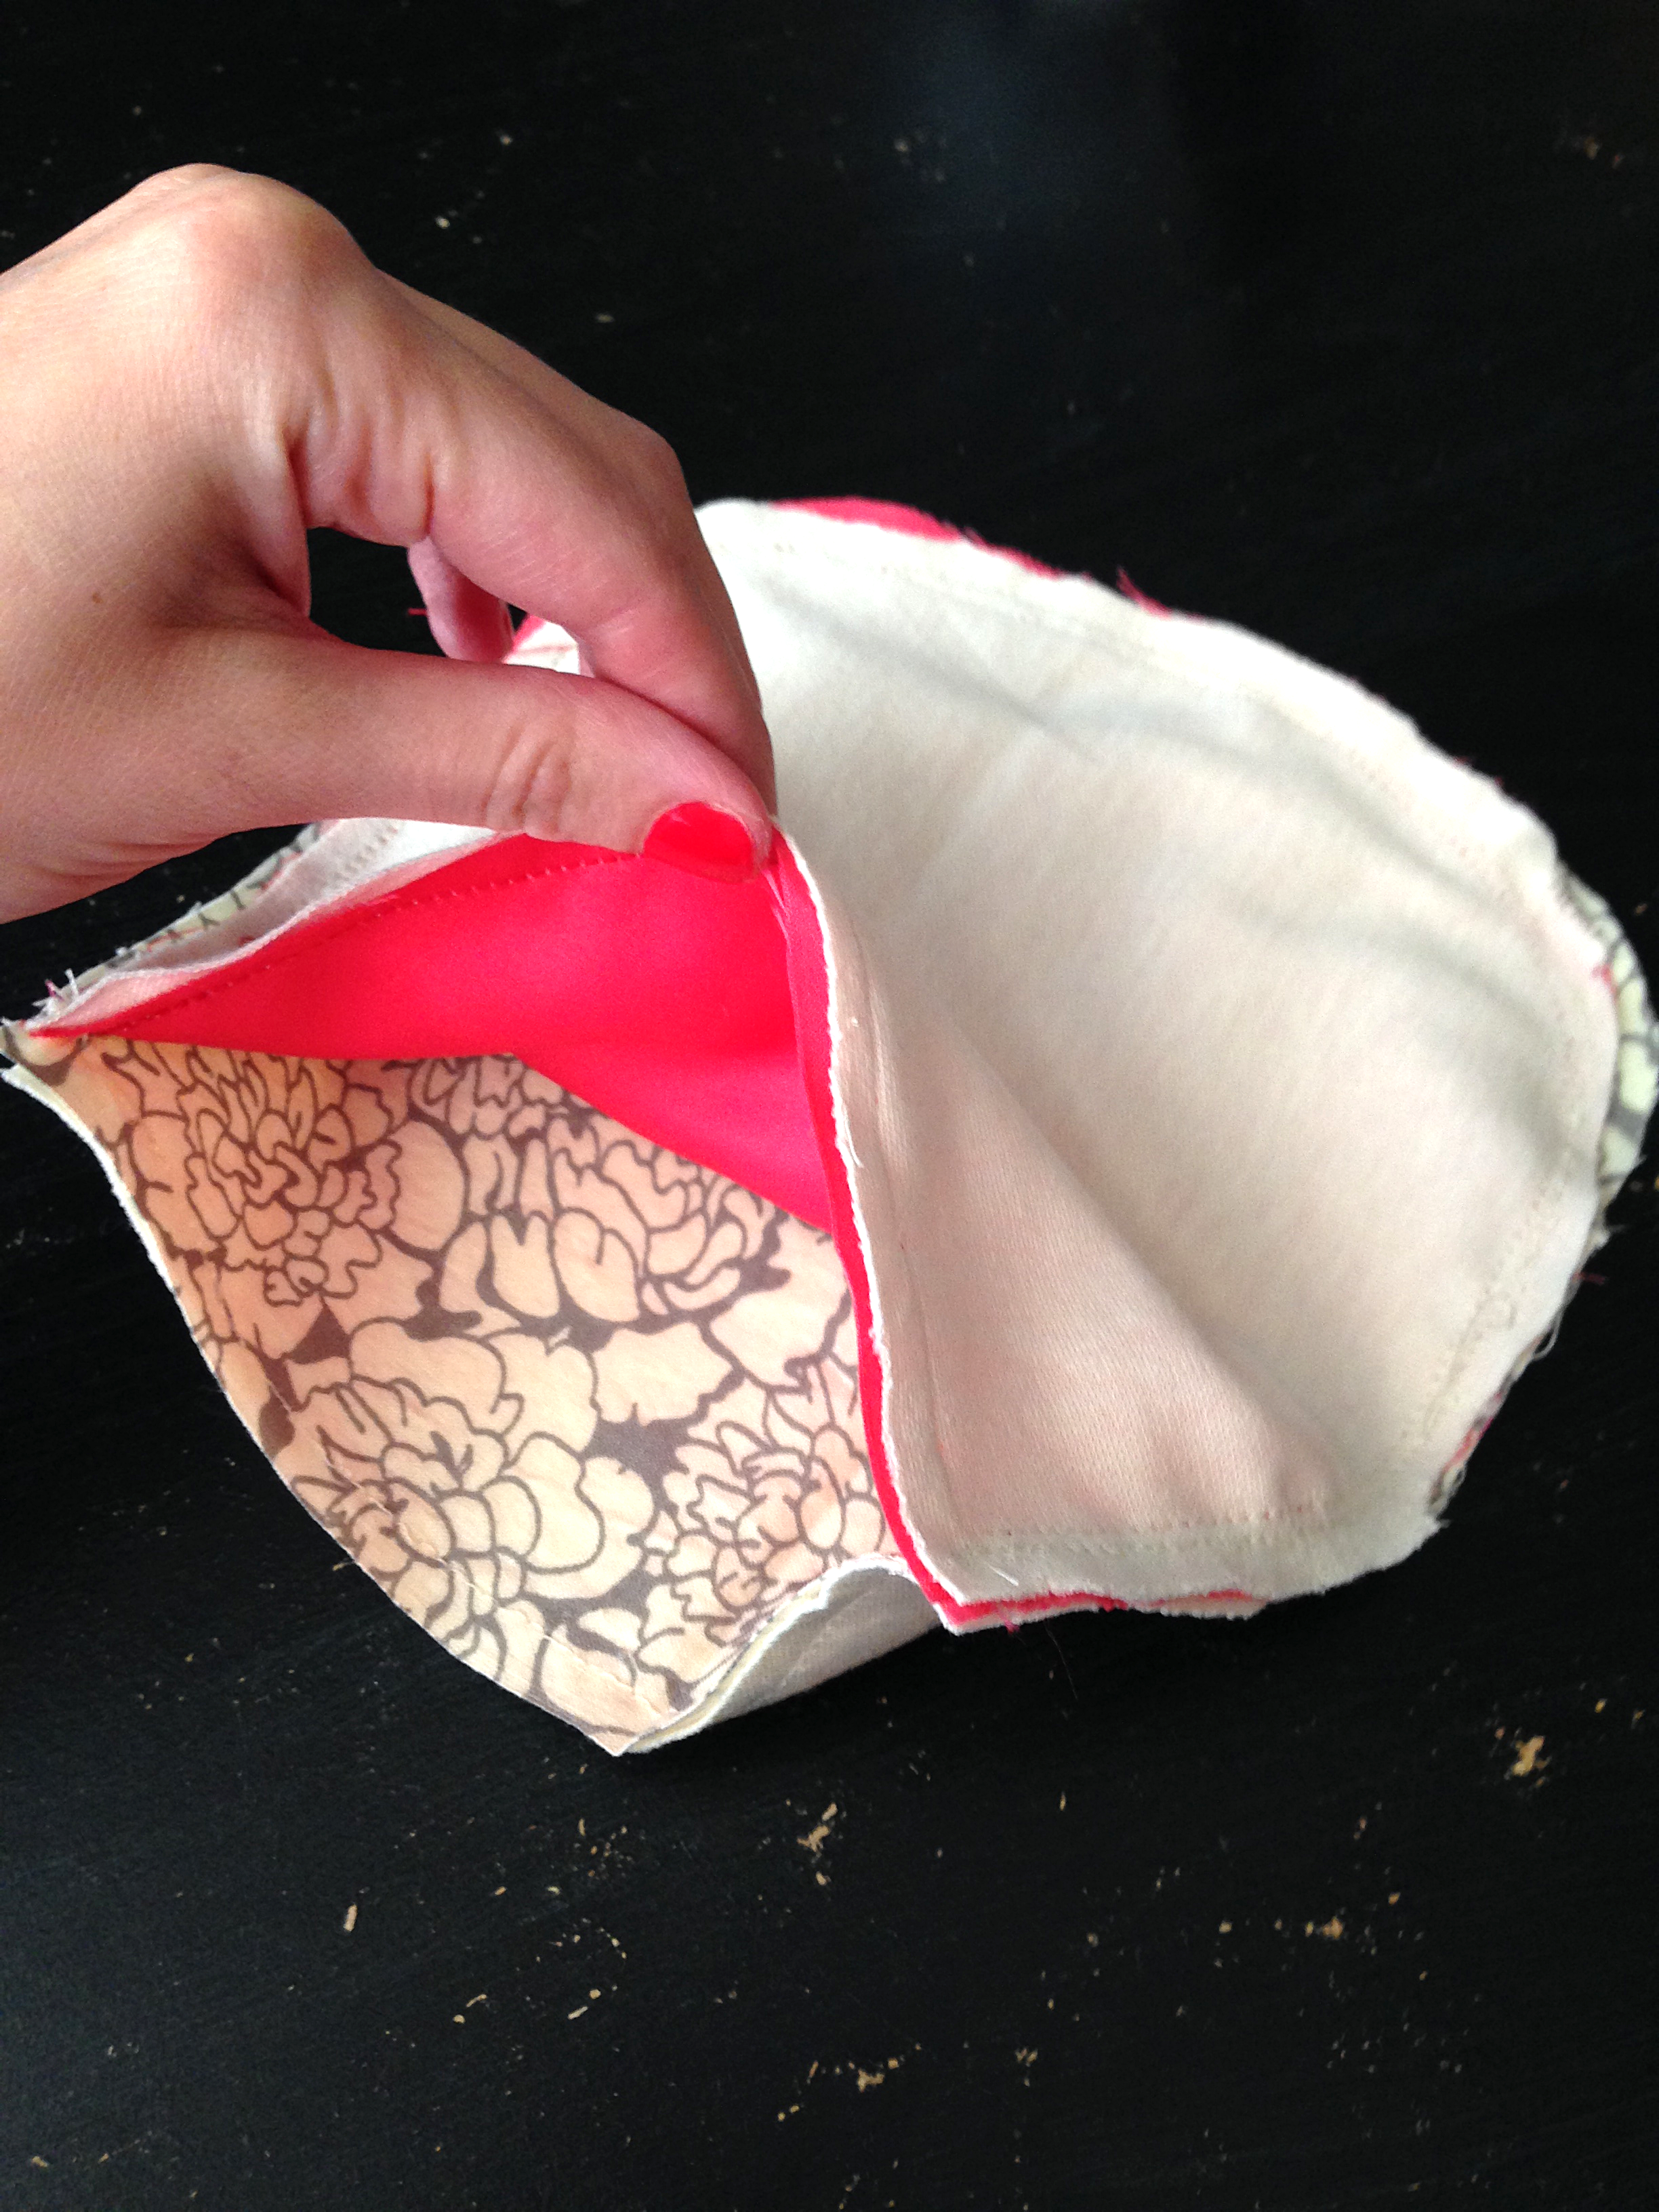
5. Take your pocket and turn it inside out along the straight, open side. Fold the straight edge up toward the lining fabric side about a 1/4″ and pin. Sew along this edge.

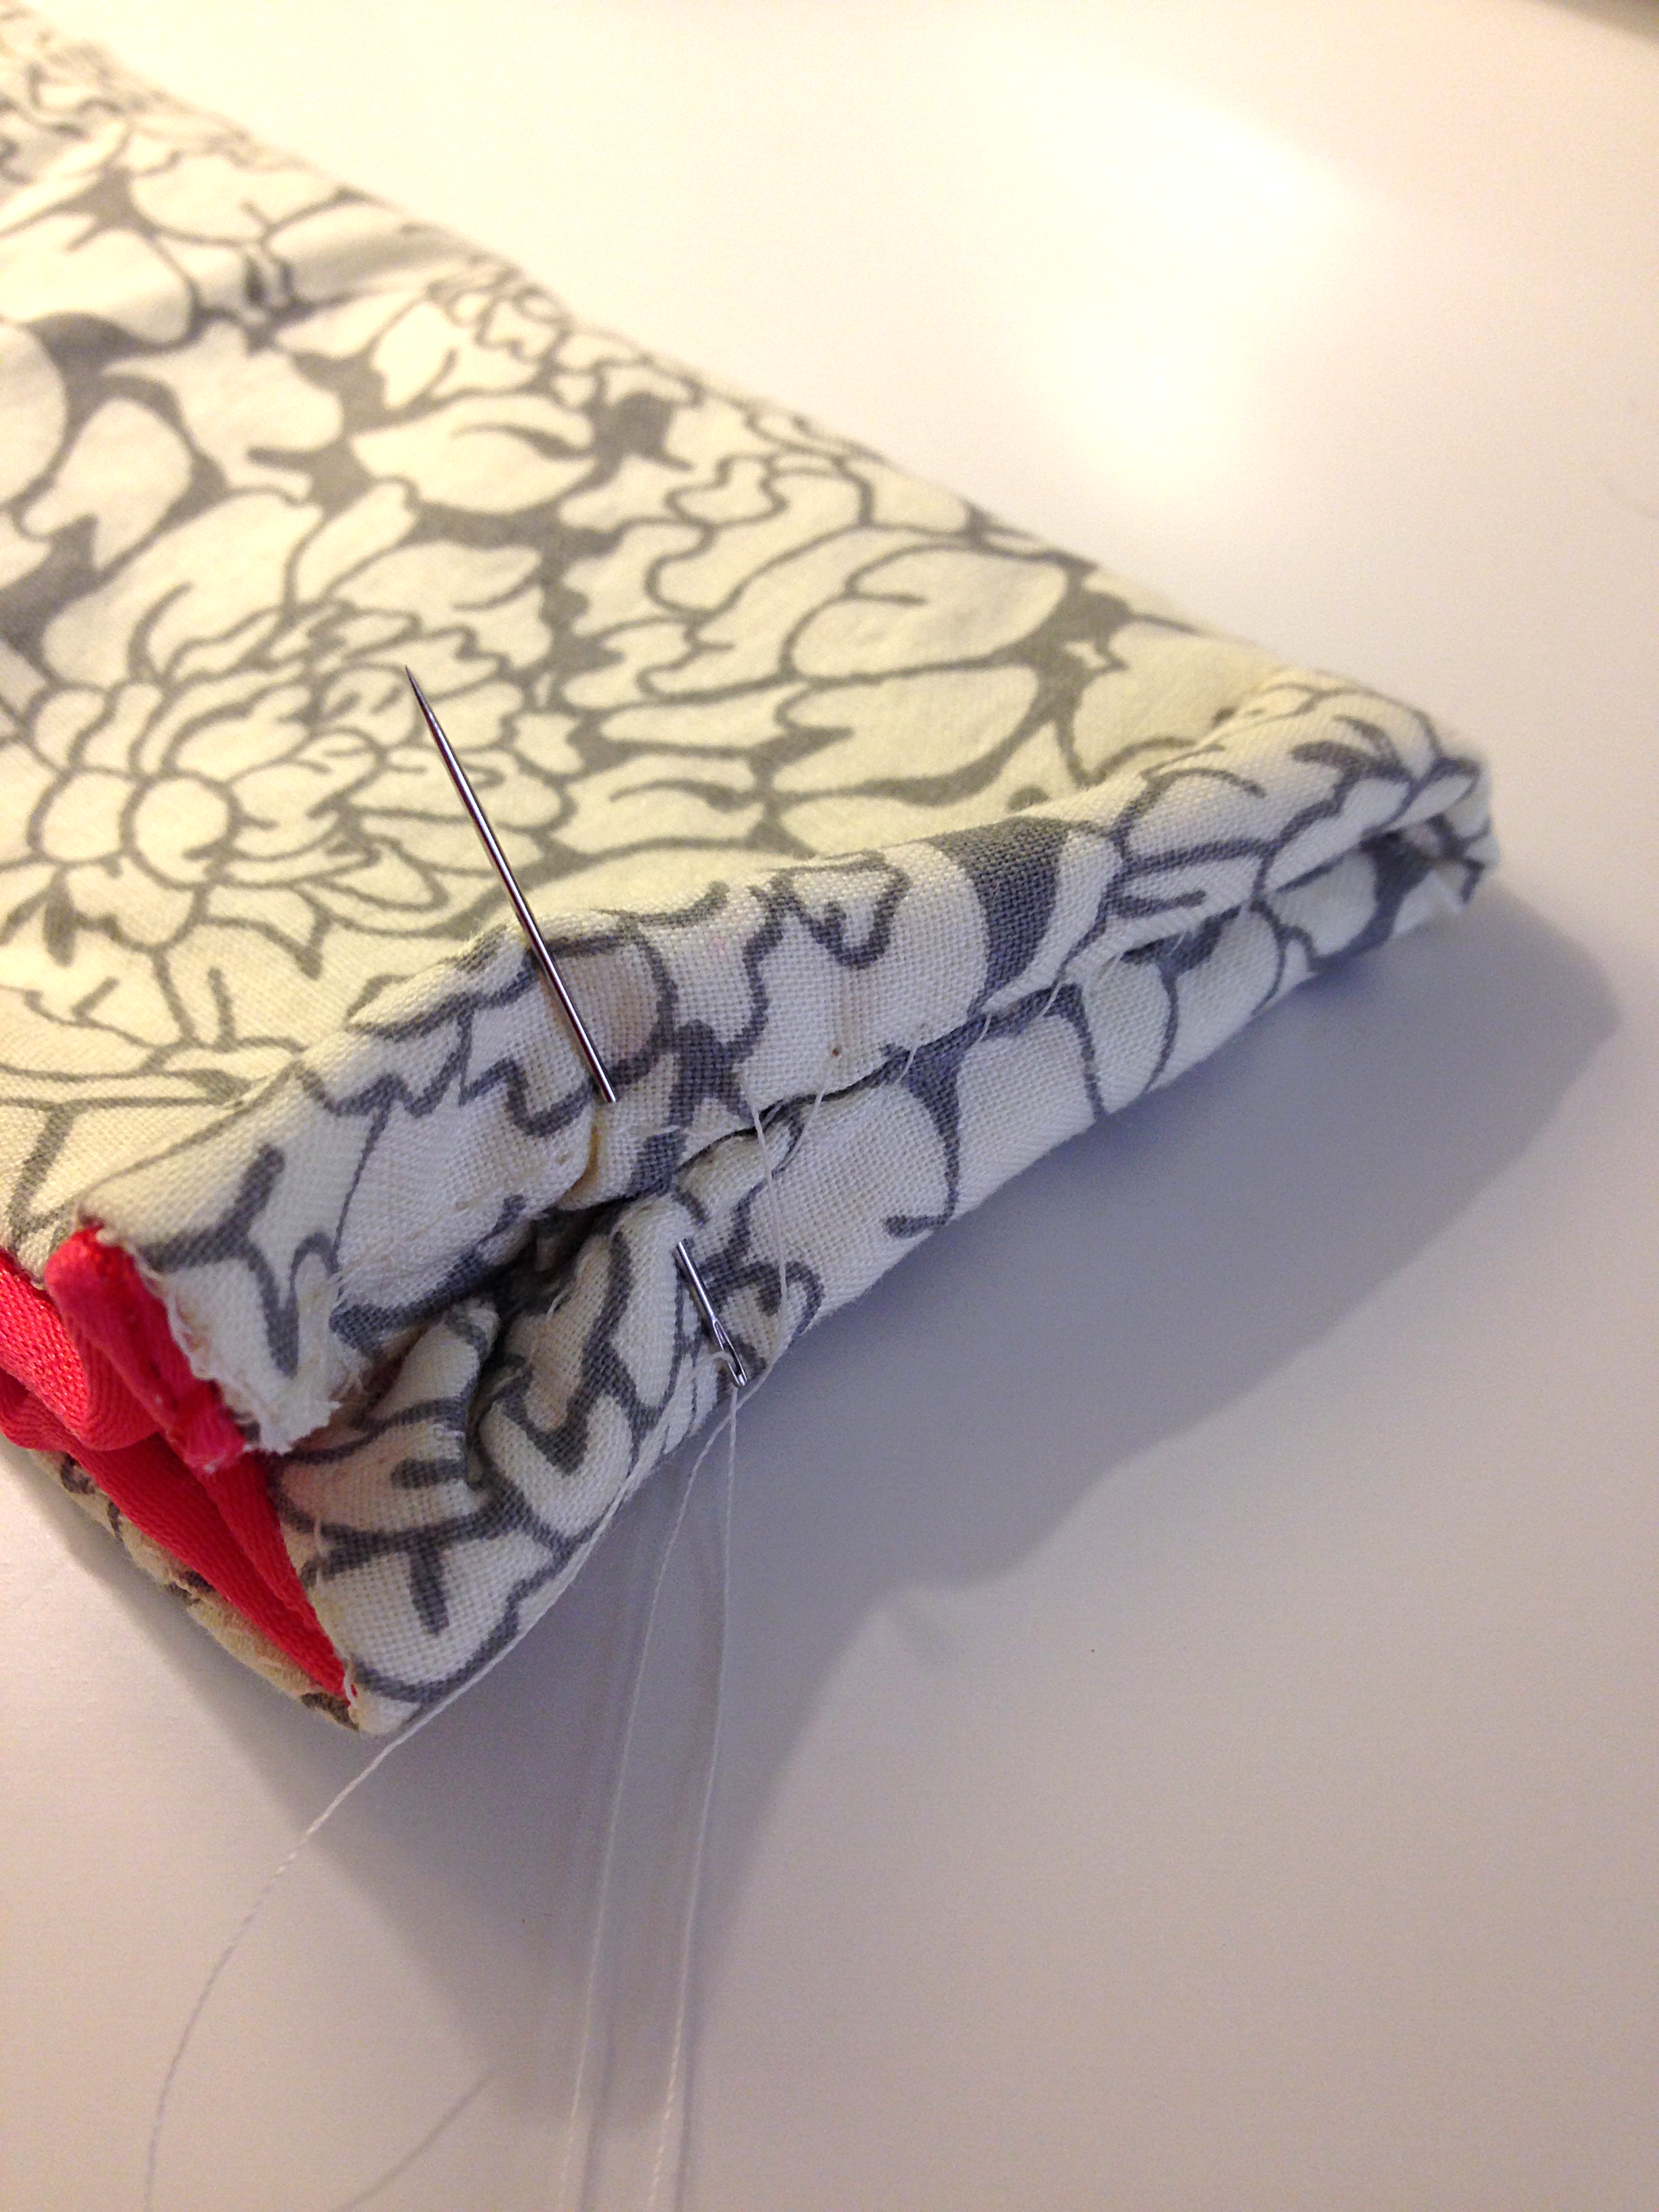
6. Fold the fabric in half with the lining fabric on the inside. You can now see how your case will look when finished! The last step is to hand sew the case closed. If you only use 2 piece of fabric with no plain pieces in between to thicken it, you may be able to just sew the glasses case closed with a machine; but if you use 4 pieces, you probably won’t be able to fit it into a machine under the needle. To hand sew the case closed with a seamless look, run the needle through both pieces of fabric on the lining side so that the thread doesn’t show on the outside. Continue to stitch through the two layers of fabric all the way along the straight edges until you reach the curved pocket at the top which will be the opening for the sunnies and tie off a knot.


Throw your sunnies into their pocket and throw ’em in your purse, safe and sound!


This came out super nice! I love the fabric, and really great pics make it easy to follow along. Thanks for posting. 🙂 http://trend-mixblog.com/
LikeLike
Thanks! It was a great afternoon project, I’m glad you liked it! 🙂
LikeLike
This is such a great DIY! The pouch is adorable!
LikeLike
Thanks! Hope you love it!
LikeLiked by 1 person