
So recently I bought a kit of decorative frosting tips and piping bags from Michael’s to make my Ombre Ruffle Cake. I only got to use the petal tip for that project, and I wondered what power the other five tools possessed…
I set out to make cupcakes and got a little carried away. Overall, I learned quite a few things from experimentation. No way is the wrong way to decorate a cupcake, but if you’re looking for a certain effect, check out my photos and instructions to copy my looks! I hope this also helps if you’re trying to purchase some tips and wonder which ones are necessary. My picks? The large round tip, the star tip, and the petal tip. These will cover most of your bases.
A small round tip is also key if you’re looking to write phrases, names, etc on cakes, but you can also buy little icing packs at the store that come with this tip built in. I find them way easier to work with.
Another tip, you can reuse those piping bags! As long as you wash them and use similar sized tips every time you use the bag, it will save you from having to keep buying more bags. To go off of this, sandwich bags and plastic wrap do not serve as piping bag replacements. They end up splitting at the seams when you apply pressure to the bag or ooze out the open sides of the wrap.
1. Large Round Tip
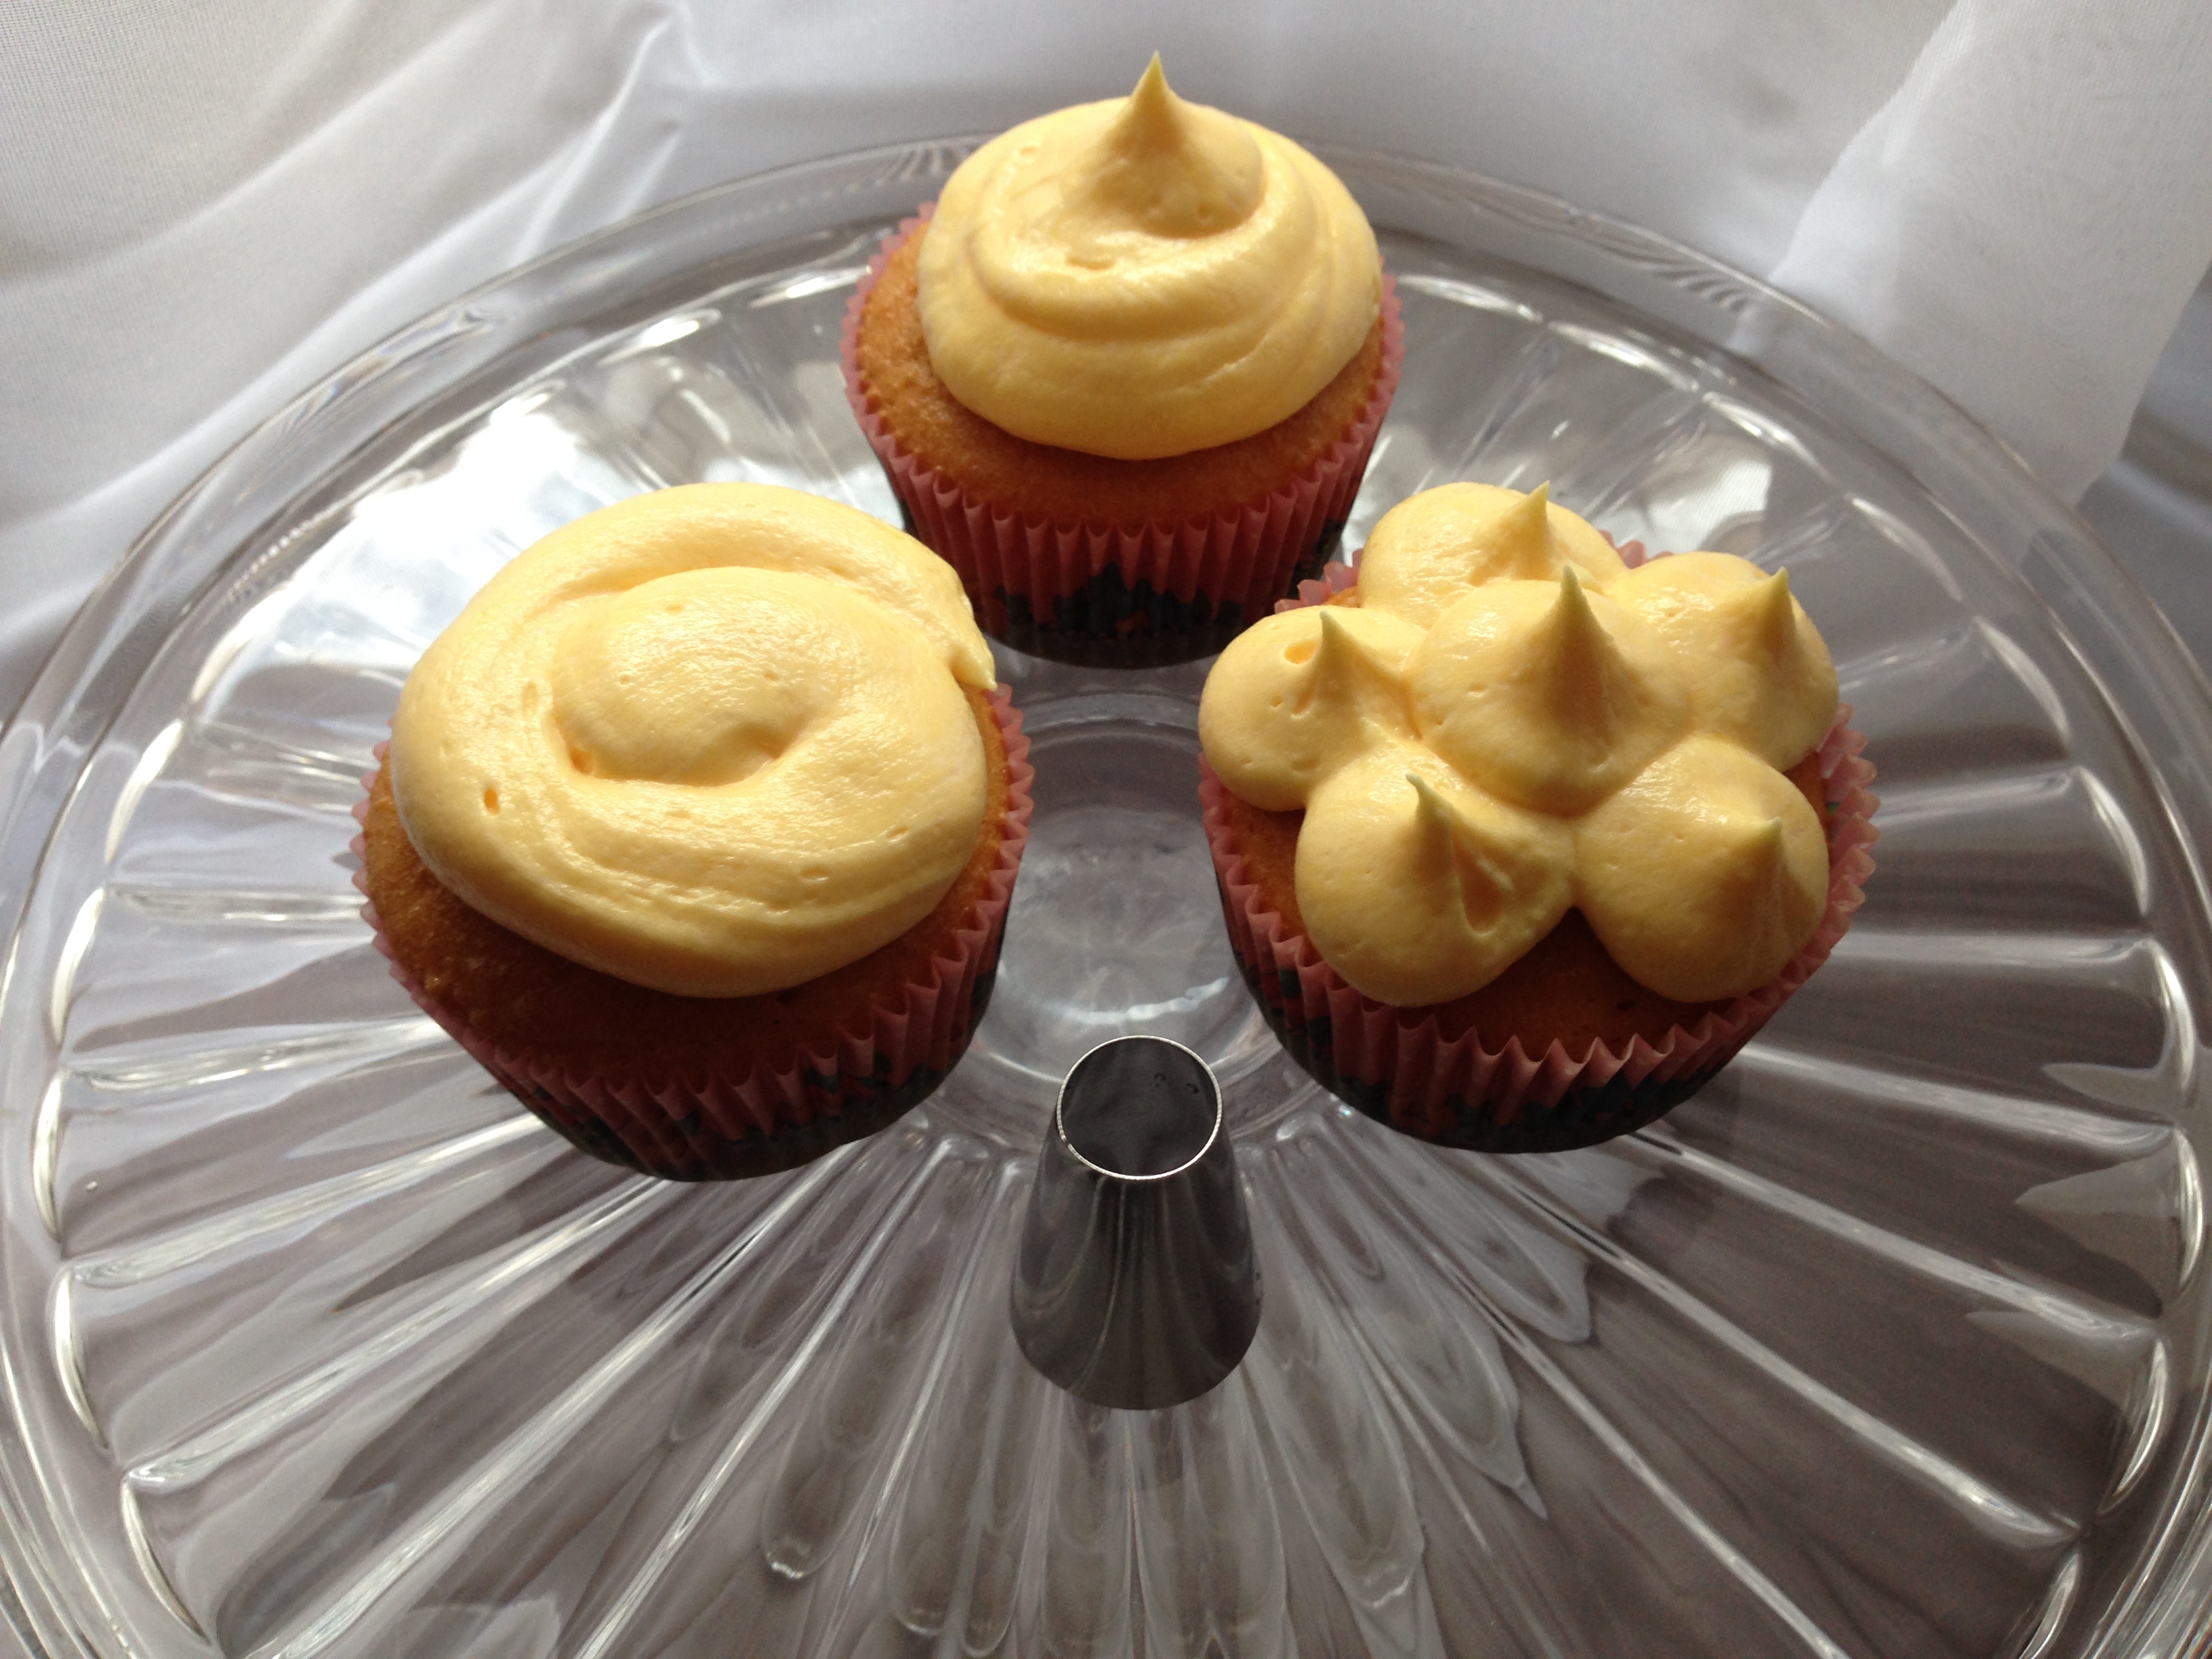
This tip is a big circle. I actually find it to be one of the most versatile tips in the bag because it can be used to make pretty swirls, large dollops, or peaks of frosting. It can also be used for piping out macaroons or other delicate cookies.
To create a swirl, start in the middle of the cupcake and apply pressure to your piping bag. Move the tip around in a circular motion until you reach the edge of the cupcake and release pressure to finish off the end.
To create a large dollop, start in the middle of the cupcake and hold the piping bag upright. Apply lots of pressure and move the tip in and out very slightly to achieve a pile of frosting until it reaches the edges of the cake.
To create peaks, place the tip close to an area of the cupcake and apply pressure to the piping bag. Quickly lift up on the tip away from the cake and release pressure to get a small peak shape. Repeat all over the cupcake. I suggest doing the outsides of the cupcake first and the center last in order to make sure the center peak doesn’t get overshadowed by the surrounding ones.
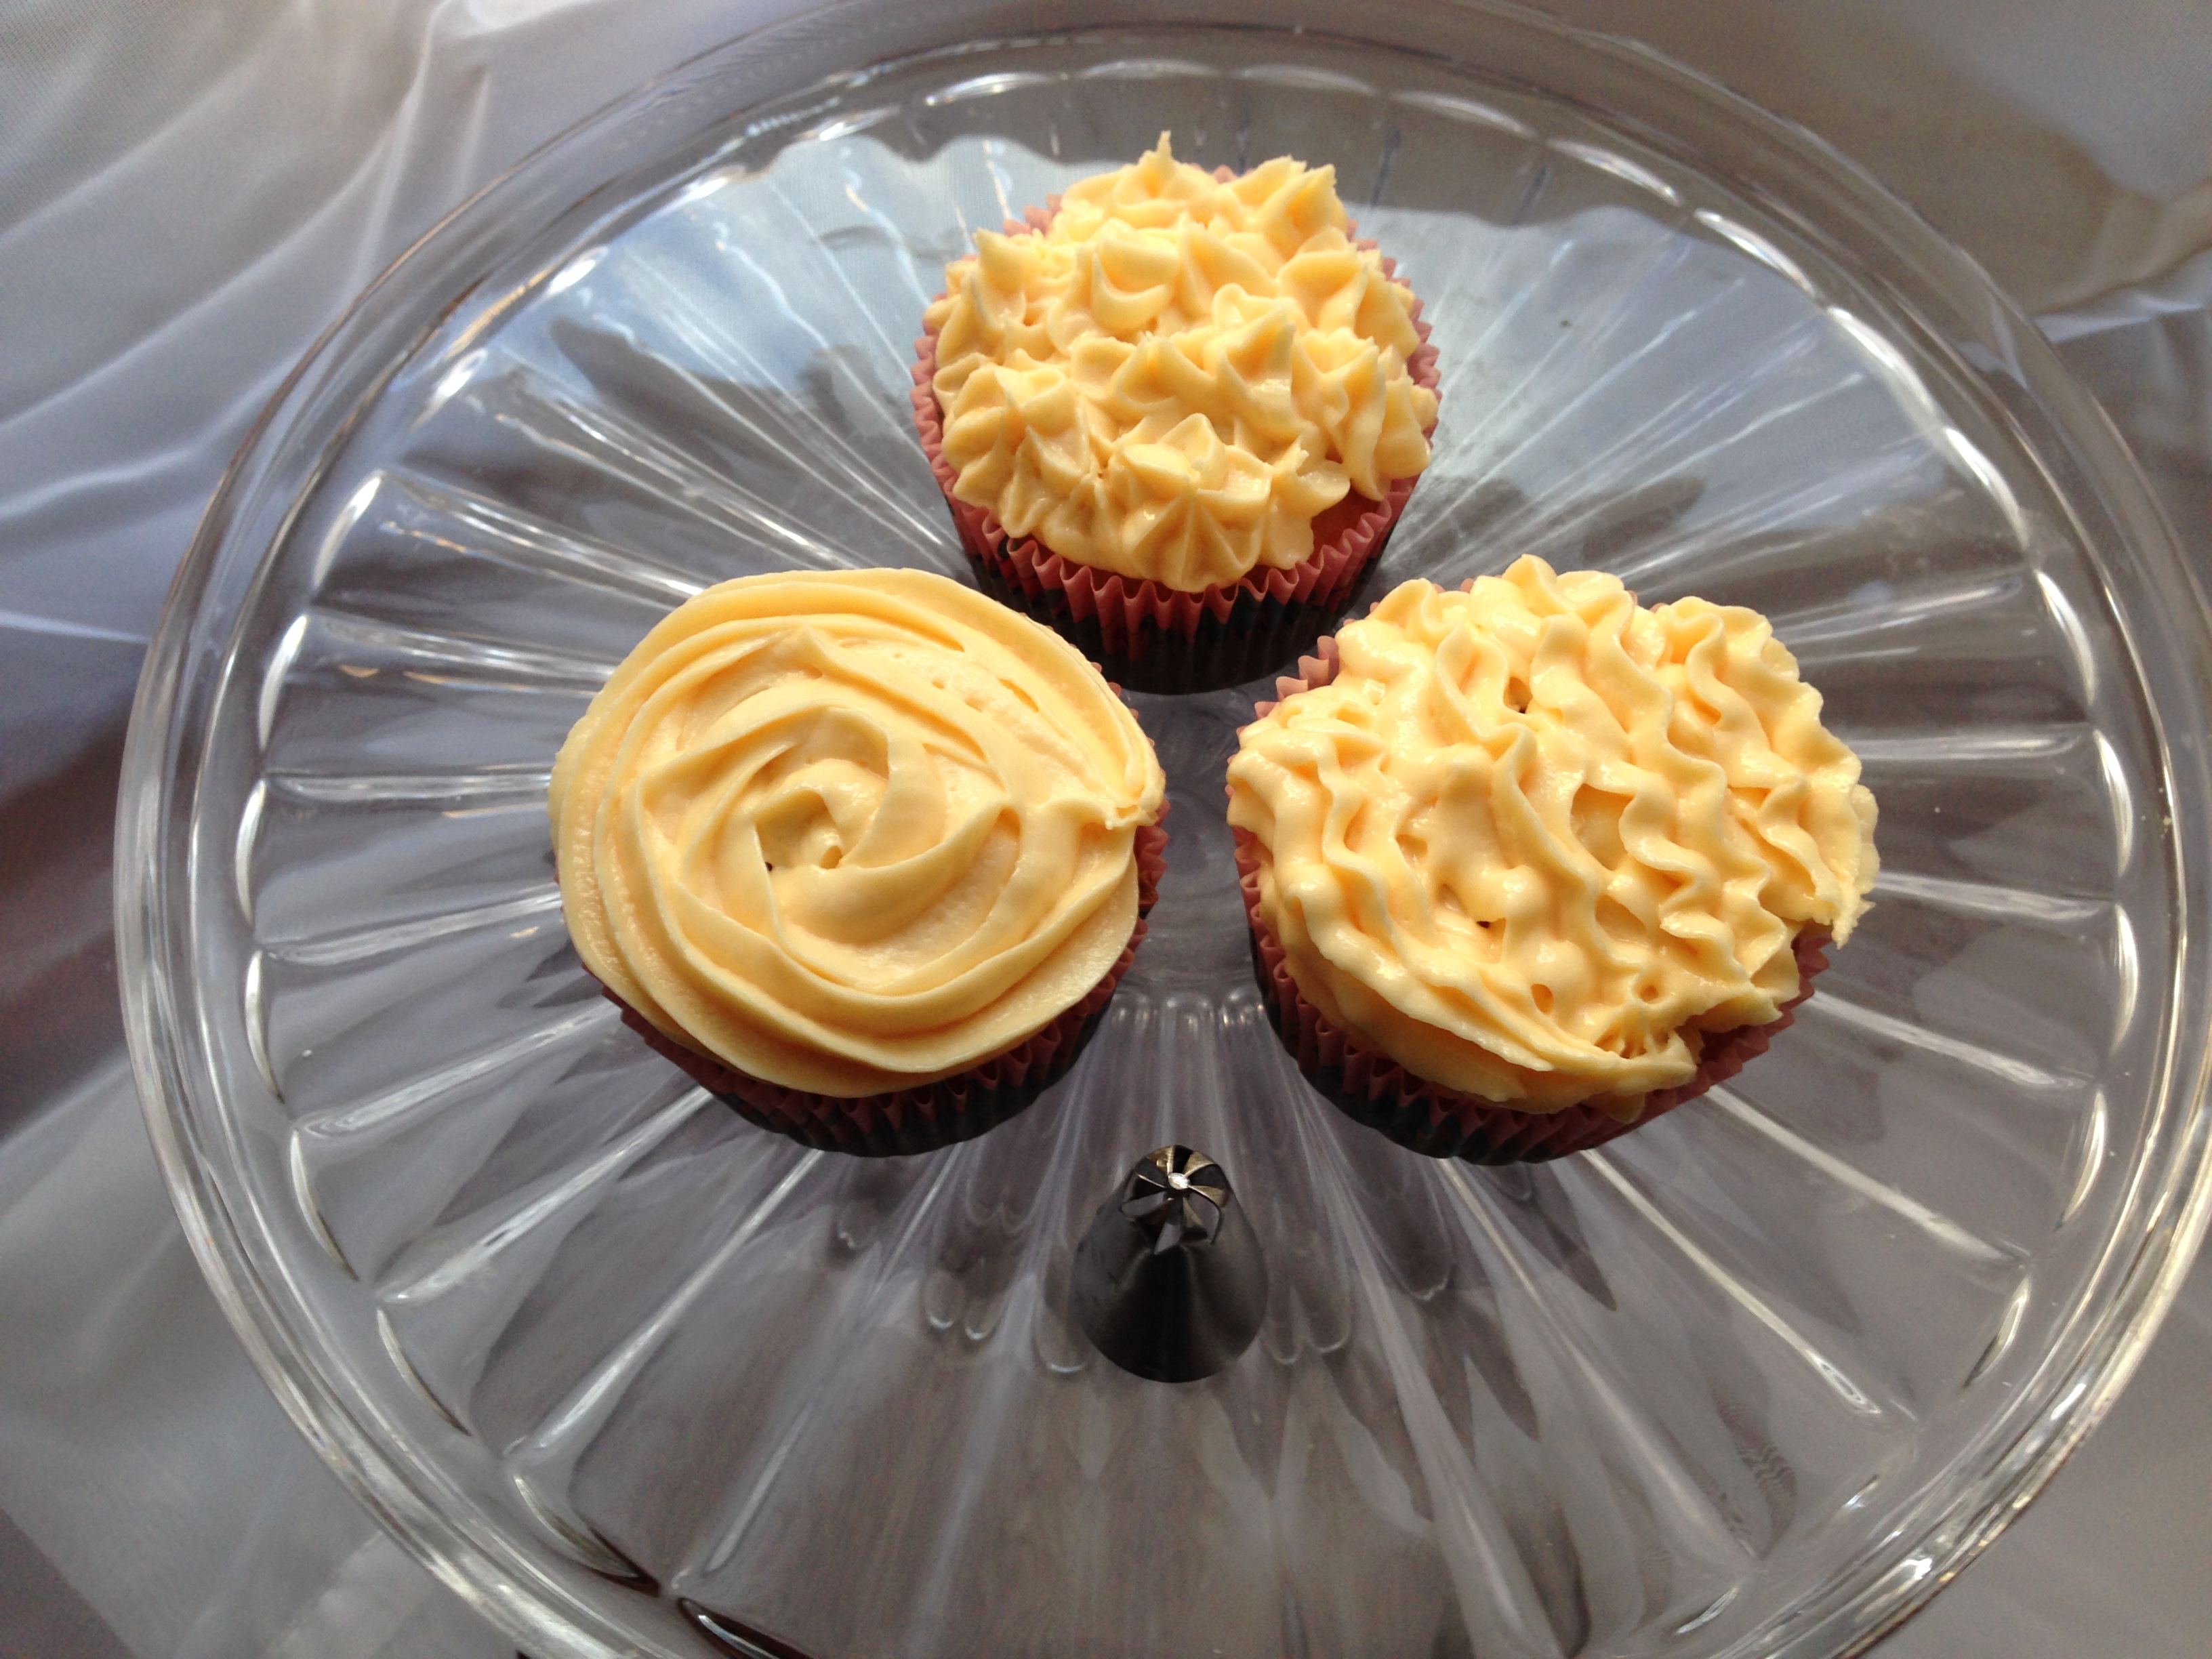
2. French Tip

The french tip is the one that looks a bit like a sun. The versatility of this tip is better seen on a large cake where it can be used to line the edges with shell like patterns. This is what you see on most of the cakes you buy in the grocery store. The french tip can be used similarly to the large round tip to create swirls and peaks. You can also use it to make a textured swirl that doesn’t look so much like a flower if you’re trying to avoid that look.
To create a swirl, start at the center of your cupcake and apply pressure. Move the tip in a circular motion towards the edges of the cupcake and release pressure to finish.
3. Star Tip

This is the tip to use to make roses! It looks, surprise, like a star. My flowers turned out a bit more flat than most you might see in a store, but the more pressure you apply, the bigger the rose shape will look.
To create a rose, start in the middle of the cupcake and apply pressure to the piping bag. Move in a circular motion around the center point making sure to go slow and keep the edges of the frosting close together. To complete the rose, release pressure and curl the end to finish.
4. Petal Tip

The petal tip is another quite versatile tip if you have a little skill. This can be used, quite frankly, to make petals. Cake decorators use this tip to create the stand up flowers on cakes that truly look like real roses. I don’t have this skill at the moment so I won’t even show you my attempts. The petal tip can also be used to make ruffles, basket weave patterns, and stripes. The options are pretty endless on this one.
To make ruffles, apply just a small amount of pressure to the piping bag and move the tip right to left in small motions as you drag the tip across the cake.
To create a basket weave pattern, frost the left right and middle of the cupcake with straight lines, leaving even gaps between all of them. Then pipe out two more stripes on top of these in the perpendicular direction, also with a gap between them.
I trust you can figure out the rest, my smart readers!
5. Closed Star Tip
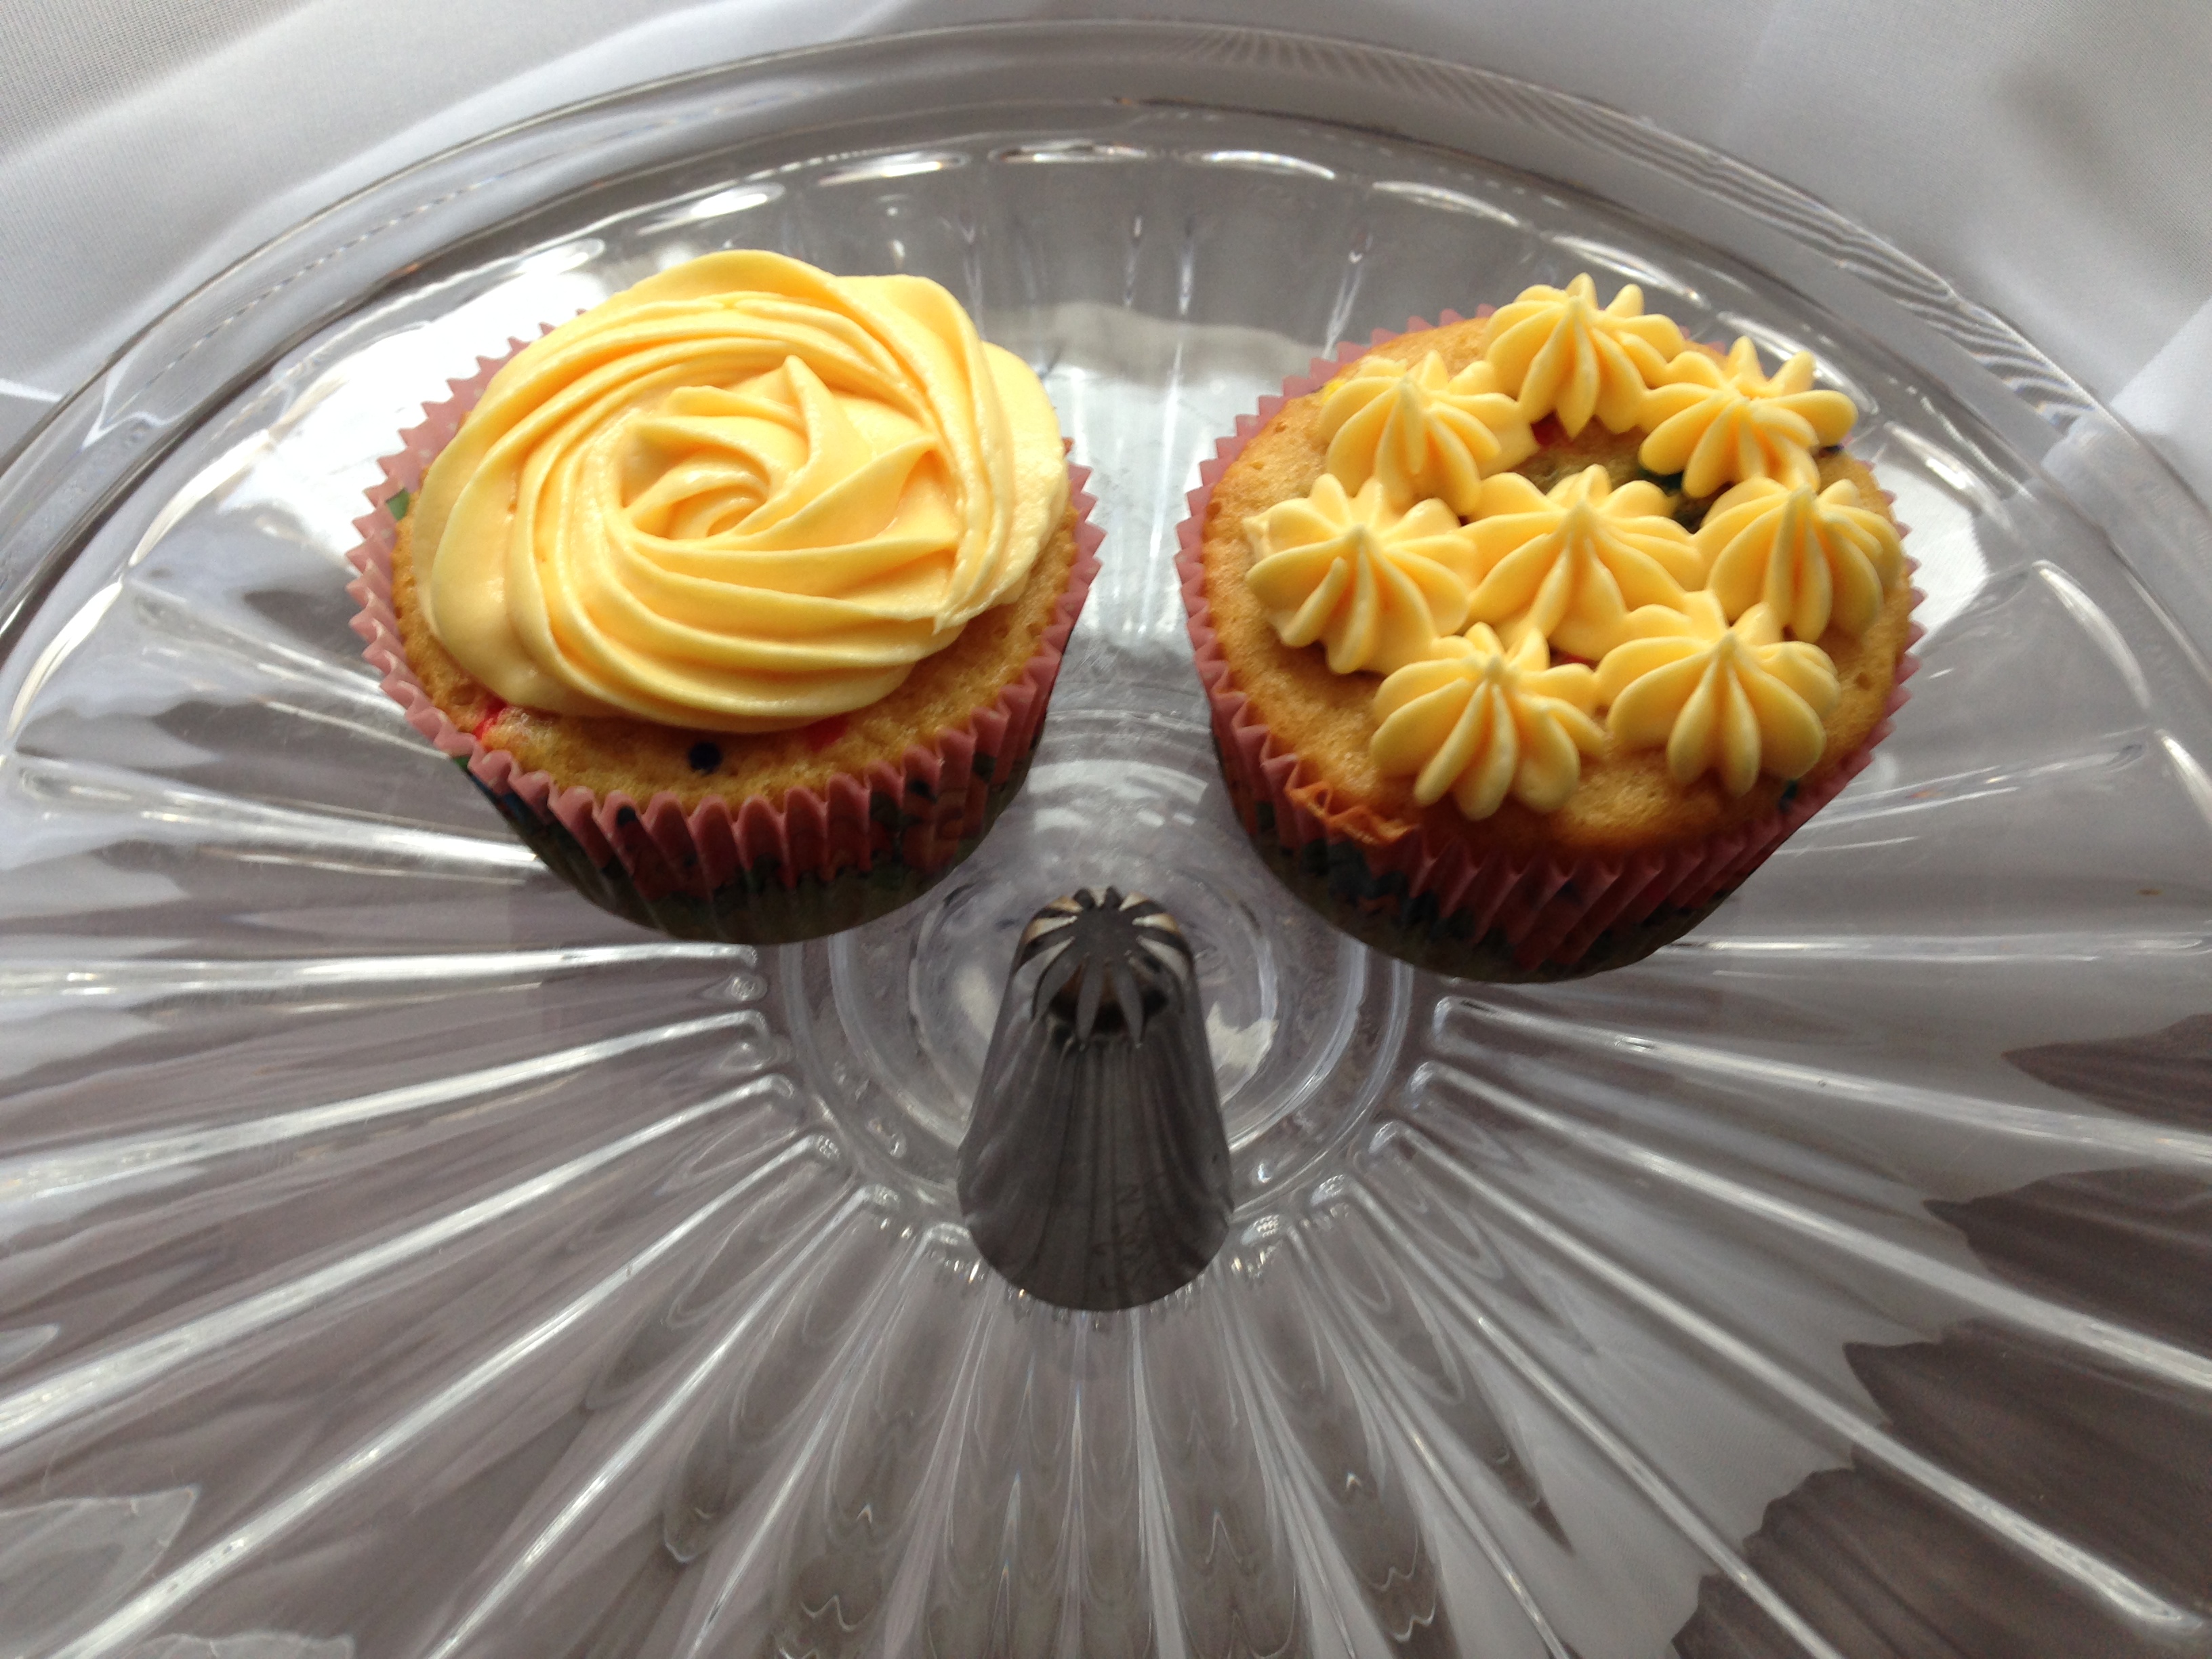
The closed star tip looks like the star tip, but the pointed tips have been folded down on the corners into the center. This tip works well for making small star shapes and more defined roses.
The rose pattern works just the same as it does with the star tip.
To make small stars, lightly apply pressure to the piping bag for just an instant as you place the tip close to the cake surface and pull away. Repeat all over the cupcake.
6. Drop Flower Tip
The drop flower tip can make beautiful delicate little flowers for larger cakes. They look like little blossoms more than full on roses. It can also be used to make a rose on a cupcake, but I don’t like the effect as much.
To make delicate flowers, follow the same pattern as the small stars from the closed star tip.
Three separate tips can be used to make a rose on top of a cupcake, but I would say the star tip works best. I’ve compared the star tip, French tip, closed star tip, and drop flower tip making roses to help you decide your favorite effect! Make some homemade buttercream and start experimenting!


3 thoughts on “Frosting Tips for your Tips!”