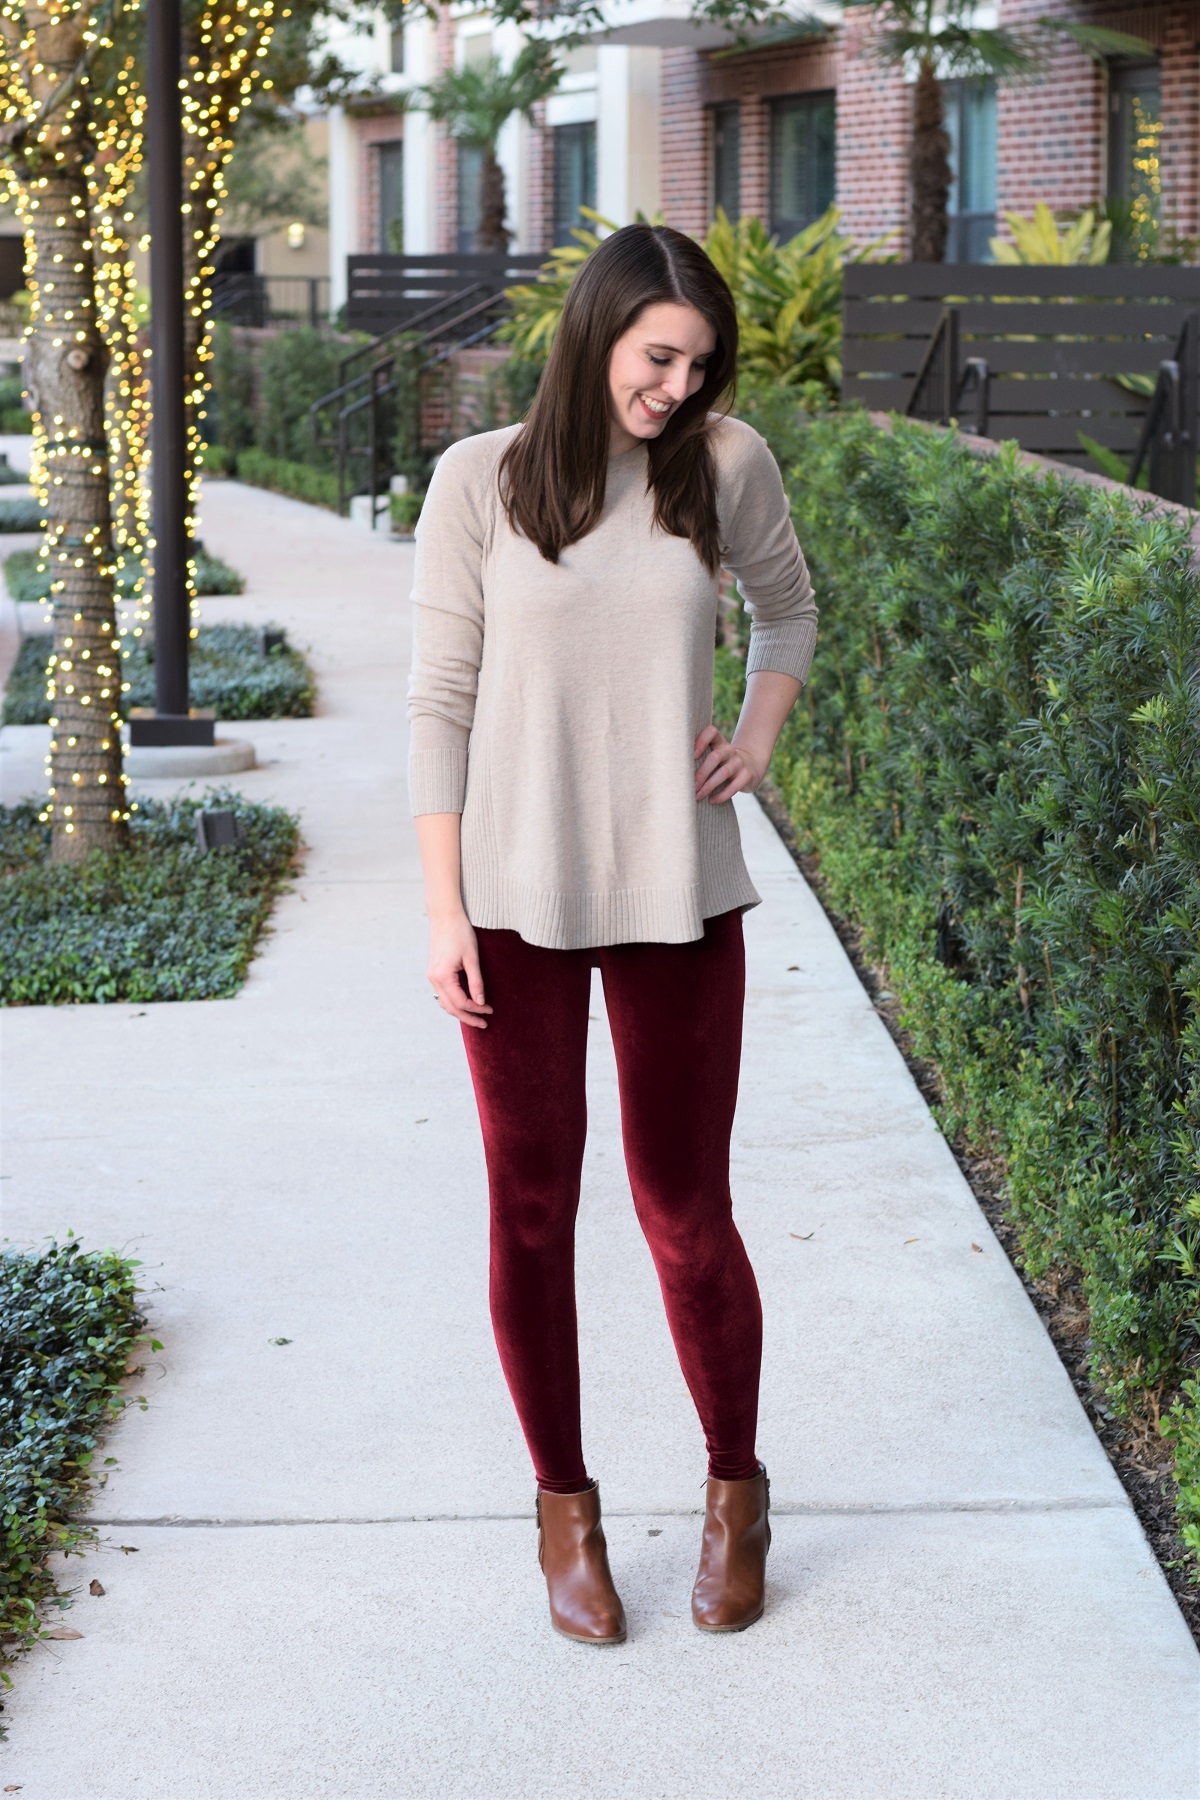
 When it comes to the holidays, the uniform involves jeans, black leggings, and all of the warmest sweaters I own. This is fine for movie watching and cooking baking, but when I want to dress up a little and also not freeze my bum off, there aren’t really that many great options. I wanted to make something a little more fun and festive to bring home with me to Chicago, so I dug up some leftover stretch velvet I had from a project last Winter and got to drafting a pattern!
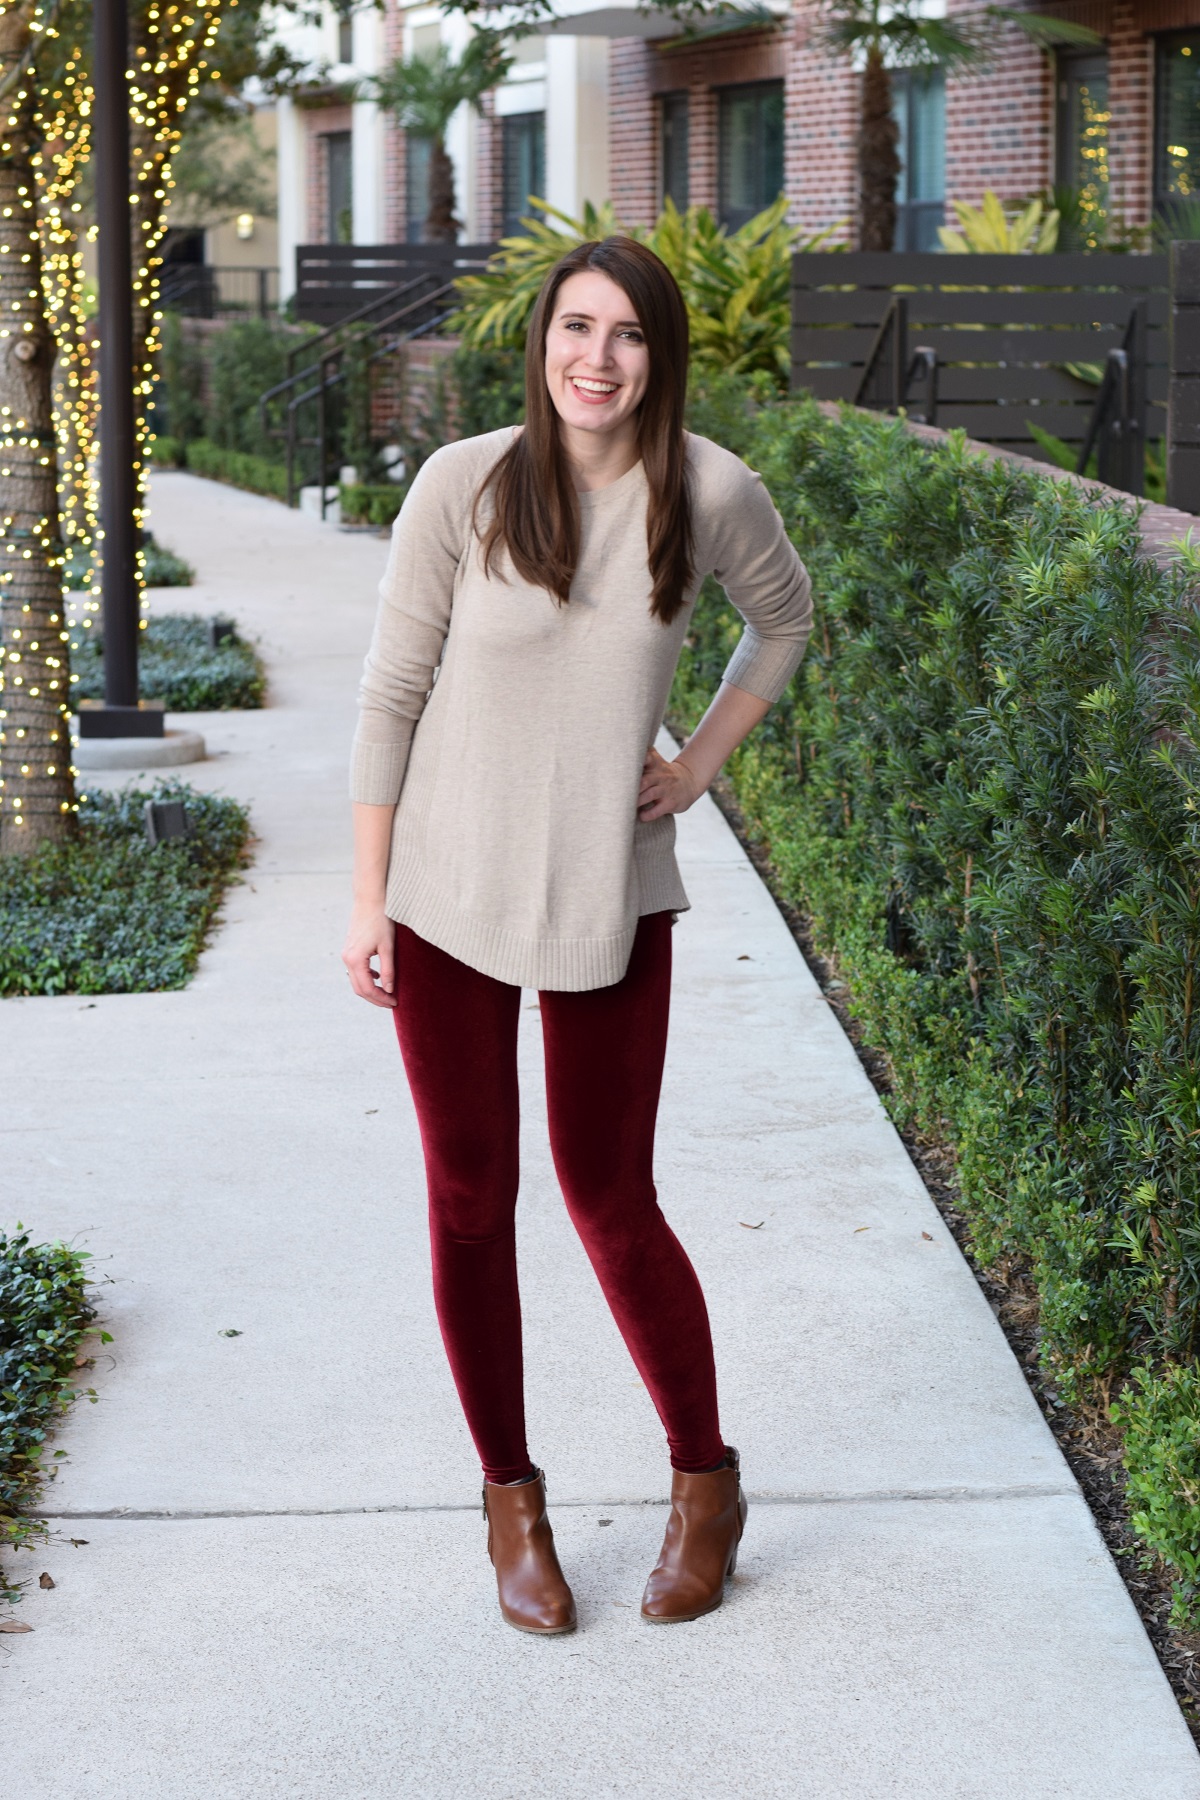
 There are a few great things about stretch velvet. The first is that it is thick and warm, making them the optimal leggings as pants material. Velvet also has a lovely sheen to it which makes any outfit a little dressier, while also being so soft and comfortable!
 For my legging pattern, the base design came directly from a pair of black, jersey leggings I already own. By turning the leggings inside out, you can see that they are made from 2-4 pieces of fabric. I used the 4 piece technique to create 2 front pieces and 2 back pieces. The one element I also really got excited about was making a thick, high waisted waistband. Most yoga pants include this waistband which helps to keep the leggings up during yoga, and there is no reason you can’t include this in everyday leggings!
 The critical part about making your own leggings are embodied in this list below:
- When creating a pattern for your leggings, make sure to add some extra material for seam allowance, as well as for more stretch if the material you are using is not as stretchy as your jersey leggings. I simply added a 5/8″ seam allowance to the size of the leggings I had to create the pattern for the velvet leggings, and they fit like a glove.
- Make sure to add some length to the leggings to accommodate hemming.
- Always add elastic to your waistband. Though the material itself is very stretchy, you will need some elastic to keep your leggings from falling down every 5 minutes.
- Use a zig-zag stitch or a serger to sew horizontal seams on your leggings, and a straight and zig-zag stitch on vertical seams. You will want the seams to be able to stretch in the horizontal direction so you can get the leggings on, so a zig-zag stitch is crucial. For the side seams of the leggings, I did a straight stitch with a zig-zag next to it for added strength.
To get started on your leggings, follow the directions below!
DIY Velvet Leggings
Supplies
1 yard 4-Way Stretch Velvet (velvet I used)
1″ Thick Elastic the Length of your Waist
Thread to match
Sewing Machine
Pins
Scissors
Measuring Tape
Paper, Tape, and a Pencil + Leggings you own to make a pattern
Time
3 hours
Difficulty
Easy-Medium
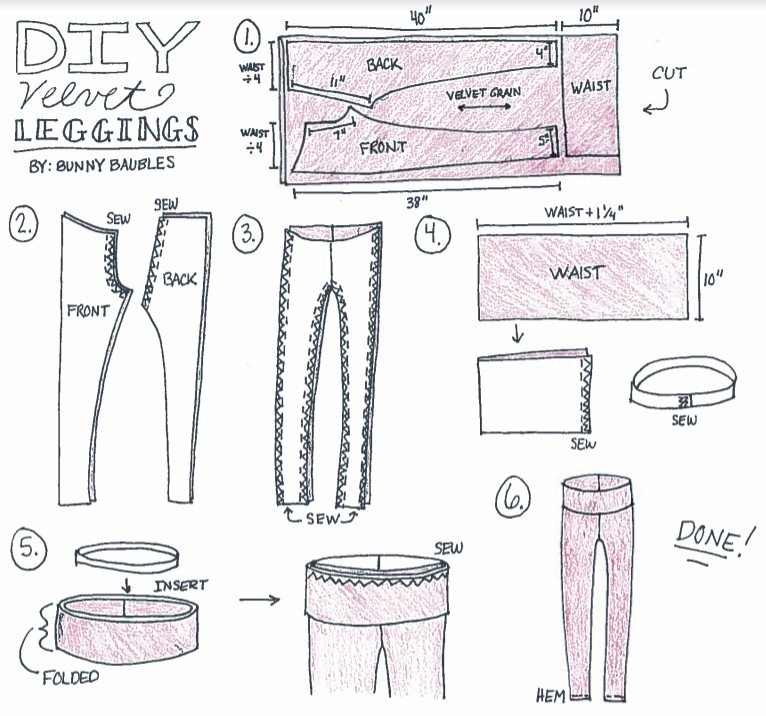
1. Take the leggings you already own and turn them inside out. Line up a bunch of sheets of paper along the front of one of the legs of the leggings and tape them together. Use a pencil to trace around all of the seam lines on the leg, making sure to add a 5/8″ seam allowance around all of the sides. Repeat this process with the back of one of the legs. Mark on the edges of the pattern pieces where the inside seam and outside seam are. Cut around these pieces to create your pattern.
Fold your velvet fabric in half along the stretchiest direction of the fabric and place the two pattern pieces on top, leaving about 10″ of material at the bottom edge of the fabric for the waistband. Pin the patterns down and cut around them, giving you two FRONT pieces and two BACK pieces. Also cut a rectangular strip of fabric that is 10″ wide by the length of your waist for the WAIST.
2. To put the pattern pieces together, start by placing both FRONT pieces together with the right sides of the fabric touching. Line up the front seam and sew along it with a straight stitch and a zig-zag stitch. Repeat on the BACK pieces, sewing the back seam together.
3. Next, place the FRONT pieces on top of the BACK pieces with the right sides of the fabric touching. Line up the inner leg seams and the outer leg seams and pin them together. Sew along these seams with a straight stitch and a zig-zag stitch. Try on the leggings at this point to make sure they are tight enough.
4. The last piece to tackle is the waistband. Measure the circumference of the waist band on the pants and cut the WAIST piece to match that length + about 1 1/4″. Fold the WAIST piece in half width wise with the right sides of the fabric touching and sew along it with a straight stitch and a zig-zag stitch. Also make your elastic into a loop with the ends overlapping by 1/4″ and sew them together with multiple zig-zag stitches.
5. Take your WAIST piece and turn it right side out. Fold the fabric in half to create a pocket and place the elastic inside of it. Slide the WAIST around the outside of the leggings with the right sides of the fabric touching and the rough edges lining up. Pin the edges together and sew along the edges with a zig-zag stitch.
6. Hem the length of the leggings to your desired length.

2 thoughts on “DIY Velvet Leggings”