
Does it feel like there are tassels everywhere these days? Purses, beach cover ups, shorts, the list goes on. One of my favorite ways to sport this trend is through beaded tassel necklaces.
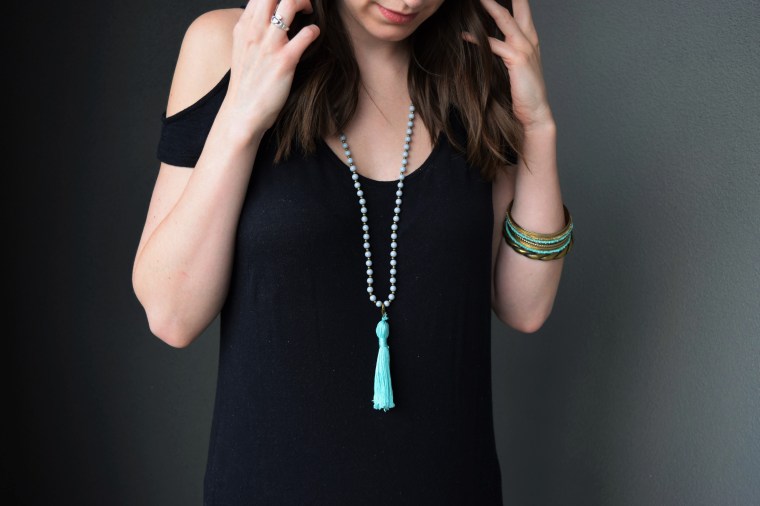

Colorful, bohemian, and eye catching, one of these necklaces can take a cutoffs and white tee look to a new level of chic. Though there are many options for sale, they are also super easy (and cheap!) to make! Beads, sting, and tassel supplies included, this necklace cost me about $12 to make when most versions in the store are closer to $20 and up.

Left – Neiman Marcus | Middle – Anthropologie | Right – Topshop
And since this is a DIY project, let’s go crazy and make it an interchangeable design! Though the turquoise tassel might be good for today, the pink one might be better for tomorrow. This makes this necklace perfect for your upcoming summer vacations since it’s small to pack and goes with everything.
Do y’all have any trips coming up? I can’t help but start planning my next one right after coming home from the last… let’s talk inspiration. Comment and let me know where you are going! Scroll below to see the full tutorial.
DIY Beaded Tassel Necklace
Supplies:
40″ No-stretch Cord (buy one pack)
~120 6mm Gray Beads (buy two packs)
~120 3mm Brass Beads (similar, could not find mine on the Hobby Lobby website) (buy 3 packs, or one pack if you can find the ones I used!)
Colored Embroidery Floss (buy one strand)
Brass Lobster Clasps (buy one pack of 4 for 4 tassels)
A Business Card
Scissors

1. Take your string and tie multiple knots at one end of it about 1 inch from the end to make one large knot. Begin stringing beads on to the string alternating between the gray beads and the brass beads. (NOTE: This string is awesome for stringing beads because it does not fray at all and is stiff enough to string over and over!) Do this until you have strung beads to the length you desire. I used most of the beads, but not all. Tie the two ends of the string together in multiple knots and cut the excess string.
2. To make the tassel, take your business card and wrap your embroidery floss around it on the long side until you have covered almost all of the width in floss. Cut the end of the floss.
3. Cut a 6″ piece of embroidery floss and string it through the loops of floss on the card and tie it in a tight knot. We will tie this into the lobster clasp in step 5. Cut the bottom of the floss on the business card to create the bottom of the tassel and detach it from the card.
4. Cut another piece of embroidery floss about 15″ long and tie it around the top area of the tassel as shown. Wrap the remaining floss around that section. Tie the end of that floss to one of the tassel pieces in a double knot and trim any excess floss.
5. String the embroidery floss from the top of the tassel through the hole in the lobster clasp and tie off with a couple of tight knots. Cut the excess embroidery floss off. Hook the latch to the middle of the beaded necklace and wear!
You can then make more tassels to attach to your necklace by repeating steps 2-5 to change up the look.

Thanks for sharing this blog for us.
Your designs are very awesome
LikeLiked by 1 person