
So these amazing pom pom balls were the center point to the decor at my Birthday Tea Party. I needed something fun and whimsical to match the youthful tea party theme, but also beautiful and elegant because….well it was technically an adult tea party after all. And I like pretty things. Surprised? I loved the idea of paper lanterns or beautiful flower arrangements, but I had already spent so much on food and booze (to come soon) that I didn’t really want to shell out a lot more on decor. Inspiration hit at the craft store and I picked up some tissue paper and string.
Magic Pom Poms are easy to make, super cheap (all my supplies cost ~$7), and make a great impact. I call these things “magic” because the materials go from the flattest, flimsiest pieces of paper to fluffy, adorable pom poms! Whip up a few Magic Pom Poms, hang them over your dining table, and revel in the dramatic effect! They look like they came from Anthropologie while costing like they came from a garage sale. Plus you can customize them and take full credit. How’s that for a leg up on being a party planner extraordinaire?
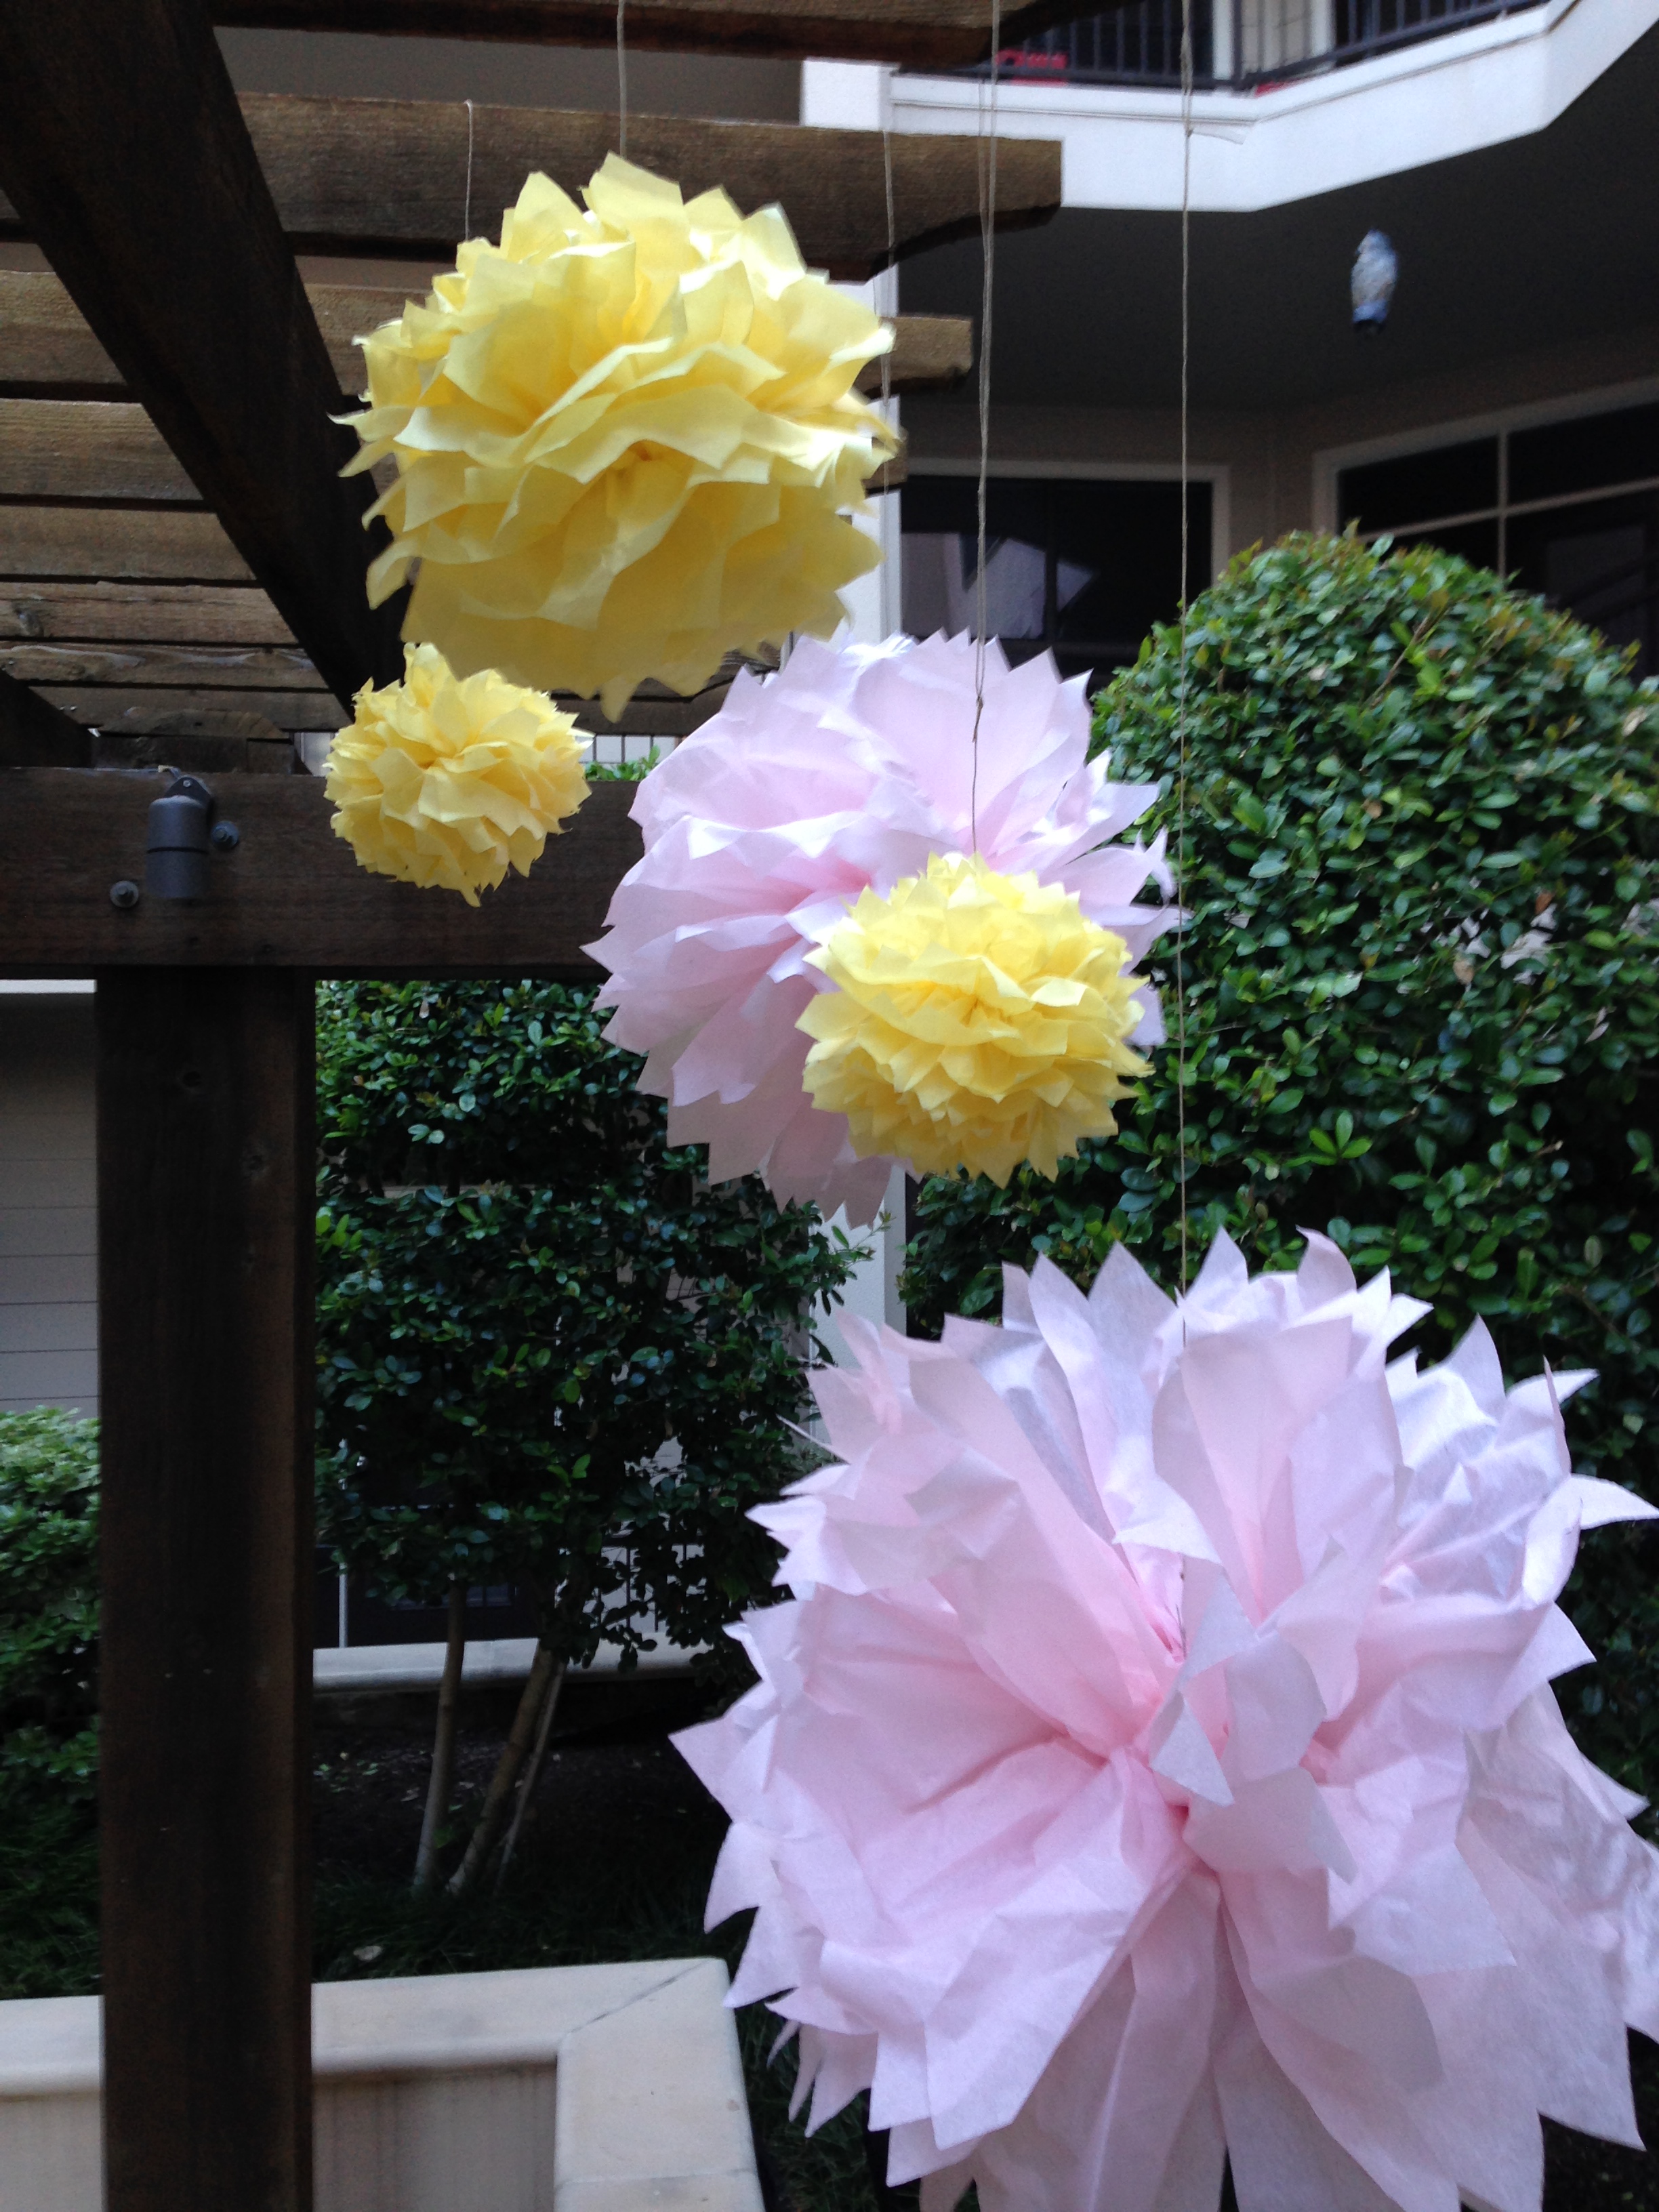
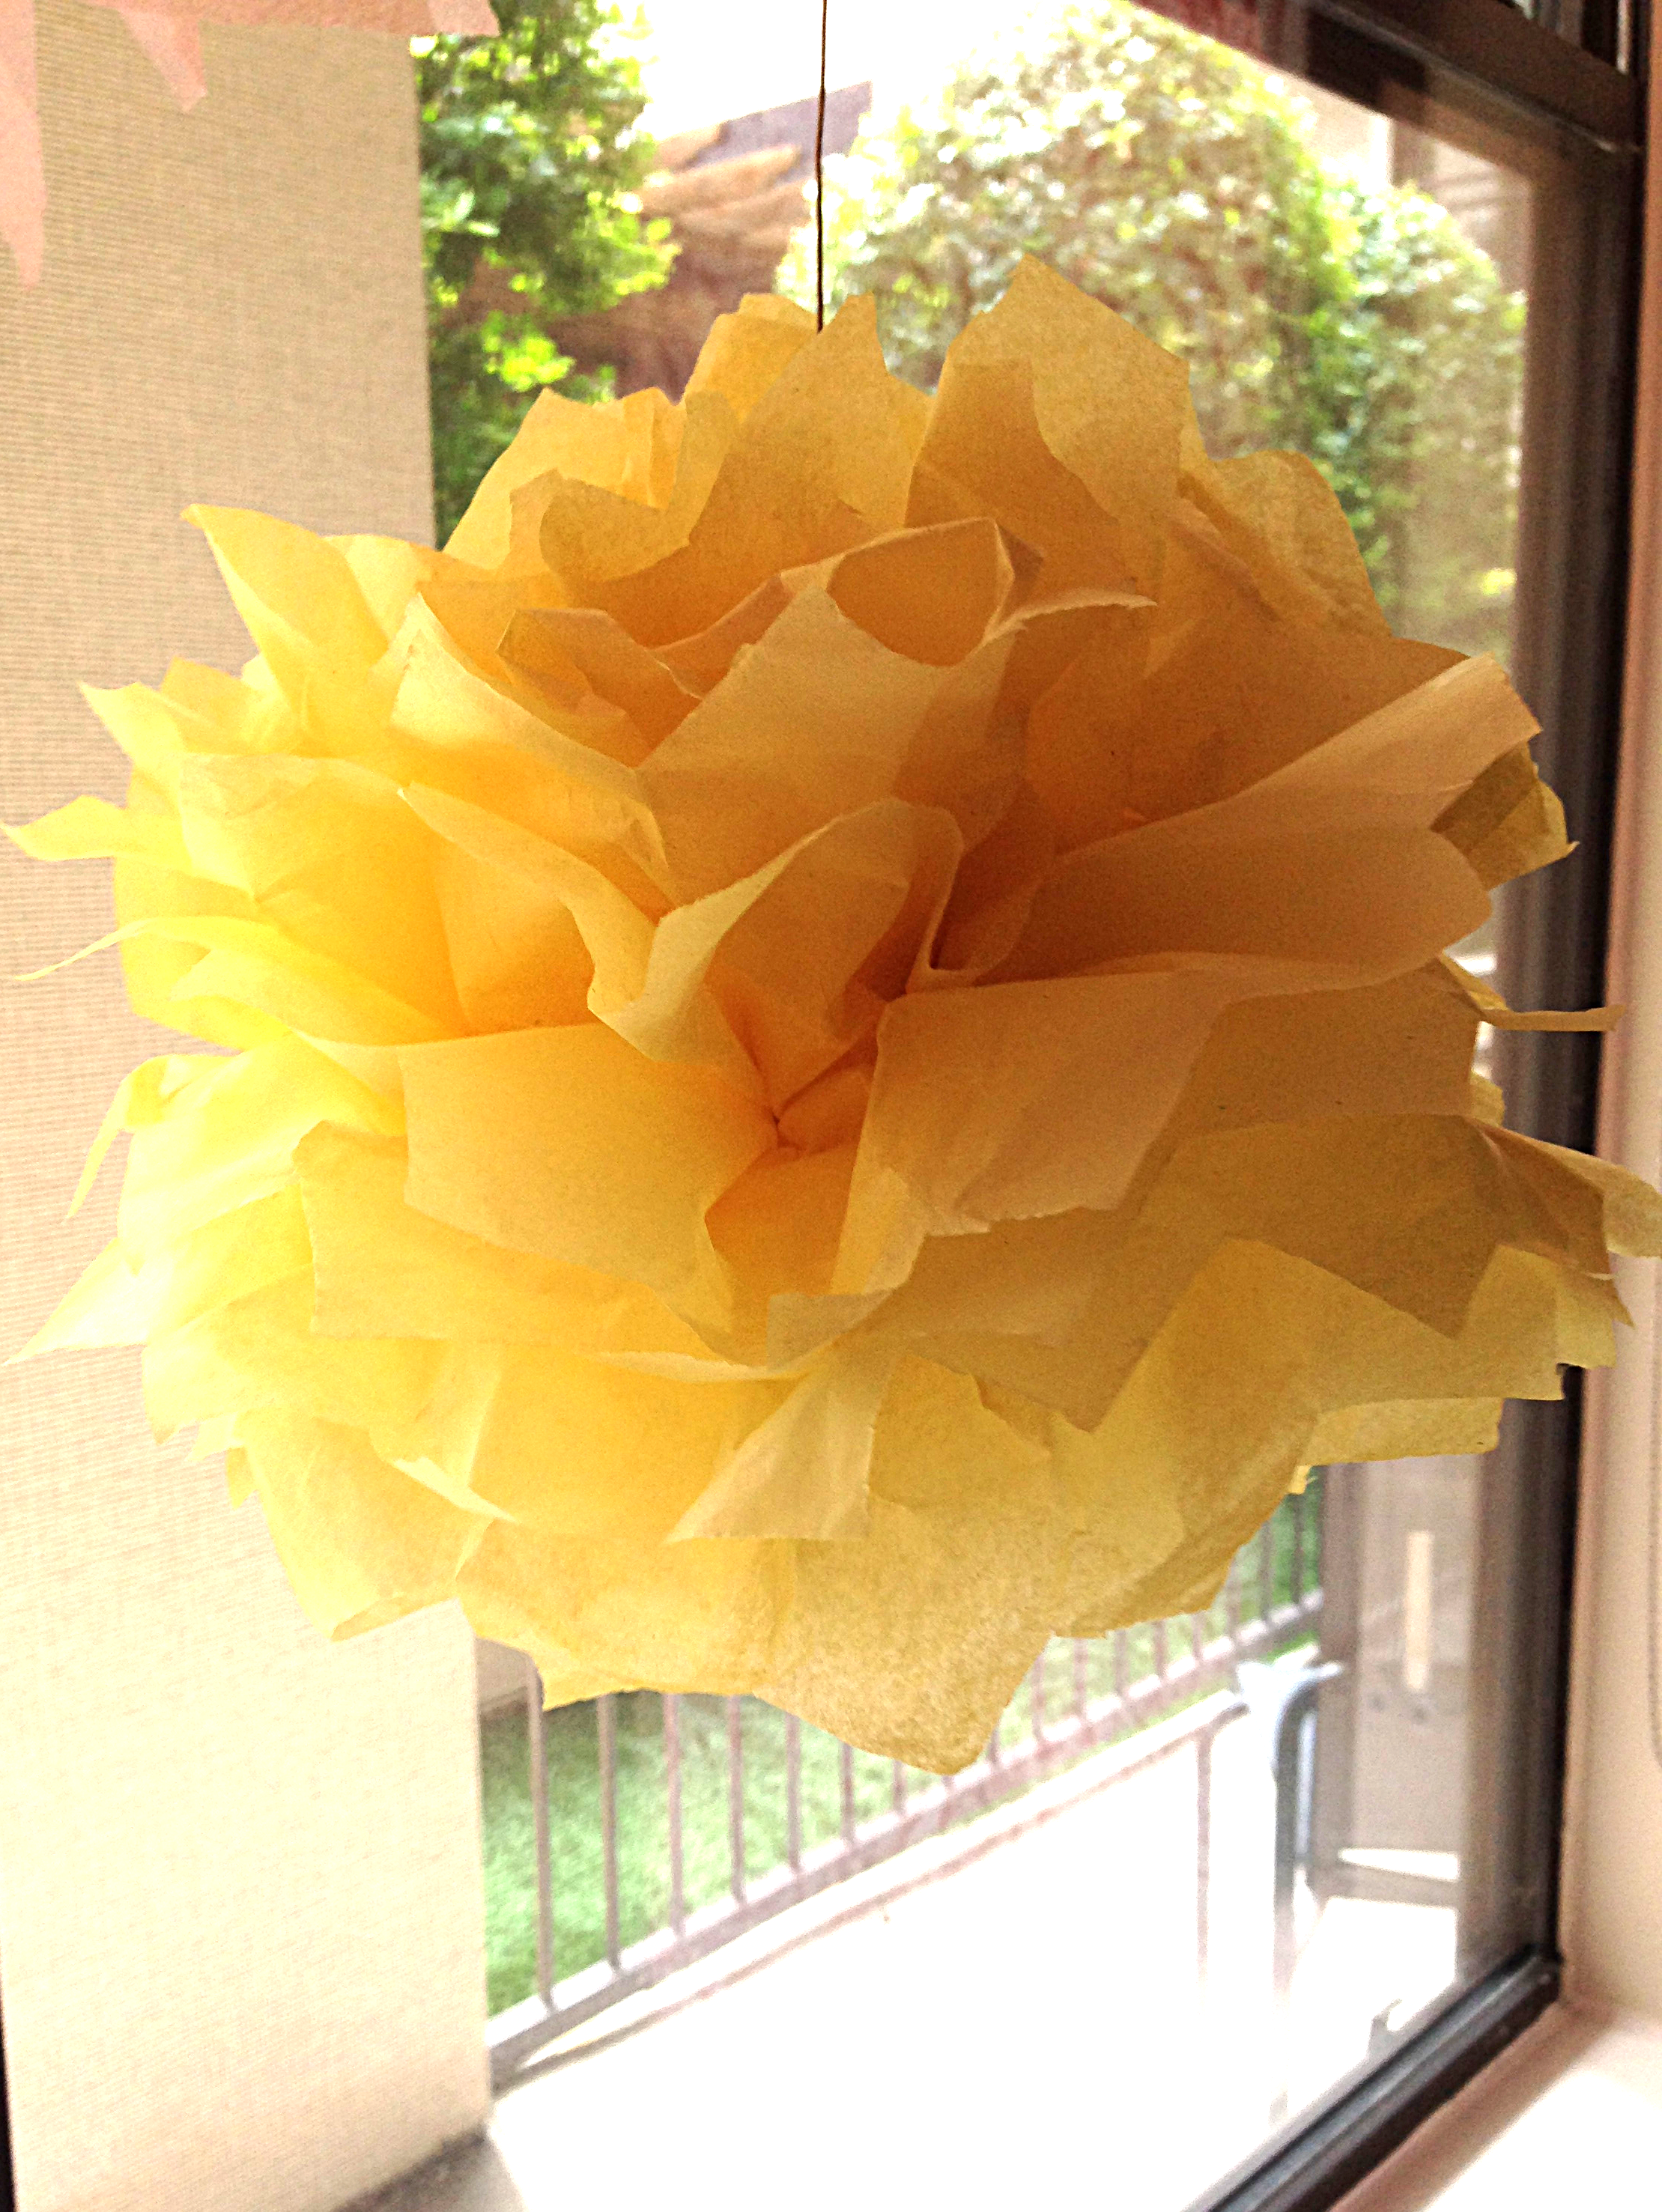
Use any color tissue paper you like. You can even use multiple colors on one pom pom to give it a more tie-dye look. Have fun party planners; I may just leave mine up permanently because they’re just so cute!
DIY Magic Pom Poms
Supplies:
(makes 1 Magic Pom Pom)
6-12 Pieces of Tissue Paper (Square pieces in any size – larger pieces make larger pom poms, more pieces make them fuller looking)
1 Paper Clip
Stapler + Staples
String
Scissors
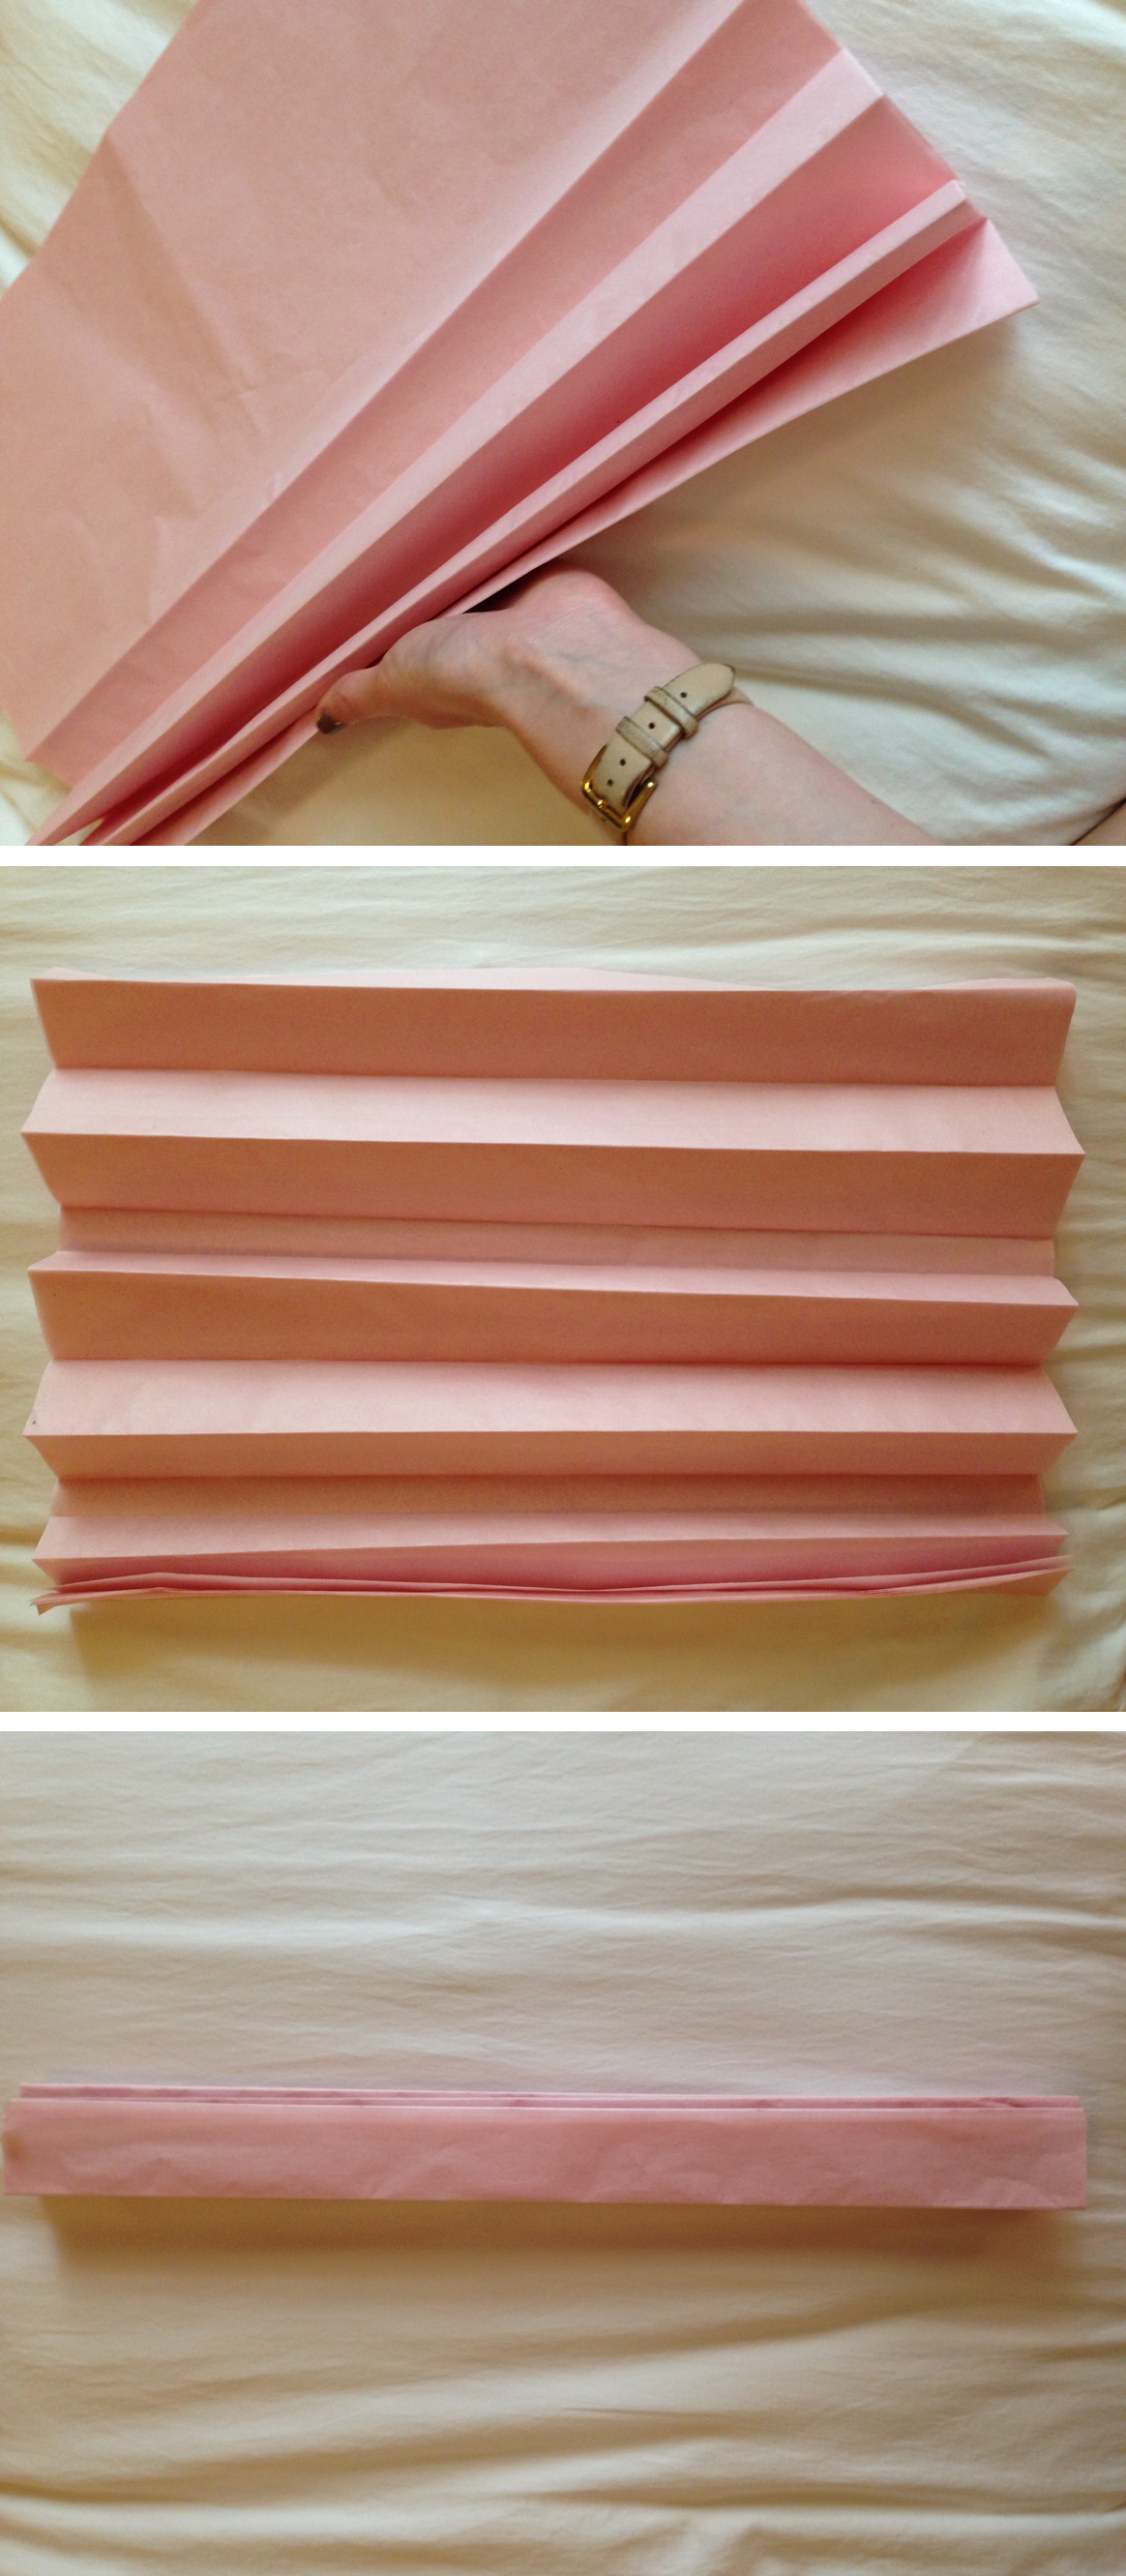
1. Lay out your tissue paper on a flat surface, all of the pieces stacked up on top of one another. Use more pieces of paper to make the pom pom more full and fluffy looking. (For reference, I used 6 12″ x 12″ pieces of paper for the large pink pom poms and 12 6″ x 6″ pieces of paper for the small yellow ones.) Fold the paper over about 1″. Flip the paper over and fold over again another 1″. Repeat this over and over until you have made an accordion of folds throughout the entire length of the paper.
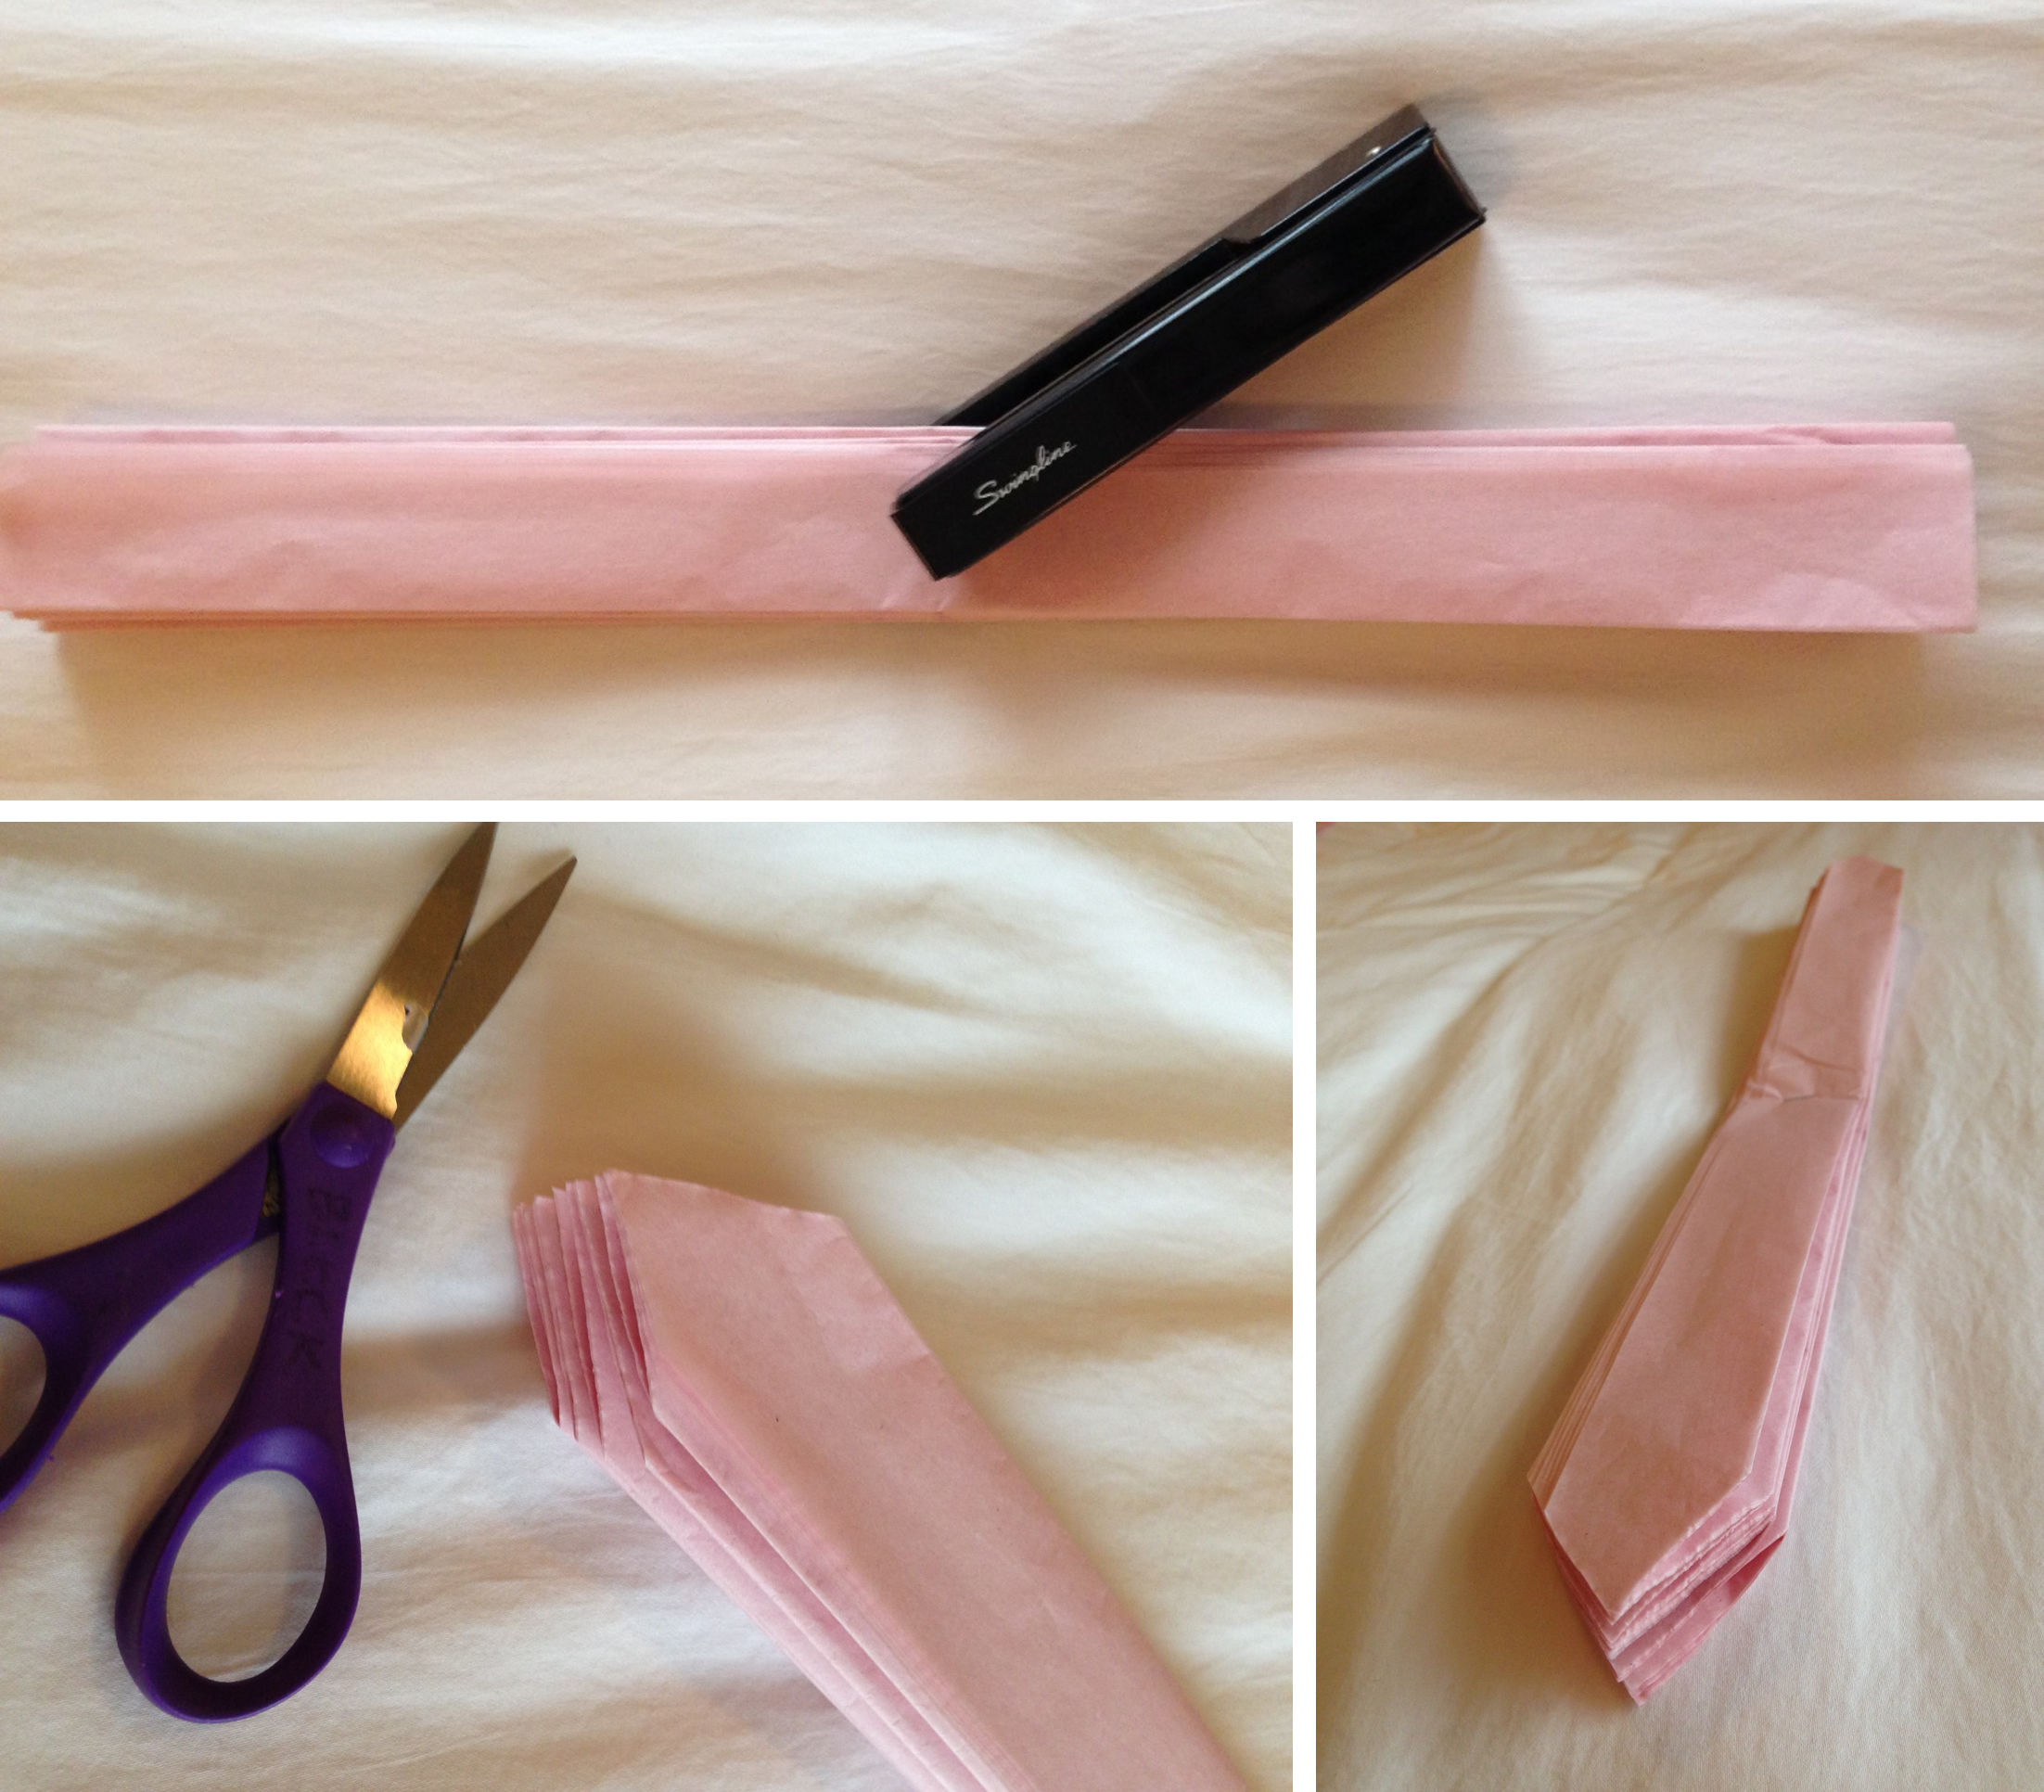
2. Find the center of the folded paper rectangle and staple it. Then take your scissors and cut the ends of the rectangle into points by cutting off the corners at 45 degree angles.
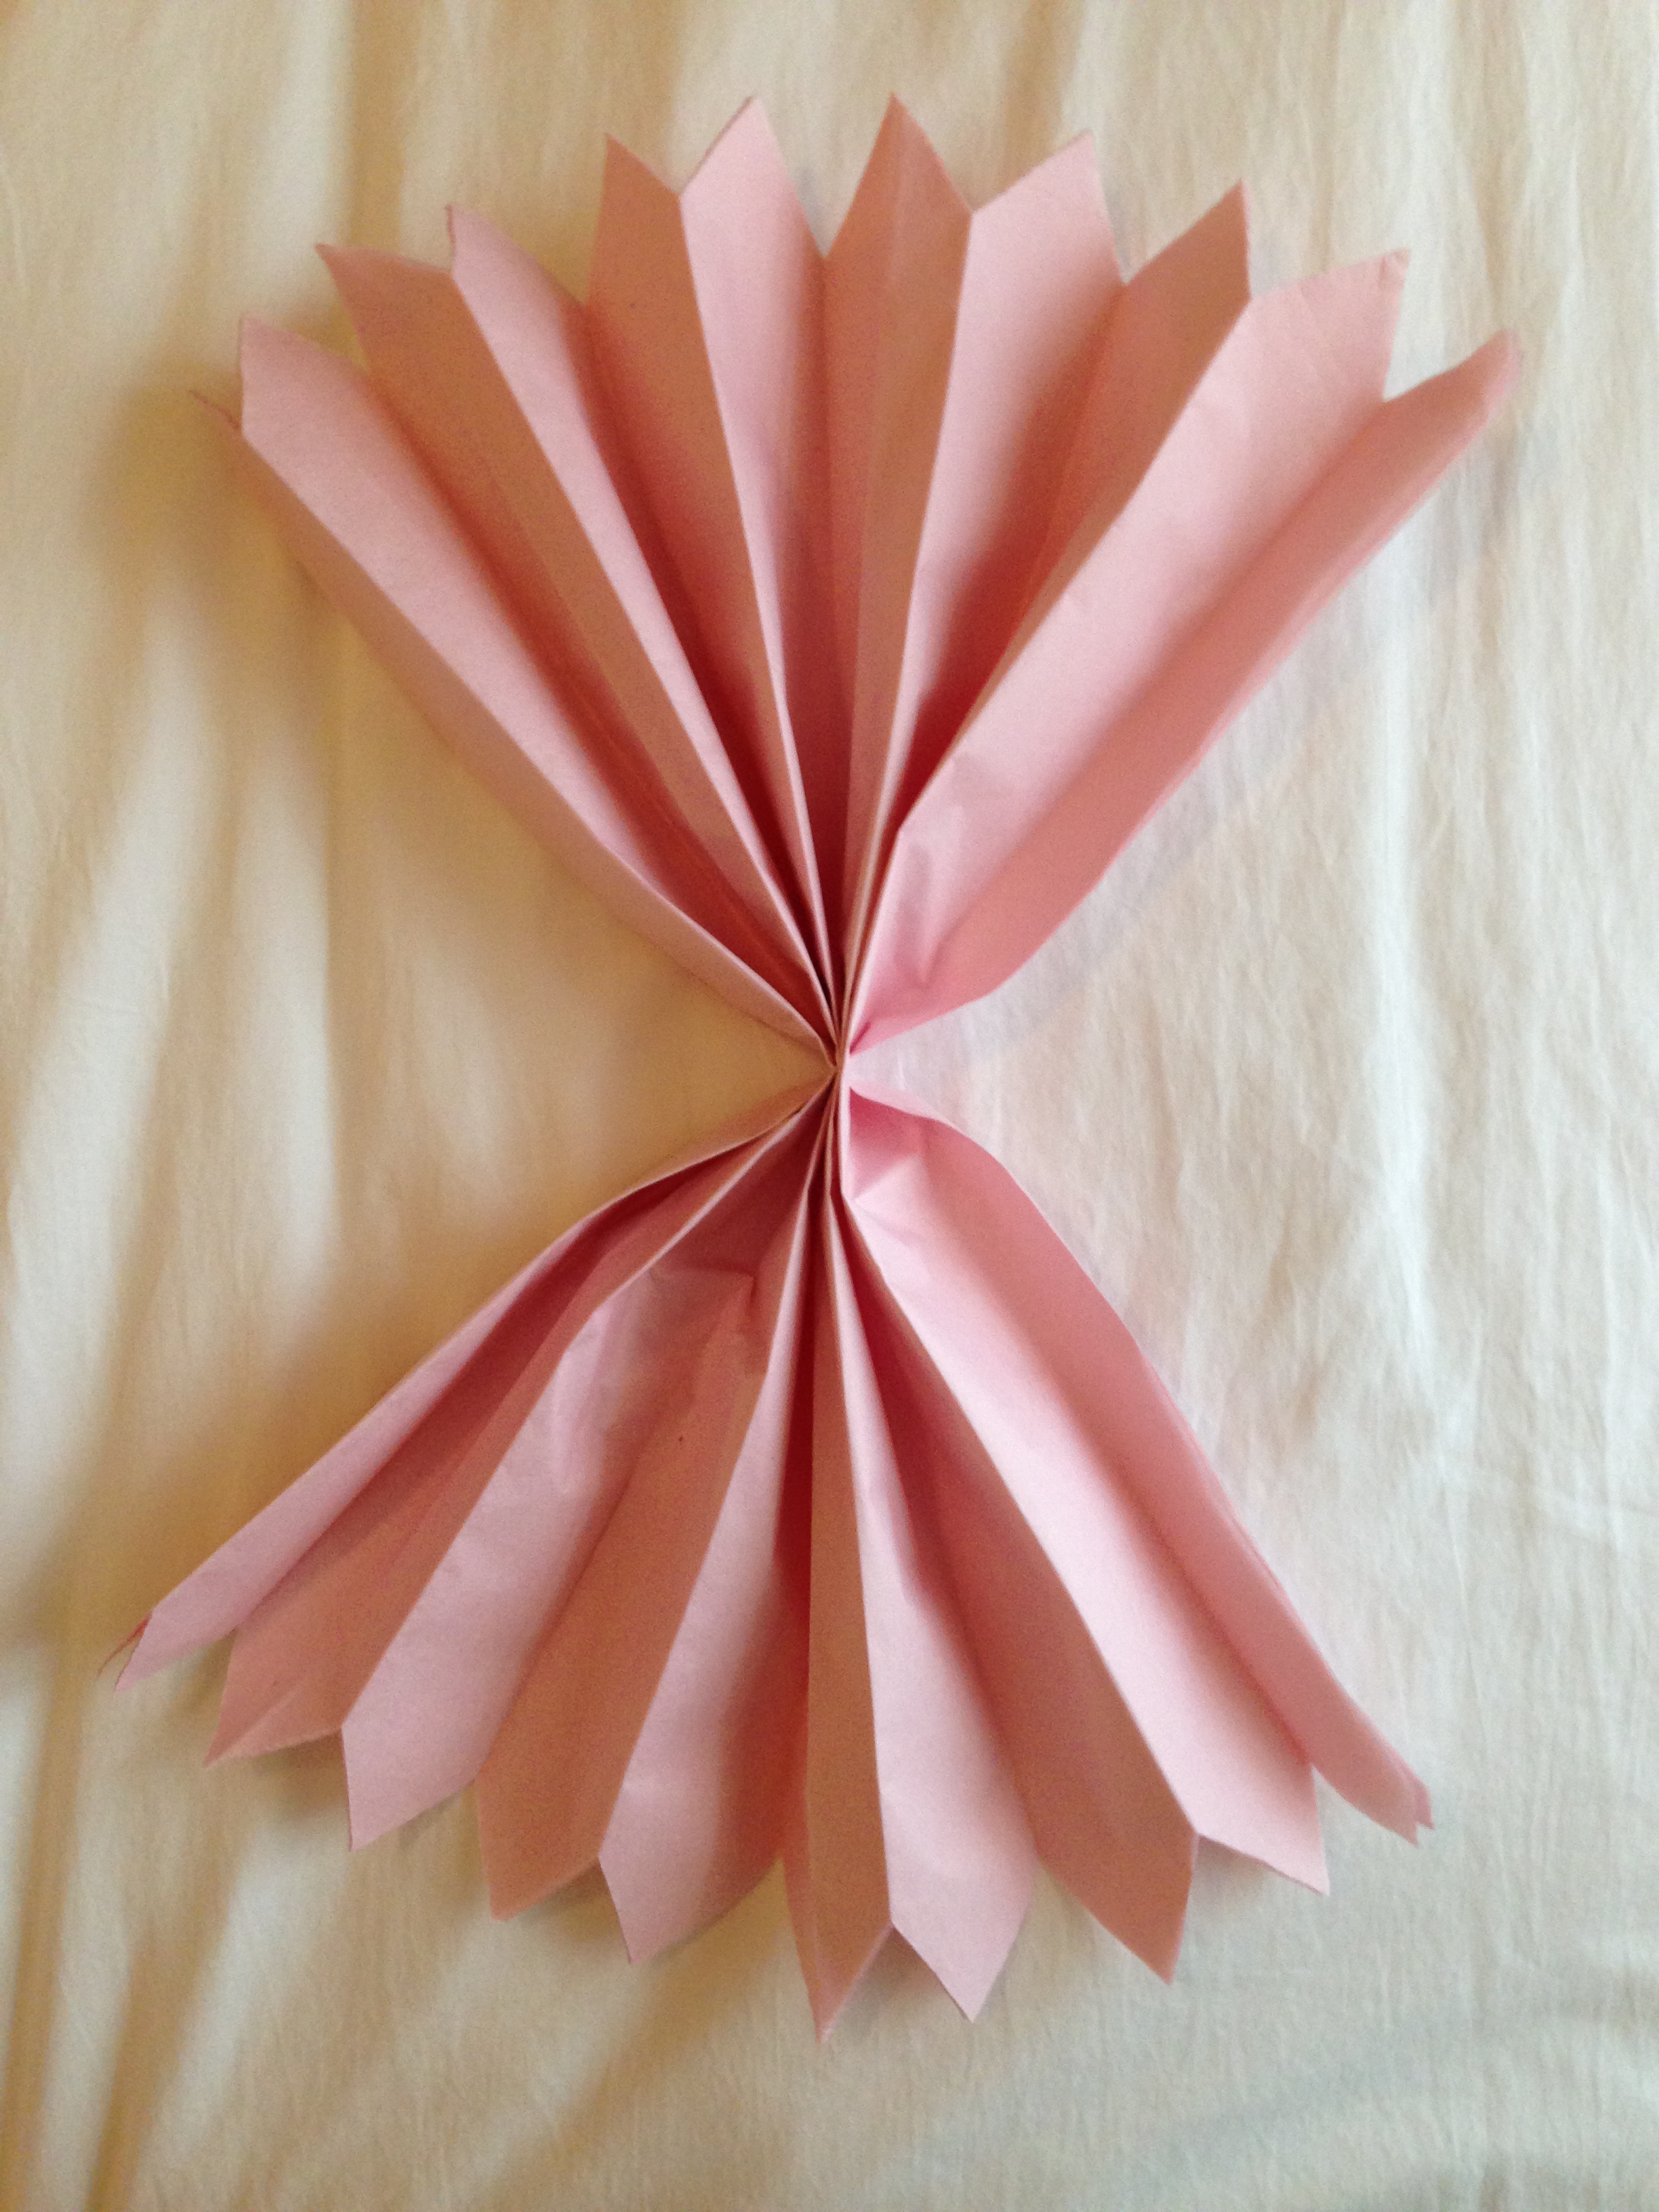
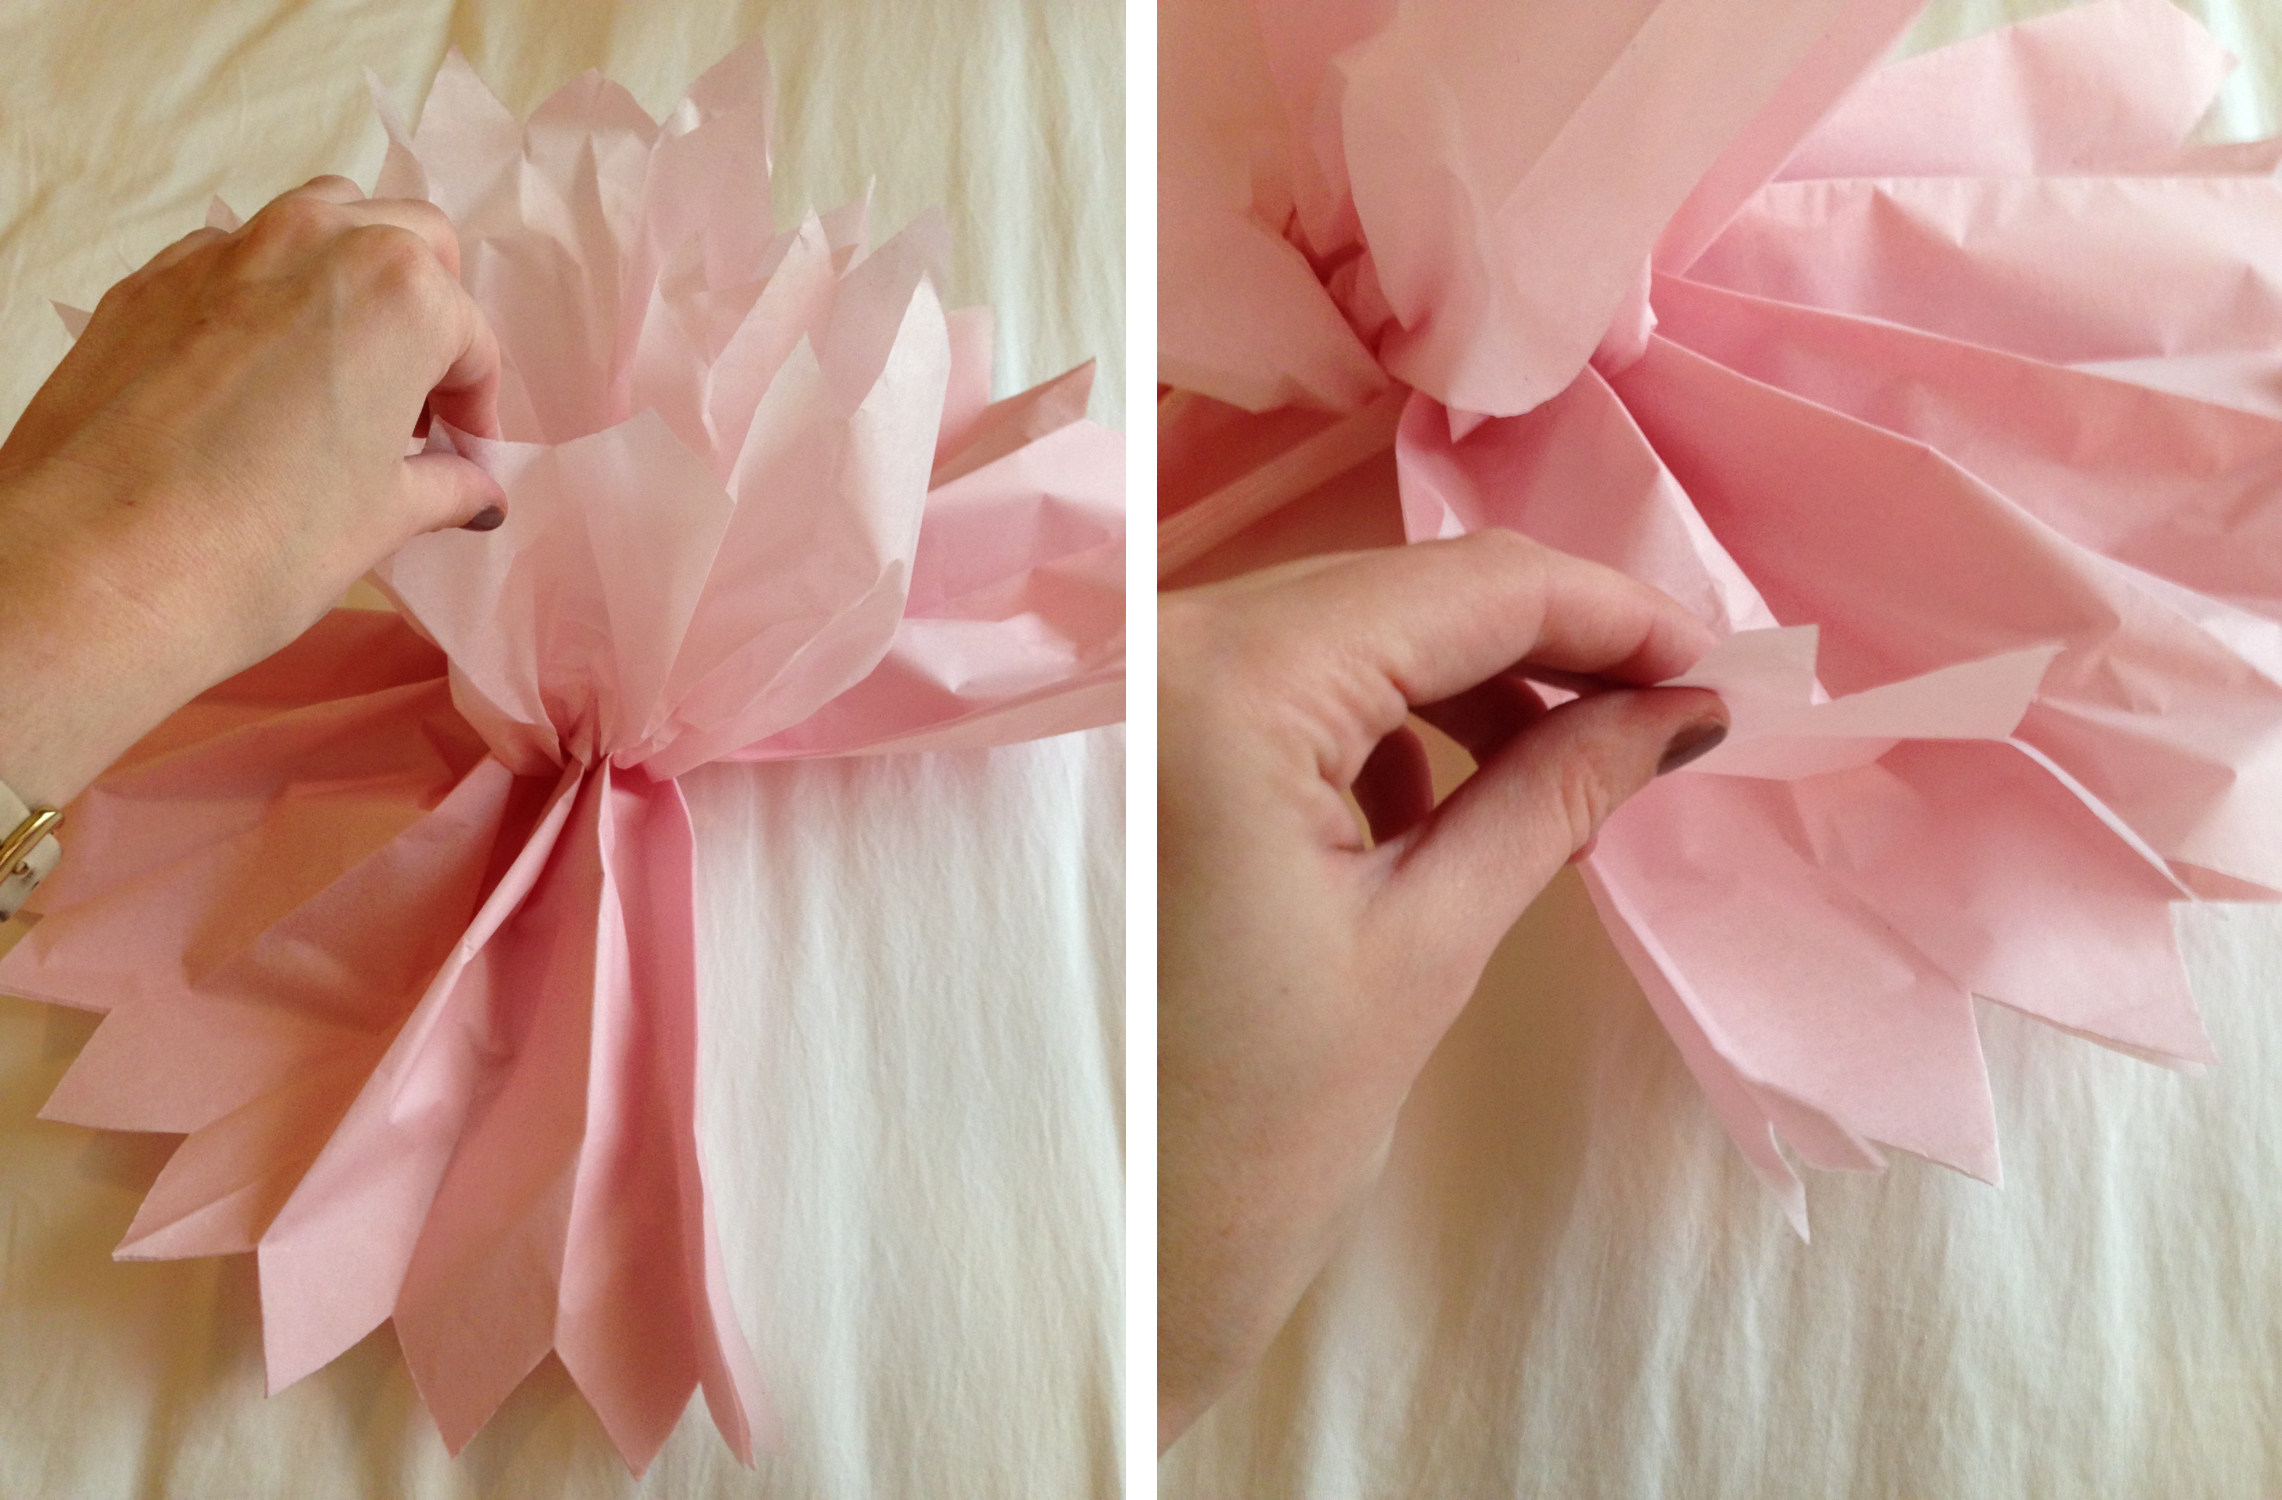
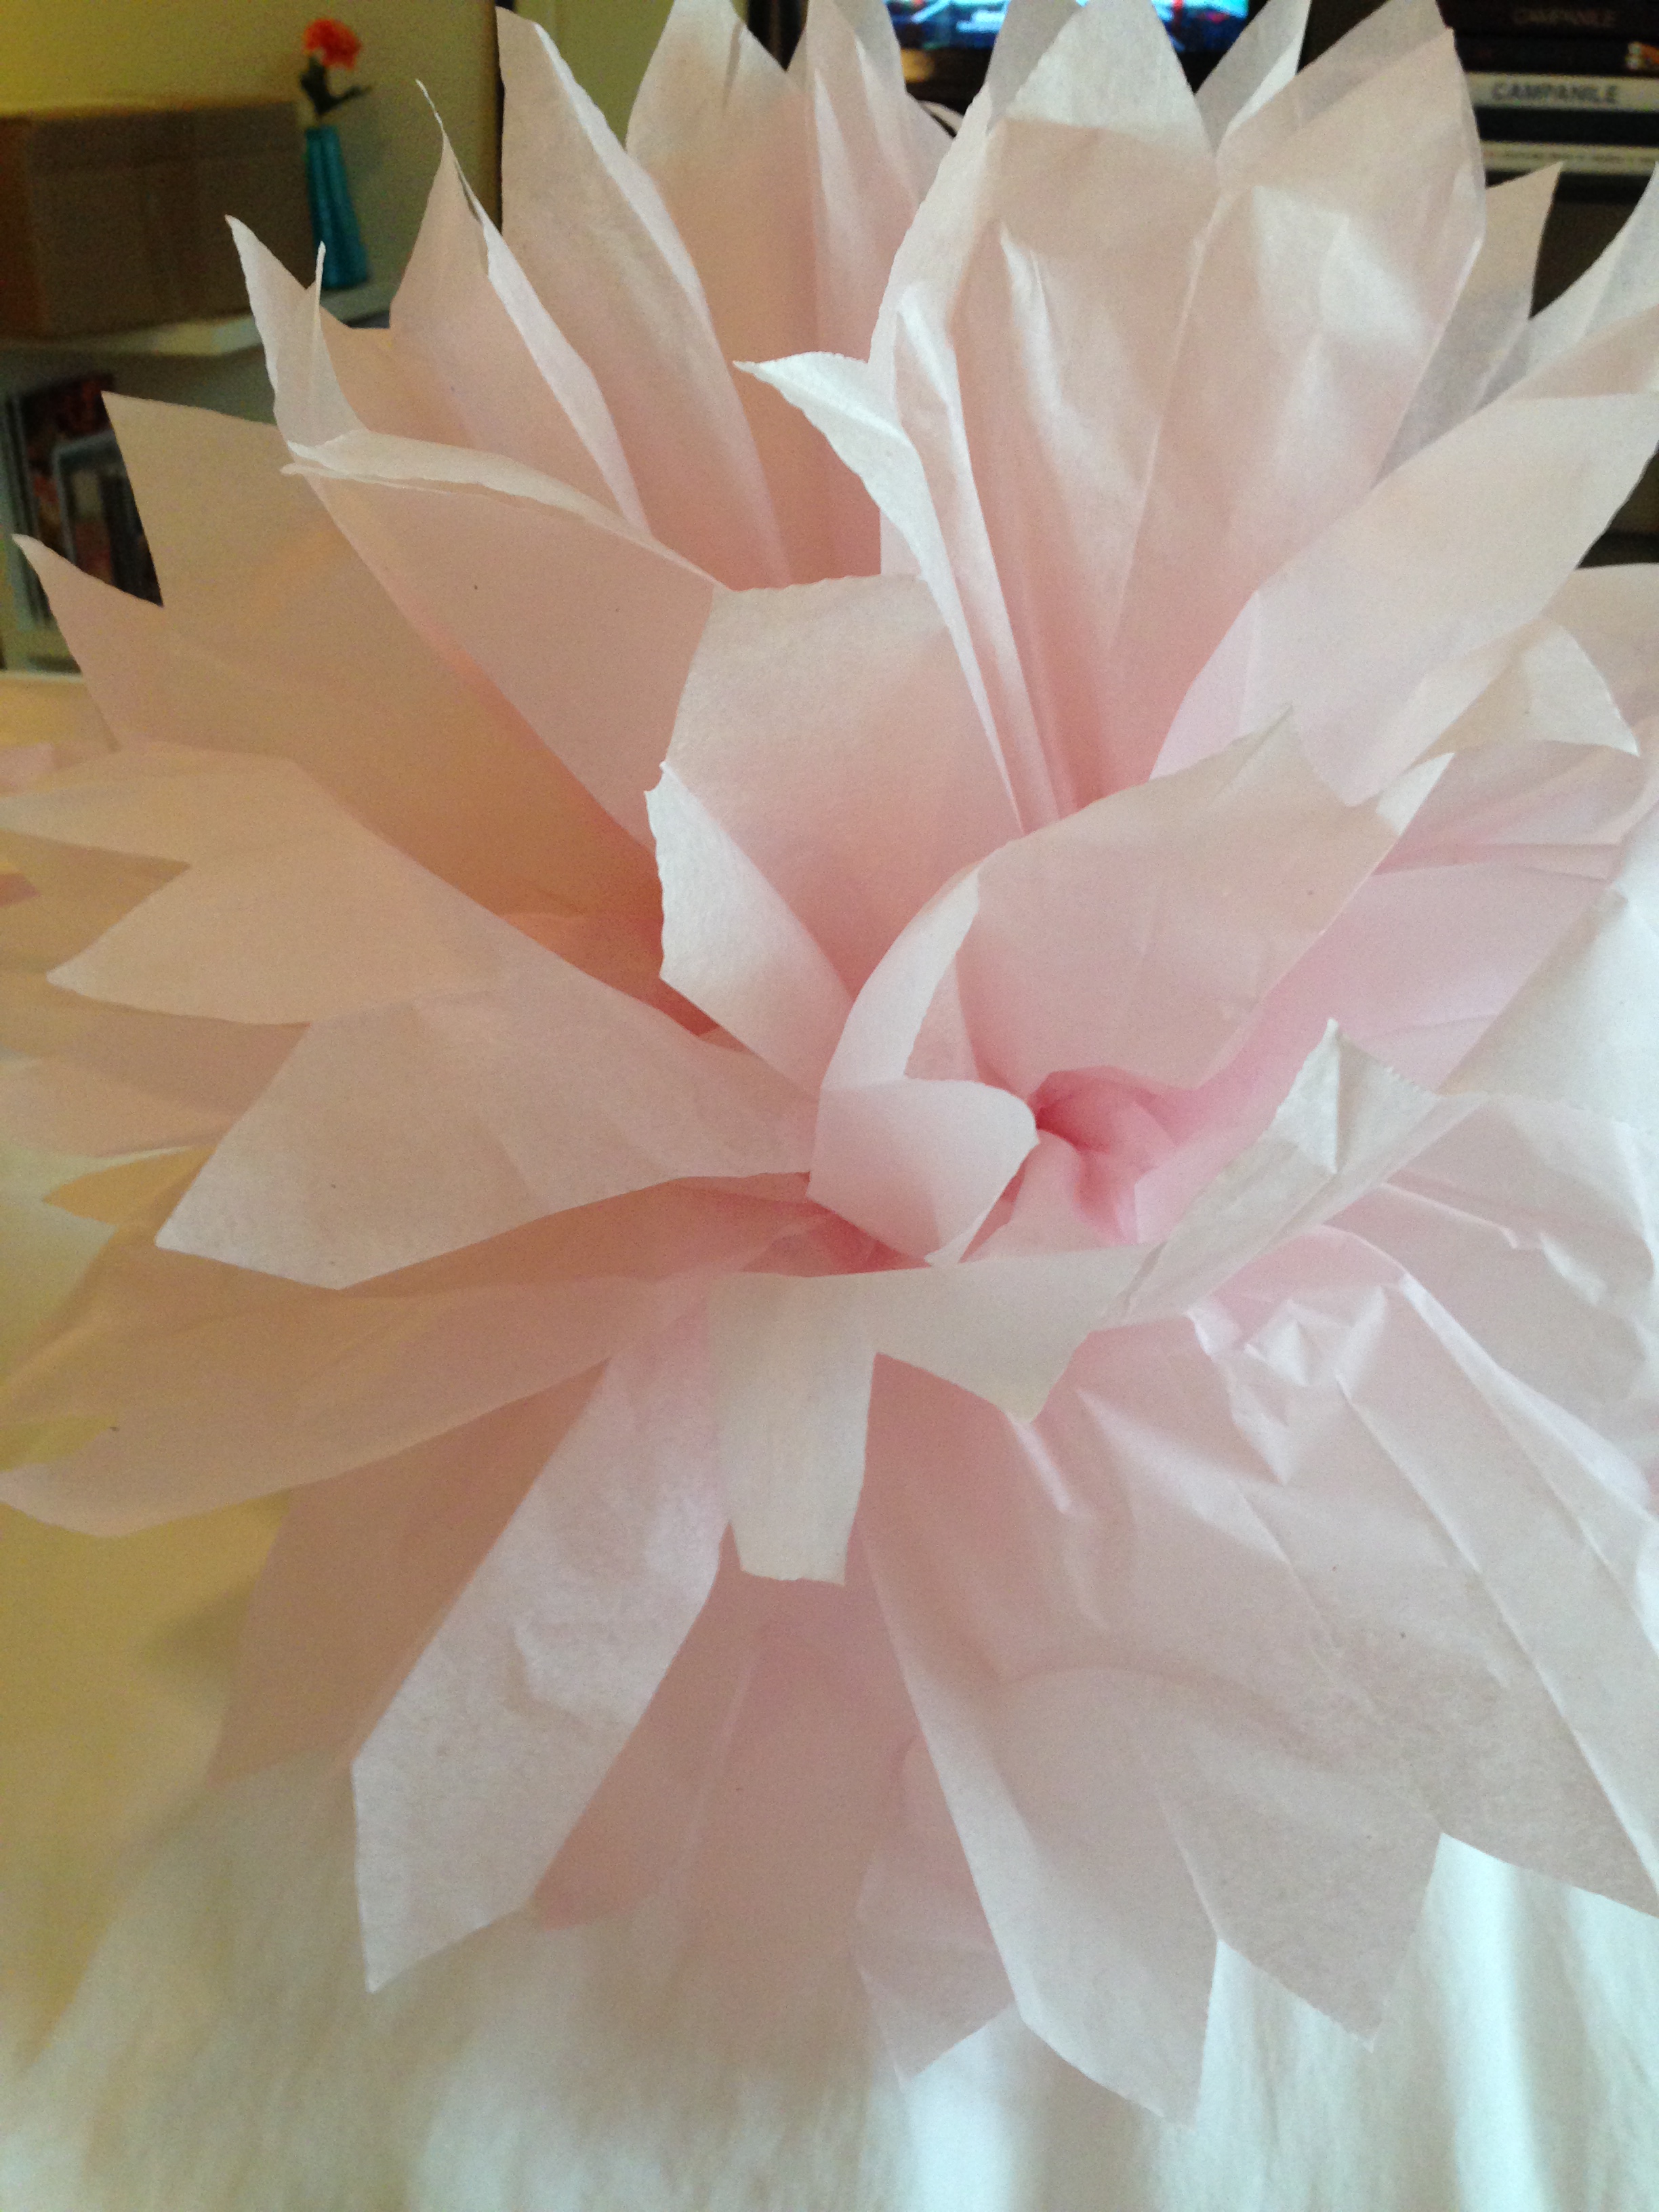
3. Pull the accordion layers of the folds apart to look like a fan on both sides of the staple. VERY carefully begin to pull the layers of tissue paper upward. Do each layer one at a time pulling the layers up to fill all of the space up and out to make circles of tissue. You will begin to see a sphere shape forming as you continue to pull. MAGIC! Make sure to pull half of the tissue layers up to form one side of the sphere and then flip it over and pull the other layers to create the other side. Once all of the layers have been pulled out, you will have to arrange the paper in a way to fill in all of the open space.
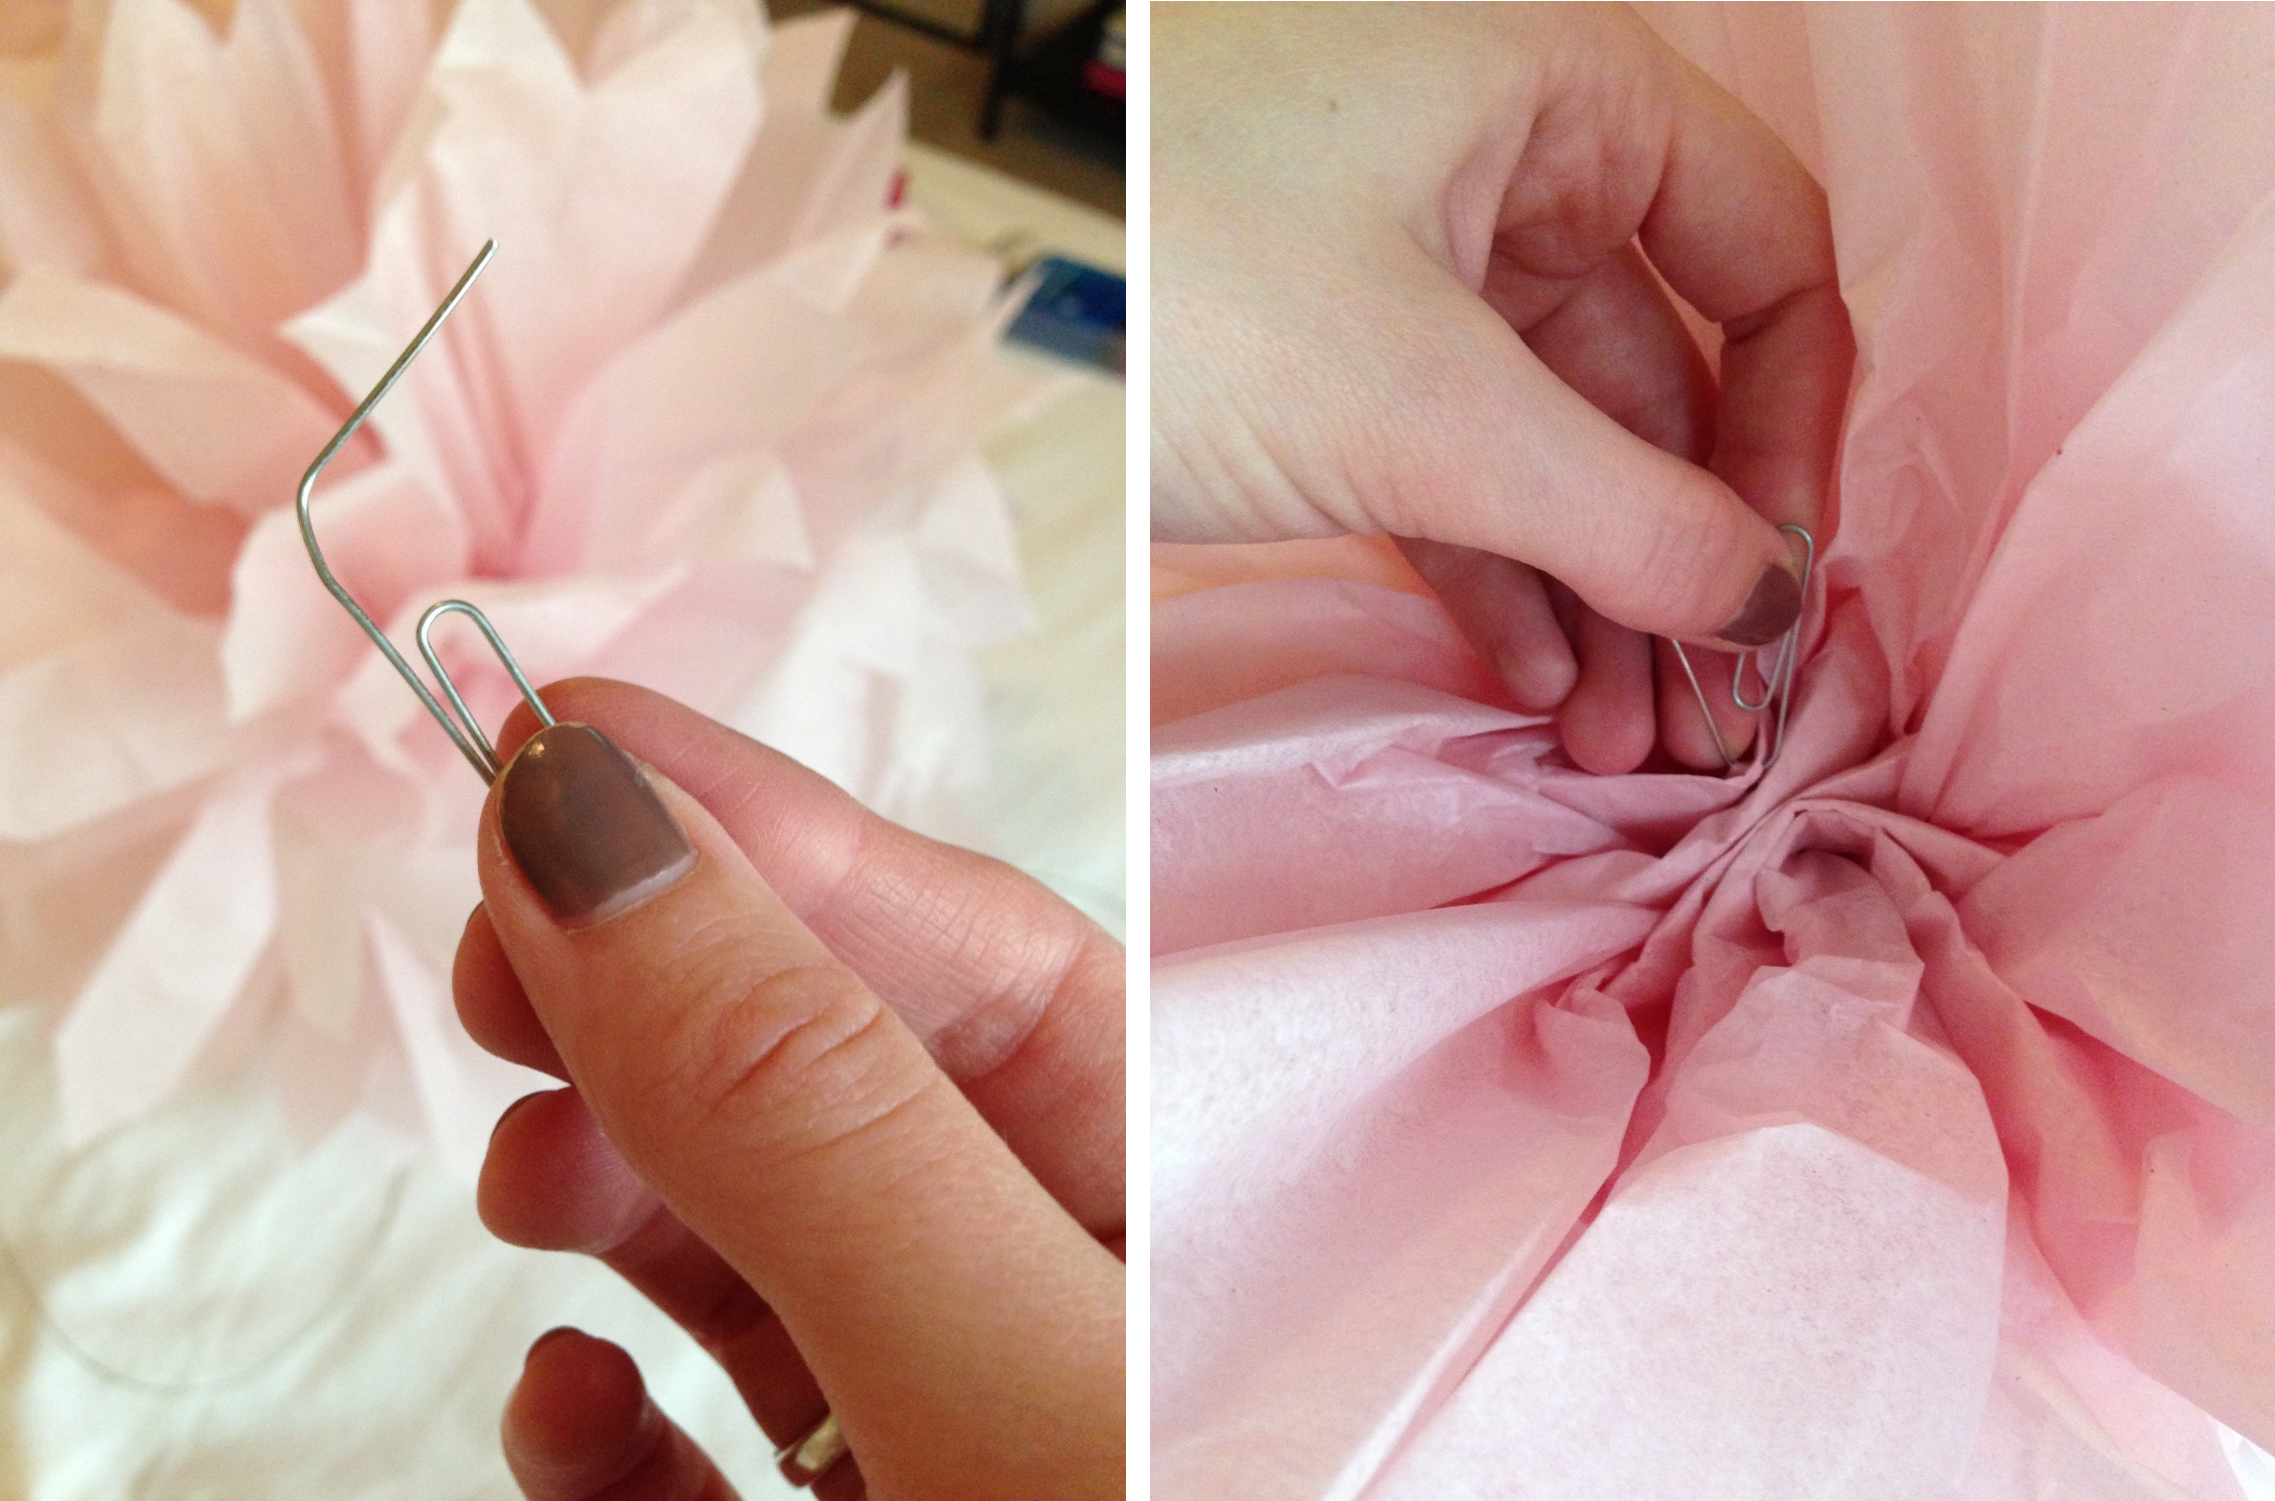
4. Lastly, take your paper clip and pull one side of it out as shown below. Poke a hole into the center of the tissue through a few layers of paper with the paper clip and then close it up to look like a normal paper clip again. Cut a piece of string and tie it through the loop on the paper clip. Tie up the other end to hang your Magic Pom Pom!


Thank you, … Lovely post it makes me feel happy
LikeLiked by 1 person
I’m so glad you liked it!
LikeLike
This cute DIY project could be repurposed for holidays, special events, or seasonal parties as well.
LikeLike
Yes! They’re also really cute to have up any time!
LikeLike
Great photos of instructions! I want to come to your next party! 🙂
LikeLike
Thanks! 🙂
LikeLike