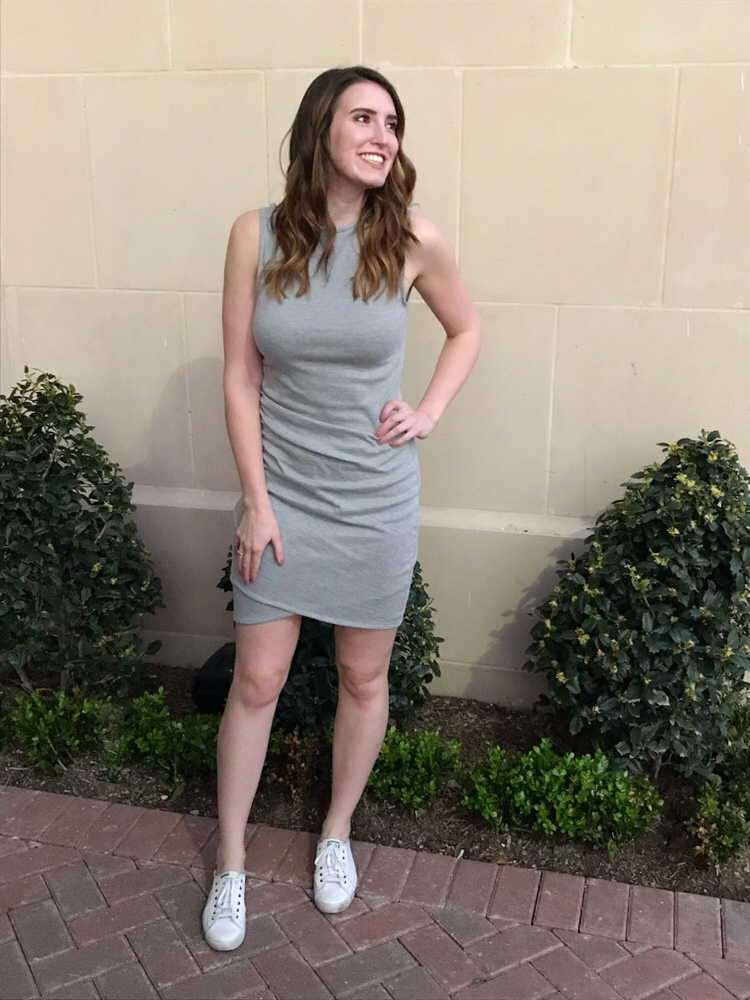
This project goes way back into the beginning of Fall 2017 when I first set my eyes on the Leith Ruched Body-con Tank Dress on Instagram on possibly ever fashion blogger ever. So flattering and so versatile, I couldn’t believe the number of outfit opportunities I saw for it. Whether it was dressed up for a dinner with heels and a great bag, or dressed down with sneakers, a baseball cap, and a sweatshirt tied around the waist, I knew I needed one of my own.

Since it was just a simple silhouette knit dress, I couldn’t justify that people were spending over $50 on it, when the fabric might only cost about $15. This dress is, for the most part, a simple body-con tank dress. The only additions are a ruched side section, and a second layer to make a tulip shaped hem at the front.


My initial complications in designing this dress were in the measurements needed on the length of the separate hemlines. The top layer would need to start as a long, straight hem, or possibly even an asymmetrical triangular shape. The side of the dress would then be sewn and the fabric pulled to ruche it, thus shortening the length on one side. The bottom layer would not need to be ruched, so it could be cut as an asymmetrical shape initially and layered below the top layer. I only made this a half layer, not including the top half of the bodice, to save fabric.

From there, all there was to do was make a simple back panel, sew everything together, and hem the edges. How easy is that!? I think I need another 2 versions in different colors… I plan to wear this dress all the time!

Ruched Body-con Tulip Hem Dress Sewing Tutorial
Supplies
2 yards Gray Jersey Fabric
Gray thread
Sewing Machine
Fabric Scissors
Pins
Measuring Tape
Tank top to use as a pattern
Time
4 hours
Difficulty
Easy-Medium

1. Start by folding the fabric so that the two edges meet in the middle and the stretch is going across the folds. Fold a fitted tank top in half and line up the folded side of the tank with the folded side of the dress. Trace around it with pins, leaving about 1″ of extra space all the way around. Continue the length of the dress beyond the tank top per the instructions above to make the FRONT of the dress.
Do this with the BACK panel of the dress as well.
Also cut out pieces for the LINING and NECK.
2. To create the asymetrical hem on the dress, take the FRONT piece and sew two 8″ basting stitches (do not tie knots at the start or finish of the seam) along the right side of the body. Pull on the ends of the thread and ruch the side of the dress. This will leave you with an angled hem at the bottom of the FRONT.
3. To assemble the dress, lay the FRONT on top of the BACK with the right sides of the fabric facing one another, and then lay the LINING on top of the FRONT so that the hems overlap making a criss cross shape. Sew along the shoulder seams and the side seams about 1/2″ from the edge of the fabric. Try on the dress and pin it in spots where it is not fitted enough. Sew along the edges again as needed.
4. Hem the bottom of the dress and the arm holes.
5. Turn the dress right side out and place the NECK pieces on top. Pin in place and sew 1/4″ from the edge of the fabric. Flip the NECK to the inside of the dress and sew again at 1/4″ from the edge of the fabric to secure.

I love it! Great job!
LikeLiked by 1 person
Thank you so much!! So glad you like it!
LikeLike
This turned out so good. It fits you perfectly!
https://www.bluelabelsboutique.com
https://www.fashionnotfear.com
LikeLiked by 1 person
Thank you so much! I love that it’s fitted but not super tight!
LikeLike
I love this dress AND the fact that you drew out instructions on how to make the pattern! Will deff try this.
LikeLiked by 1 person
I’m so glad you like it! Thanks! Let me know how it turns out if you end up trying it.
LikeLiked by 1 person